Welcome to your new favorite recipe for Vegan Peanut Butter Cookies! Get ready to bake a batch of incredibly soft, thick, and wonderfully chewy cookies that are entirely plant-based. Whether you are a seasoned vegan baker or just looking for a simple, delicious dairy-free treat, this recipe is designed for success. I will guide you through every step to create a batch of these irresistible cookies, complete with a unique twist for ultimate chewiness and plenty of tips for perfect results every time.
Why You’ll Love This Recipe
My kitchen is all about creating plant-based magic, and these Vegan Peanut Butter Cookies are a shining example. What makes this recipe truly special is my unique flax egg twist. Instead of traditional eggs, we use a simple mixture of ground flaxseed meal and water that gels into a powerful binder. This flax egg is not just an egg substitute; it actively enhances the cookie’s texture, giving you an unbelievably thick, soft, and chewy cookie with a richer, deeper peanut butter flavor.
The scientific logic behind the flax egg is fascinating. The mucilage in ground flaxseed forms a gel that binds the ingredients beautifully, preventing dryness and creating that sought-after chewy texture. It also adds a subtle depth of flavor and a boost of fiber, aligning perfectly with a whole-foods, plant-based diet. Beyond the amazing texture, this recipe is incredibly easy to make, often in one bowl, quick to prepare, and even freezer-friendly, making it ideal for meal prepping delicious vegan desserts and snacks.
Ingredients Needed
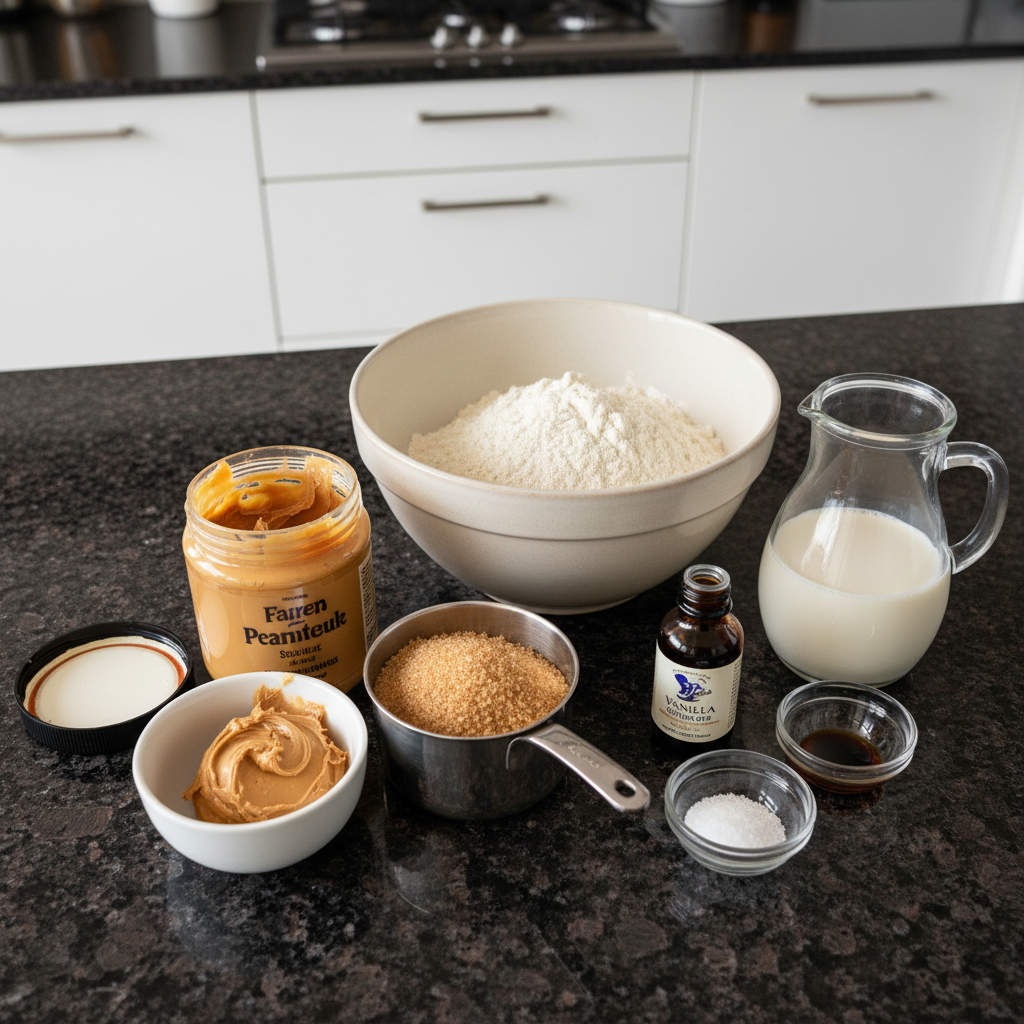
- 1 cup natural peanut butter (270g), creamy or crunchy (or almond butter)
- 1 cup coconut sugar or pure cane sugar* (192g)
- 6 tablespoons almond milk, room temp
- 2 teaspoons vanilla extract
- 1 cup flour (120g), spelt, unbleached all-purpose, almond flour, or 1-1 gluten-free blend
- 1 teaspoon baking soda**
- generous pinch of mineral salt (only use if nut butter is unsalted)
- 1 tablespoon ground flaxseed meal + 3 tablespoons water (for the flax egg)
Ingredient Notes & Substitutions
Peanut Butter: I always recommend using a natural peanut butter for these vegan cookies, one where the only ingredients are peanuts and perhaps a little salt. Both creamy and crunchy peanut butter work beautifully, depending on your texture preference. Be aware that natural peanut butter often has oil separation; just stir it well before measuring. If you have a nut allergy, almond butter or sunbutter (sunflower seed butter) are excellent alternatives that yield equally delicious results.
Sugar: This recipe calls for coconut sugar or pure cane sugar. Coconut sugar lends a lovely caramel note and is a less refined option, while pure cane sugar provides a classic sweetness. Both work well for these plant-based cookies. For those aiming for a less sweet cookie, you can reduce the sugar to 3/4 cup without compromising the texture too much.
Flour: I love how versatile this Vegan Peanut Butter Cookies recipe is with flour. You can use unbleached all-purpose flour for a classic soft and slightly chewy result. Spelt flour offers a delightful nutty flavor and can result in a slightly denser cookie. Almond flour makes for a softer, more delicate cookie that is naturally gluten-free. If you are using a 1-to-1 gluten-free blend, look for one that includes xanthan gum for structure. Each flour type will impart a slightly different texture, which I will detail further in the “Flour Power” section.
Almond Milk: Room temperature almond milk helps to create a smooth, emulsified dough. Feel free to substitute with other plant-based milks like soy milk or oat milk. While they may subtly alter the flavor profile, they will work just as well in terms of consistency for these dairy-free cookies.
Baking Soda: Baking soda is key for the rise and tenderness of these cookies. If you are in a pinch and do not have baking soda, you can use baking powder as a substitute, but the leavening effect might be slightly different.
Flax Egg: This is our secret weapon for chewy vegan peanut butter cookies! To prepare it, simply combine 1 tablespoon of ground flaxseed meal with 3 tablespoons of water in a small bowl. Let it sit for about 5 minutes until it thickens into a gel-like consistency. This acts as a binder, replacing eggs in our plant-based recipe.
How to Make Vegan Peanut Butter Cookies
Step 1: Prep Your Space and Flax Egg
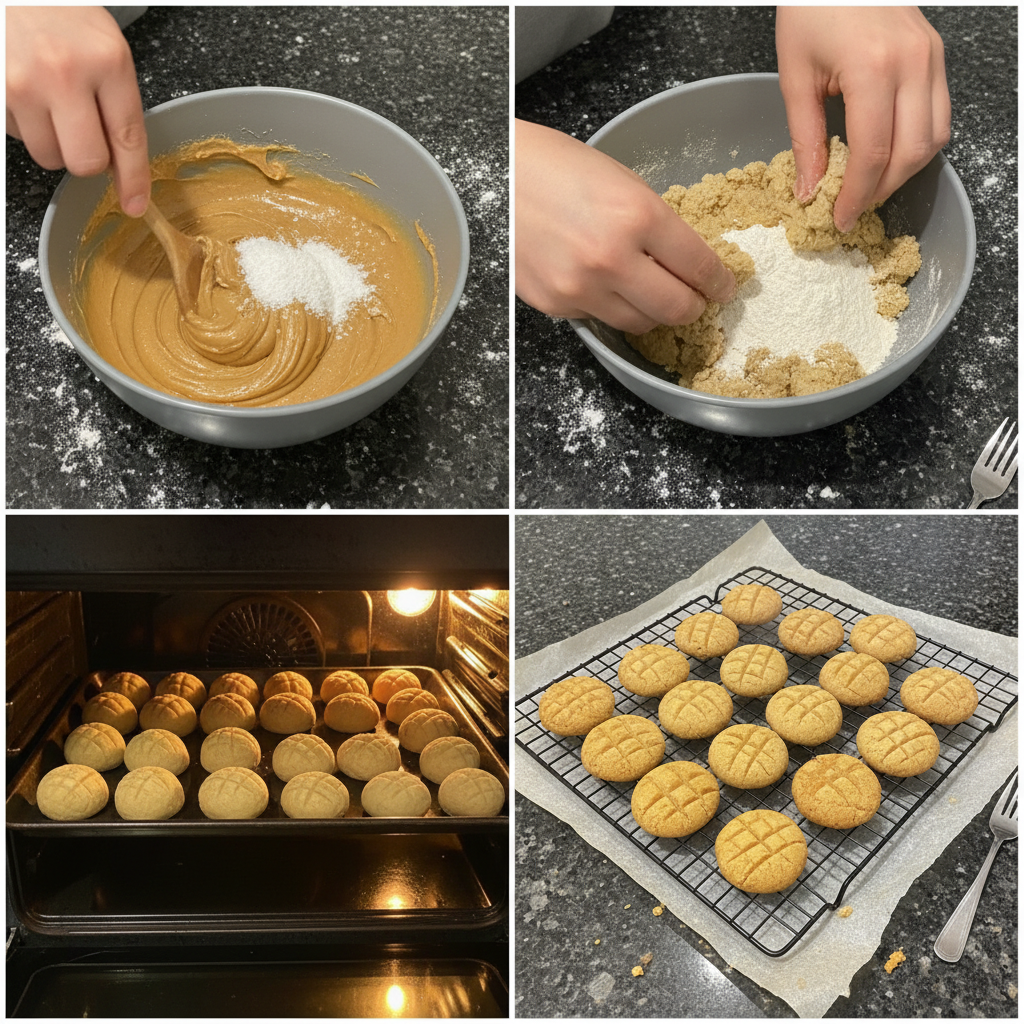
Preheat your oven to 350°F (175°C). Line a cookie sheet with a silicone mat or parchment paper; this will prevent sticking and ensure easy cleanup for your vegan cookies. In a small bowl, combine 1 tablespoon ground flaxseed meal with 3 tablespoons water. Stir it gently and then set it aside for 5 minutes. You will notice it thicken into a gel-like consistency, which is our essential flax egg.
Step 2: Cream Wet Ingredients
In a large mixing bowl, combine the natural peanut butter and your chosen sugar (coconut sugar or pure cane sugar). Mix them together with a spatula or spoon until the mixture is creamy and well combined. Next, stir in the room-temperature almond milk and vanilla extract. Finally, add your prepared flax egg to the bowl. Mix everything until it is thoroughly incorporated and smooth.
Step 3: Combine Dry Ingredients
To the wet mixture, add the flour (spelt, unbleached all-purpose, almond, or 1-1 gluten-free blend), baking soda, and the generous pinch of mineral salt (if your peanut butter is unsalted). Begin to mix the ingredients. The dough will be quite thick and tough as it comes together. I find it easiest to switch from a spoon to my clean hands for the final mixing to ensure all the dry ingredients are evenly incorporated into the peanut butter base.
Step 4: Roll and Flatten
Using a 1.5 tablespoon cookie scoop, portion out the dough. Roll each portion into a smooth ball, about 1.25 inches in diameter. Place these dough balls about 2.5 inches apart on your prepared baking sheet to allow for some spreading. Take a fork and gently flatten each cookie ball, creating the classic crisscross pattern. Expert Tip: Dip the tines of your fork in a small bowl of sugar between pressing each cookie. This prevents the dough from sticking to the fork and gives you beautifully defined patterns. Optionally, sprinkle a little coarse salt or extra sugar on top for a delightful sparkle and flavor boost.
Step 5: Bake to Perfection
Place the baking sheet in your preheated oven and bake for 10-13 minutes. For a softer, chewier cookie, I aim for 10-11 minutes. If you prefer a slightly crispier edge with a tender center, bake for 12-13 minutes. The cookies should look set around the edges and slightly golden, but the centers may still appear a little soft. Do not worry; they will firm up wonderfully as they cool, so resist the urge to overbake them.
Step 6: Cool and Enjoy
Once baked, remove the cookies from the oven. Let them cool on the baking sheet for a few minutes. This crucial step allows them to set properly, preventing them from breaking when you move them. After a few minutes, carefully transfer them to a wire rack to cool completely. Repeat this process with any remaining dough. This recipe typically yields 20-24 delicious Vegan Peanut Butter Cookies.
Flour Power: Understanding Your Cookie Texture
The type of flour you choose for your Vegan Peanut Butter Cookies plays a significant role in their final texture and how they spread. It is one of those subtle details that can truly elevate your baking experience.
Unbleached All-Purpose Flour: This is a classic choice for a reason. Its balanced protein content typically yields a soft yet pleasantly chewy cookie with good structure. It is a reliable option if you are aiming for a traditional cookie feel.
Spelt Flour: If you are looking to add a little more character, spelt flour is fantastic. It has a slightly nutty flavor that complements the peanut butter beautifully. Spelt often results in a denser, sometimes chewier cookie. Sometimes it can absorb liquid differently than all-purpose flour, so keep an eye on your dough consistency; it might feel a little thicker.
Almond Flour: For a softer, more delicate, and naturally gluten-free cookie, almond flour is an excellent choice. Because it is low in gluten, the cookies will be more tender and have a less chewy bite. When measuring almond flour, it is important to be precise; it is denser than other flours, so spooning and leveling rather than scooping directly is key to avoid a crumbly dough.
1-to-1 Gluten-Free Blend: These blends are designed to behave much like all-purpose flour, but results can vary between brands. Many good quality 1-to-1 gluten-free blends include xanthan gum, which helps provide structure and elasticity that gluten would normally offer. The absorption rate can still differ, so pay attention to the dough. If it seems a little dry or wet, you may need to add a touch more liquid or flour, respectively.
General Advice: Regardless of your flour choice, pay attention to the dough’s consistency. It should be thick and pliable enough to roll into balls without being excessively sticky or crumbly. If your dough seems too dry, a tiny bit more almond milk can help. If too wet, a tablespoon of extra flour can often balance it out.
Pro Tips & Troubleshooting
Pro Tips
- Perfecting the Flax Egg: The flax egg is crucial for the binding and chewiness of these vegan peanut butter cookies. Ensure your ground flaxseed meal has enough time to gel, usually about 5 minutes, until it reaches a noticeably thick, gooey consistency. If it looks too thin, let it sit for another minute or two.
- Sweetness Control: For those who prefer a less sweet cookie, I highly recommend reducing the sugar to 3/4 cup instead of a full cup. The cookies will still be perfectly delicious and satisfyingly sweet.
- Preventing Sticky Forks: To achieve those beautiful, clean crisscross patterns without the dough sticking to your fork, simply dip the tines of your fork into a small bowl of sugar between flattening each cookie.
- Achieving Even Baking: For consistently baked cookies, use a cookie scoop. This ensures all your dough balls are uniform in size, allowing them to bake evenly and finish at the same time.
- Do Not Overmix: When adding the dry ingredients, mix until they are just combined. Overmixing can develop gluten in traditional flours, leading to tough cookies. For gluten-free flours, it can still result in a less tender crumb.
- Patience with Cooling: Vegan cookies can be delicate when hot. Always allow your cookies to cool on the baking sheet for a few minutes before attempting to transfer them to a wire rack. This helps them set up and prevents them from breaking apart.
Common Mistakes to Avoid
- Dough Too Dry/Crumbly: If your dough feels too dry or crumbly to roll into balls, this is a common issue that can arise from different brands of peanut butter or flour. Simply add almond milk, one teaspoon at a time, mixing thoroughly after each addition, until the dough comes together into a workable consistency.
- Cookies Spreading Too Thin: Several factors can cause cookies to spread too much. Ensure your ingredients, especially the almond milk, are at room temperature (not warm). Using natural peanut butter with less oil separation can also help. If you are still seeing excessive spreading, try chilling the dough for 15-30 minutes before baking.
- Incorrect Flour Measurement: Scooping flour directly from the bag with your measuring cup can compact it, leading to significantly more flour than intended. This extra flour can result in dry, crumbly cookies. Always spoon your flour into the measuring cup and then level it off with a straight edge for accuracy.
- Overbaking: It is tempting to leave cookies in for “just one more minute,” but overbaking is a common culprit for dry, hard cookies. Keep a close eye on the oven. Look for the edges to be lightly golden and set, while the centers may still appear slightly soft. They will continue to cook slightly and firm up as they cool on the hot baking sheet.
- Using Non-Natural Peanut Butter: Avoid sweetened, hydrogenated peanut butter spreads. Their added sugars and fats will drastically alter the texture, sweetness, and baking behavior of these vegan peanut butter cookies, often leading to very different and less desirable results.
Serving & Storage
Serving Ideas
There is nothing quite like a freshly baked Vegan Peanut Butter Cookie. I love serving these warm from the oven with a tall, cold glass of almond milk, a classic pairing that never disappoints. For a gourmet touch, sprinkle them with a pinch of coarse sea salt immediately after they come out of the oven, enhancing both their sweetness and their rich peanut flavor.
These cookies also make a fantastic addition to any plant-based dessert platter, perhaps alongside some fresh berries or a scoop of dairy-free vanilla ice cream. For a fun twist, inspired by a classic, you can even make a well in each dough ball, add 1 teaspoon of grape jelly before baking, and create delicious Vegan Peanut Butter and Jelly Cookies!
Storage and Make-Ahead
These Vegan Peanut Butter Cookies are wonderful for making ahead or storing for later enjoyment. Once completely cooled, you can store the baked cookies in an airtight container on your counter for up to 5 days. They also remain quite good loosely covered on the counter for 2-3 days, though they may soften slightly.
To extend their freshness, place them in an airtight container in the refrigerator for up to 2 weeks. They become a bit firmer when chilled, which some people enjoy. For long-term storage, these cookies freeze beautifully. Once they are fully cooled, place them in a freezer-safe container or bag for up to 2 months. You can thaw them at room temperature or warm them briefly in the microwave for that fresh-baked warmth.
You can even freeze the cookie dough. Roll and flatten the dough balls as instructed, then freeze them on a baking sheet until they are solid. Transfer the frozen dough balls to a freezer-safe bag for up to 2 months. When you are ready to bake, place them directly on a lined baking sheet and bake from frozen, adding just 1-2 minutes to the usual baking time.
Conclusion
I hope you are as excited as I am about these Chewy Vegan Peanut Butter Cookies. The unique flax egg twist truly sets them apart, delivering an incredible chewiness and rich flavor that will impress everyone, whether they are vegan or not. This recipe proves that going plant-based does not mean sacrificing on taste or texture. You now have all the expert tips and knowledge to bake a perfect batch in your own kitchen.
Do not hesitate to experiment with the serving ideas or make-ahead options I have shared. I encourage you to try this recipe, share your delicious creations, and let me know what you think. Happy baking!
FAQ
Q: Can I use a different type of nut butter?
A: Yes, absolutely! The recipe explicitly mentions almond butter as a suitable alternative. For those with nut allergies, sunflower seed butter, often called sunbutter, works very well too. The key is to use natural, unsweetened varieties to maintain the intended texture and sweetness of the vegan peanut butter cookies.
Q: Can I make these cookies gluten-free?
A: Yes, these cookies are easily adaptable to be gluten-free. The recipe specifically lists almond flour or a 1-to-1 gluten-free blend as options. When using a gluten-free blend, I recommend looking for one that contains xanthan gum, as it helps provide structure in the absence of gluten, ensuring a great texture.
Q: How do I prevent the cookies from spreading too thin?
A: To prevent thin spreading, ensure your ingredients, especially the almond milk, are at room temperature but not overly warm. Using natural peanut butter with less separated oil can also help. If your kitchen is warm or the dough feels very soft, chilling the dough for 15-30 minutes before baking can significantly improve the cookie’s structure and prevent excessive spreading.
Q: How long do these cookies last?
A: Vegan Peanut Butter Cookies can be stored in an airtight container on the counter for up to 5 days, or in the refrigerator for up to 2 weeks. For longer storage, they freeze beautifully in a freezer-safe container for up to 2 months. Refer to the “Storage and Make-Ahead” section for more detailed information on freezing and thawing.
Q: Do I need to chill the dough?
A: While not strictly necessary for this particular recipe, chilling the dough for 15-30 minutes can be beneficial. It helps to firm up the dough, which is especially helpful if your kitchen is warm or if you notice your cookies are spreading more than desired during baking. It can result in a slightly thicker cookie.
Q: What can I do if my dough is too dry?
A: If your dough feels too dry or crumbly to form into balls, it is likely due to variations in peanut butter brands or flour absorption. Simply add almond milk (or your chosen plant milk) one teaspoon at a time, mixing thoroughly after each addition, until the dough comes together into a cohesive and workable consistency.
Q: Can I add chocolate chips to this recipe?
A: Yes, absolutely! Vegan Peanut Butter Cookies with chocolate chips are always a hit. You can stir in about 1 cup of your favorite dairy-free chocolate chips with the dry ingredients for an extra layer of deliciousness.
Q: What is the best way to measure flour for this recipe?
A: The most accurate way to measure flour is to use the spoon and level method. First, fluff up the flour in its container. Then, spoon the flour into your dry measuring cup until it overflows slightly. Finally, use the back of a straight edge, like a knife, to level off the top. Avoid scooping directly with the measuring cup, as this can compact the flour and lead to using too much, resulting in drier cookies.
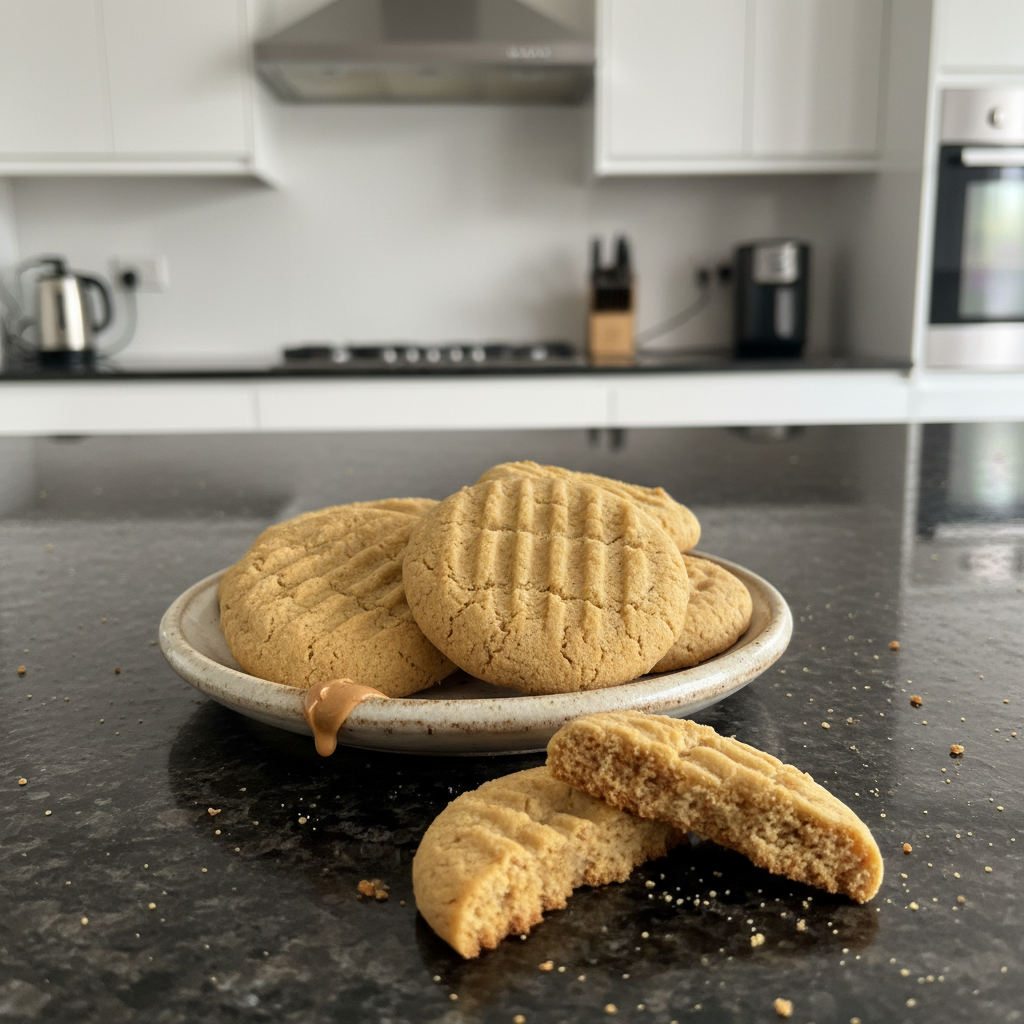
Vegan Peanut Butter Cookies (with a Chewy Flax Egg Twist!)
Ingredients
Equipment
Method
- Preheat your oven to 350°F (175°C). Line a cookie sheet with a silicone mat or parchment paper; this will prevent sticking and ensure easy cleanup. In a small bowl, combine 1 tablespoon ground flaxseed meal with 3 tablespoons water. Stir it gently and then set it aside for 5 minutes until it thickens into a gel-like consistency, which is your essential flax egg.
- In a large mixing bowl, combine the natural peanut butter and your chosen sugar (coconut sugar or pure cane sugar). Mix them together with a spatula or spoon until the mixture is creamy and well combined. Next, stir in the room-temperature almond milk and vanilla extract. Finally, add your prepared flax egg to the bowl. Mix everything until it is thoroughly incorporated and smooth.
- To the wet mixture, add the flour (spelt, unbleached all-purpose, almond, or 1-1 gluten-free blend), baking soda, and the generous pinch of mineral salt (if your peanut butter is unsalted). Begin to mix the ingredients. The dough will be quite thick and tough as it comes together. You may find it easiest to switch from a spoon to your clean hands for the final mixing to ensure all the dry ingredients are evenly incorporated into the peanut butter base.
- Using a 1.5 tablespoon cookie scoop, portion out the dough. Roll each portion into a smooth ball, about 1.25 inches in diameter. Place these dough balls about 2.5 inches apart on your prepared baking sheet to allow for some spreading. Take a fork and gently flatten each cookie ball, creating the classic crisscross pattern. Expert Tip: Dip the tines of your fork in a small bowl of sugar between pressing each cookie to prevent sticking and give beautifully defined patterns. Optionally, sprinkle a little coarse salt or extra sugar on top for a delightful sparkle and flavor boost.
- Place the baking sheet in your preheated oven and bake for 10-13 minutes. For a softer, chewier cookie, aim for 10-11 minutes. If you prefer a slightly crispier edge with a tender center, bake for 12-13 minutes. The cookies should look set around the edges and slightly golden, but the centers may still appear a little soft. They will firm up wonderfully as they cool, so resist the urge to overbake them.
- Once baked, remove the cookies from the oven. Let them cool on the baking sheet for a few minutes. This crucial step allows them to set properly, preventing them from breaking when you move them. After a few minutes, carefully transfer them to a wire rack to cool completely. Repeat this process with any remaining dough.
Notes

Taya Bennett is the founder of YumEasyMeals, a platform dedicated to easy, delicious, and quick-to-prepare recipes for busy families. Passionate about everyday cooking, she simplifies meals with practical, accessible, and always delicious ideas.
Discover her creations at: yumeasymeals.com