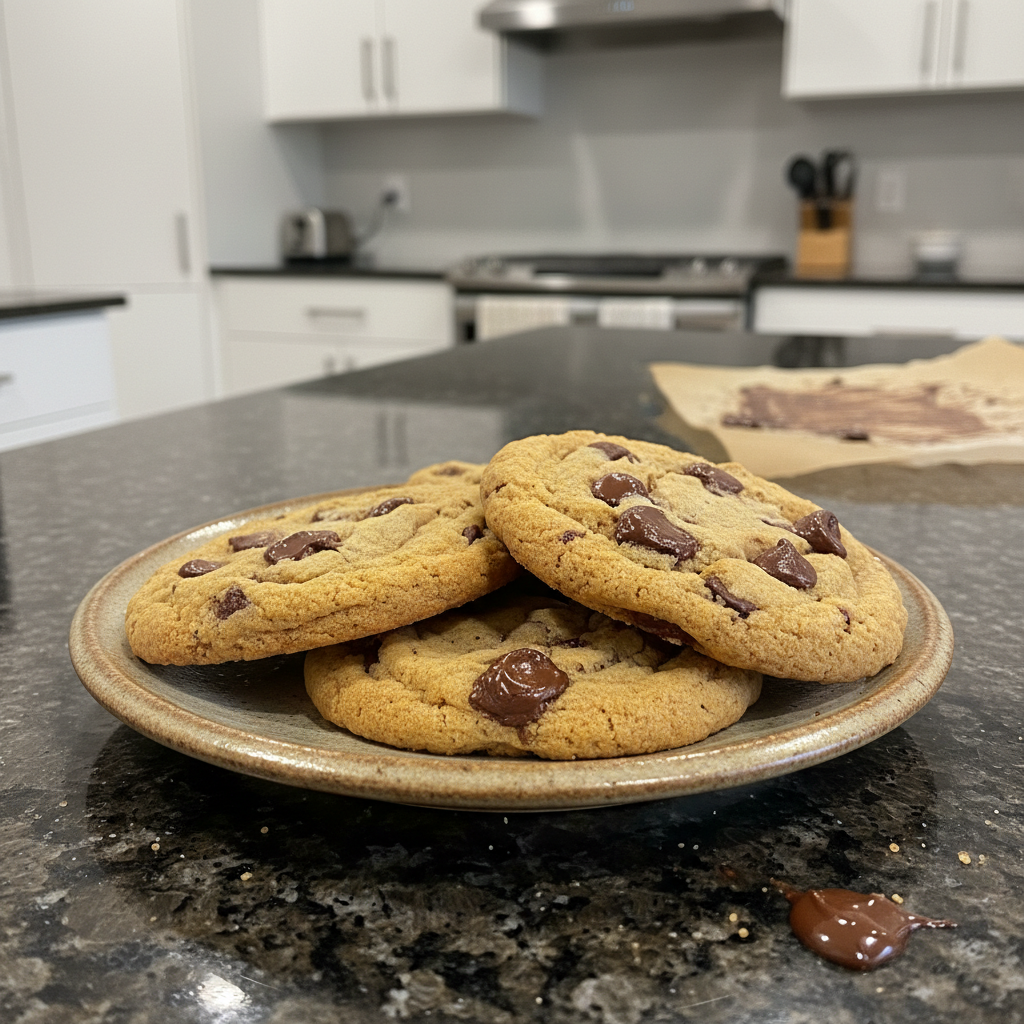
Welcome to my kitchen, where we are about to bake the most incredible old fashioned chocolate chip cookies you have ever tasted. This recipe is a true classic, delivering that perfect nostalgic flavor and texture we all adore. I have a simple yet incredibly effective trick to ensure your cookies are always thick, soft, and wonderfully chewy, making this a foolproof recipe for both beginners and seasoned bakers. Get ready to experience pure chocolate chip cookie bliss.
Why You’ll Love This Recipe
You will adore these old fashioned chocolate chip cookies because of their unique twist. The secret lies in chilling the dough, a simple step that makes all the difference. To understand more about this technique, read about why chilled cookie dough is better. Chilling the dough prevents the cookies from spreading too thin during baking. This results in a thicker, chewier cookie with a more concentrated, richer flavor that truly stands out.
You will achieve that sought-after soft and chewy center with a slightly crisp edge. This perfect texture is a hallmark of truly great chocolate chip cookies.
These cookies are easy to make, featuring simple steps and minimal effort for maximum reward. The process is straightforward, ensuring delicious results every time.
The recipe is also make-ahead friendly. The dough can be chilled for up to 24 hours, which is fantastic for busy schedules or when you want freshly baked cookies on demand.
Ingredients Needed

⅔ cup unsalted butter, softened
½ cup granulated or caster sugar
½ cup packed brown sugar
1 egg
1 generous teaspoon vanilla
1½ cups + 2 tablespoons all purpose flour (all purpose flour is also known as plain flour)
½ teaspoon baking soda
½ teaspoon salt
1 cup chocolate chips (my son used a combination of white and milk chocolate chips this time)
Ingredient Notes & Substitutions
When it comes to butter, I always recommend unsalted butter for better control of the overall salt levels in your old fashioned chocolate chip cookies. If you find yourself using salted butter, simply reduce the added salt in the recipe by ¼ teaspoon to maintain balance.
The combination of granulated sugar, also known as caster sugar, and brown sugar is crucial. Granulated sugar provides a crisp edge, while brown sugar adds moisture and contributes to that wonderfully chewy texture and rich flavor.
All-purpose flour forms the essential structure for these classic cookies. It is important not to substitute it with self-rising flour, as self-rising flour already contains leavening agents that would throw off the balance of the recipe and likely lead to an undesirable texture.
For the chocolate chips, feel free to use any type you prefer. Semi-sweet chocolate chips are a classic choice, but milk chocolate chips, dark chocolate chips, or even a combination of white and milk chocolate chips work beautifully. For a fun twist, chocolate peanut butter chips are also a delightful option, adding a unique flavor profile to your dessert. If you love chocolate, you might also enjoy our fudgy chocolate crinkle cookies. Each type offers a different level of sweetness and intensity, so choose what you love.
For a vegan adaptation, you can substitute the unsalted butter with a good quality vegan butter. For the egg, a flax egg (one tablespoon ground flaxseed mixed with three tablespoons water, let sit for 5 minutes) or a quarter cup of applesauce can work as an effective binder.

How to Make Old Fashioned Chocolate Chip Cookies
1. First, preheat your oven to 350°F (175°C). If you are using a fan oven, set it to 165°C. Making sure the oven is fully preheated is essential for even baking and prevents the cookies from spreading too quickly.
2. Next, in an electric mixer, cream together the softened unsalted butter and both the granulated sugar and brown sugar. This creaming process involves beating the butter and sugars together until the mixture becomes light and fluffy, usually taking 3-5 minutes. The mixture should appear pale in color and airy in texture. This step incorporates air into the fats, which creates a lighter cookie texture during baking.
3. Add the egg and the generous teaspoon of vanilla extract to the creamed mixture and beat until everything is well combined. Remember to scrape down the sides of the bowl to ensure all ingredients are evenly mixed into the dough.
4. In a separate bowl, sift together the all purpose flour, baking soda, and salt. Sifting helps to break up any lumps and ensures these dry ingredients are evenly distributed throughout the dough, which is important for consistent baking.
5. Gradually add the sifted flour mixture to the wet ingredients, mixing on low speed until just combined. Be careful not to overmix the dough, as this can overdevelop the gluten in the flour and lead to tough, rather than tender, old fashioned chocolate chip cookies.
6. Remove the bowl from the electric mixer and gently fold in the chocolate chips with a wooden spoon. Make sure to distribute the chocolate chips evenly throughout the rich cookie dough.
7. Cover the bowl of dough and chill it in the refrigerator for at least 30 minutes, or even up to 24 hours. This step is absolutely crucial for preventing the cookies from spreading too thin during baking and is key to achieving a thick, chewy texture. The fats solidify, and the flour hydrates further.
8. Once chilled, drop rounded teaspoonfuls of dough about 2 inches apart onto ungreased baking sheets. For uniform size and consistent baking, I often use a cookie scoop.
9. Bake for 8 to 10 minutes, or until the edges of the cookies are lightly golden brown and their centers still appear soft. Remember that the cookies will continue to bake slightly on the hot baking sheet after you remove them from the oven, so avoid overbaking.
10. Allow the baked cookies to cool on the baking sheets for 5 minutes before carefully transferring them to a wire rack. Cooling them briefly on the baking sheet helps the cookies set up and prevents them from breaking.
11. Once completely cooled, store your delicious old fashioned chocolate chip cookies in an airtight container at room temperature to maintain their freshness.
Achieving Your Perfect Cookie Texture
Controlling the texture of your cookies is all about understanding a few key factors. You can easily adjust this recipe to get exactly the kind of old fashioned chocolate chip cookies you crave.
For thicker, chewier cookies, the importance of chilling the dough cannot be overstated. A longer chilling time, up to 24 hours, will result in even thicker and chewier cookies as the fats firm up and the flour fully hydrates. You can also try using slightly less granulated sugar and slightly more brown sugar, as brown sugar adds more moisture and chewiness.
For thinner, crispier cookies, you can reduce or even eliminate the chilling time altogether. Instead of chilling, use more granulated sugar than brown sugar. Gently flattening the dough balls slightly with the palm of your hand or a spoon before baking will also encourage them to spread more and become crispier.
Pro Tips & Troubleshooting
Pro Tips
Always measure your ingredients accurately, especially flour. I recommend using the spoon and level method: spoon the flour into your measuring cup and then level it off with a straight edge, rather than scooping directly from the bag.
To prevent sticking and for easier cleanup, use parchment paper or a silicone baking mat on your baking sheets.
Do not overbake the cookies. They should look slightly soft in the center when you remove them from the oven. This ensures a wonderfully chewy texture.
Chilling the dough for at least 30 minutes is a simple step that yields the best results for thick, soft old fashioned chocolate chip cookies.
For truly exceptional flavor, use high-quality chocolate chips. The difference in taste is noticeable, and it’s key to creating delicious treats like these or even fudgy gluten-free brownies.
For an extra touch of gourmet flavor, sprinkle a pinch of sea salt on top of the warm, baked cookies just after they come out of the oven.
Common Mistakes to Avoid
A common mistake is using butter that is too soft or melted. Your unsalted butter should be softened but still cool to the touch, not greasy or liquid. This ideal consistency is crucial for proper creaming and cookie structure.
Overmixing the dough is another pitfall. Once you add the all purpose flour, mix only until no dry streaks remain. Overmixing develops gluten excessively, which can lead to tough, dense cookies.
Not measuring flour accurately can drastically alter your cookie’s texture. Too much flour results in dry, crumbly cookies, while too little can make them spread too much. Always use the spoon and level method.
Overbaking is a frequent culprit for hard, dry cookies. Keep a close eye on your cookies; the edges should be lightly golden brown, but the centers should still look slightly underdone and soft when you pull them from the oven.
If you are aiming for thick, chewy old fashioned chocolate chip cookies, not chilling the dough will often result in flatter, crispier cookies. Don’t skip that chill time.
Using old baking soda can lead to flat cookies that do not rise properly. Always make sure your baking soda is fresh for optimal leavening.
Serving & Storage
Serving Ideas
There’s nothing quite like a warm old fashioned chocolate chip cookie. Serve them straight from the oven with a tall glass of cold milk for a classic treat.
Elevate your dessert by enjoying a warm cookie with a scoop of creamy vanilla ice cream. It is an irresistible combination.
These delicious cookies also pair wonderfully with a hot cup of coffee or a comforting cup of tea, making them a perfect afternoon snack.
For a decadent dessert, use two cookies to make an ice cream sandwich with your favorite flavor in the middle.
Storage and Make-Ahead
Baked old fashioned chocolate chip cookies can be stored in an airtight container at room temperature for up to 3 days, maintaining their softness and chewiness.
For longer storage, you can freeze baked cookies for up to 2 months. Simply thaw them at room temperature before serving to bring them back to their delicious best.
You can also freeze individual cookie dough balls for up to 3 months. Arrange them on a baking sheet, freeze until solid, then transfer to a freezer-safe bag. When ready to bake, place them on a baking sheet directly from frozen, adding just 1-2 minutes to the baking time.
Conclusion
These old fashioned chocolate chip cookies are more than just a dessert; they are a comforting classic with a simple twist that guarantees success. By chilling the dough, we unlock a depth of flavor and achieve that perfect soft and chewy texture that makes these cookies irresistible. Whether you are a novice baker or an experienced one, this recipe promises foolproof results that everyone will love. So go ahead, give it a try, and enjoy the delicious reward of warm, homemade cookies straight from your oven.
FAQ
What kind of chocolate chips should I use for the best flavor?
For the best flavor, I recommend using a high-quality brand of chocolate chips. Semi-sweet chocolate chips offer a classic balance, but you can also experiment with milk chocolate chips for a sweeter cookie or dark chocolate chips for a richer, more intense chocolate flavor. A mix of white and milk chocolate chips, as my son prefers, also adds a lovely visual and flavor variety.
Can I freeze old fashioned chocolate chip cookies?
Absolutely! You can freeze both baked cookies and raw cookie dough. To freeze baked cookies, allow them to cool completely, then place them in a freezer-safe airtight container or bag for up to two months. Thaw them at room temperature. To freeze dough, scoop balls of dough onto a baking sheet, freeze until firm, then transfer to a freezer bag. Bake from frozen, adding an extra 1-2 minutes to the baking time.
What causes chocolate chip cookies to spread too thin, and how can I prevent it?
Cookies spread too thin for several reasons, but the most common is warm dough or too much softened butter. To prevent this, ensure your unsalted butter is just softened, not melted. Most importantly, chill the cookie dough for at least 30 minutes, or up to 24 hours. This solidifies the fats, preventing excessive spreading in the oven and resulting in thicker, chewier cookies. Using too much baking soda or an oven that is not fully preheated can also contribute to spreading.
How do I store the cookies to keep them fresh and chewy?
To keep your old fashioned chocolate chip cookies fresh and chewy, store them in an airtight container at room temperature. They will remain delicious for up to three days. For longer freshness, you can also place a slice of bread in the container with the cookies; the cookies will absorb moisture from the bread, keeping them soft.
Can I make these without an electric mixer, and if so, what’s the best technique?
Yes, you can certainly make these old fashioned chocolate chip cookies without an electric mixer. You will need a large bowl and a sturdy wooden spoon or rubber spatula. Begin by creaming the softened butter and sugars together vigorously until light and fluffy. This will require some elbow grease. Then, stir in the egg and vanilla. Finally, gradually add the dry ingredients and chocolate chips, mixing just until combined. It takes a bit more effort, but the results are equally delicious.
What is the best way to measure flour for chocolate chip cookies?
The best way to measure all purpose flour for cookies is using the spoon and level method. Lightly spoon the flour into your dry measuring cup until it overflows, then use a straight edge (like the back of a knife or a ruler) to level off the excess flour. Do not scoop the flour directly from the bag with the measuring cup, as this can pack it down and lead to using too much flour, resulting in dry cookies.
How long will old fashioned chocolate chip cookies keep?
Baked old fashioned chocolate chip cookies will keep fresh in an airtight container at room temperature for up to three days. If you freeze them, they can last for up to two months.
Can I use salted butter instead of unsalted?
Yes, you can use salted butter in this old fashioned chocolate chip cookie recipe. However, if you do, I recommend reducing the amount of added salt by ¼ teaspoon to maintain the intended flavor balance. Unsalted butter gives you more control over the overall salt content of your dessert.
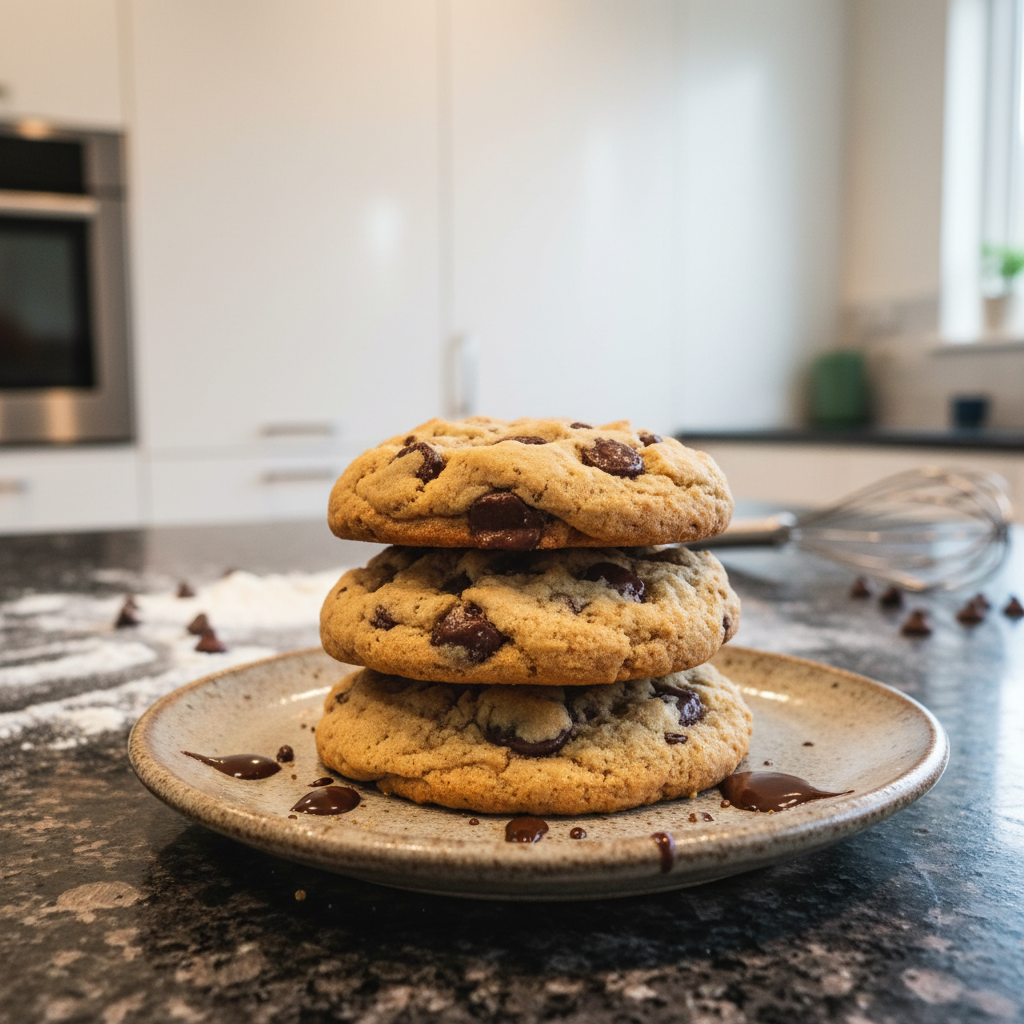
Best Old Fashioned Chocolate Chip Cookies Recipe
Ingredients
Equipment
Method
- First, preheat your oven to 350°F (175°C). If you are using a fan oven, set it to 165°C. Making sure the oven is fully preheated is essential for even baking and prevents the cookies from spreading too quickly.
- Next, in an electric mixer, cream together the softened unsalted butter and both the granulated sugar and brown sugar. This creaming process involves beating the butter and sugars together until the mixture becomes light and fluffy, usually taking 3-5 minutes. The mixture should appear pale in color and airy in texture. This step incorporates air into the fats, which creates a lighter cookie texture during baking.
- Add the egg and the generous teaspoon of vanilla extract to the creamed mixture and beat until everything is well combined. Remember to scrape down the sides of the bowl to ensure all ingredients are evenly mixed into the dough.
- In a separate bowl, sift together the all purpose flour, baking soda, and salt. Sifting helps to break up any lumps and ensures these dry ingredients are evenly distributed throughout the dough, which is important for consistent baking.
- Gradually add the sifted flour mixture to the wet ingredients, mixing on low speed until just combined. Be careful not to overmix the dough, as this can overdevelop the gluten in the flour and lead to tough, rather than tender, old fashioned chocolate chip cookies.
- Remove the bowl from the electric mixer and gently fold in the chocolate chips with a wooden spoon. Make sure to distribute the chocolate chips evenly throughout the rich cookie dough.
- Cover the bowl of dough and chill it in the refrigerator for at least 30 minutes, or even up to 24 hours. This step is absolutely crucial for preventing the cookies from spreading too thin during baking and is key to achieving a thick, chewy texture. The fats solidify, and the flour hydrates further.
- Once chilled, drop rounded teaspoonfuls of dough about 2 inches apart onto ungreased baking sheets. For uniform size and consistent baking, I often use a cookie scoop.
- Bake for 8 to 10 minutes, or until the edges of the cookies are lightly golden brown and their centers still appear soft. Remember that the cookies will continue to bake slightly on the hot baking sheet after you remove them from the oven, so avoid overbaking.
- Allow the baked cookies to cool on the baking sheets for 5 minutes before carefully transferring them to a wire rack. Cooling them briefly on the baking sheet helps the cookies set up and prevents them from breaking.
- Once completely cooled, store your delicious old fashioned chocolate chip cookies in an airtight container at room temperature to maintain their freshness.
Notes

Sophie Reynolds is a baking specialist and dessert contributor at YumEasyMeals. She develops approachable, family-friendly dessert recipes focused on flavor, simplicity, and reliable results for everyday home cooks.