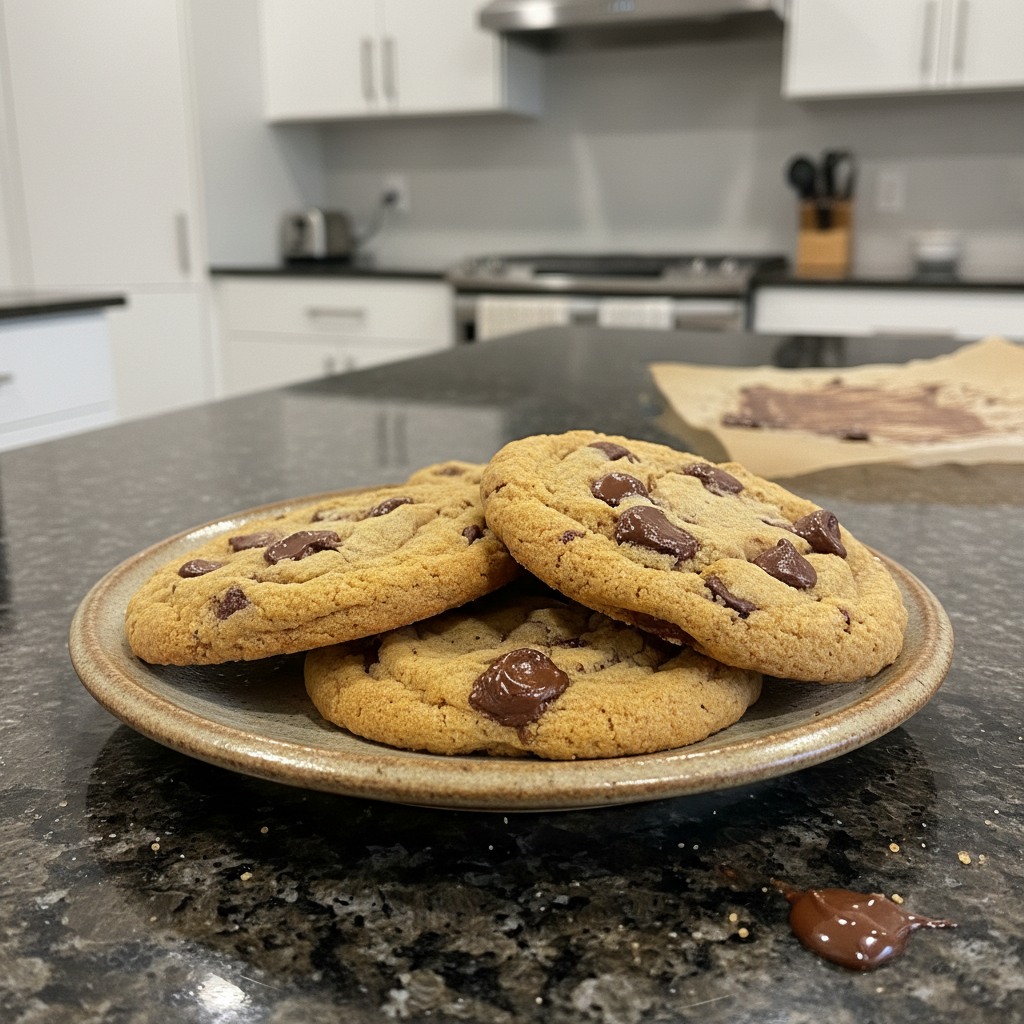
There’s nothing quite like the magic of baking, especially during the holidays. Imagine a plate of perfectly snowy, intensely dark chocolate crinkle cookies, each one promising a soft, fudgy center and that signature crackle. These chocolate crinkle cookies are a classic for a reason, bringing smiles to every cookie exchange and family gathering.
I’ve developed this recipe to deliver the ultimate fudgy and chewy experience, with a unique, intensely chocolatey flavor that truly stands out. My easy-to-follow steps, coupled with a special secret ingredient, elevate these chocolate crinkle cookies far beyond the ordinary. Prepare to bake your new favorite Christmas cookies!
Why You’ll Love This Recipe
My secret to truly superior chocolate crinkle cookies lies in a simple yet impactful twist: I add finely grated semi-sweet chocolate to the dough after it has chilled. This isn’t just a casual addition; it’s a game-changer.
Intense chocolate flavor: The finely grated chocolate melts during baking, creating tiny pockets of concentrated chocolate throughout the cookie. This enhances the overall cocoa powder flavor, making each bite incredibly rich and deep.
Superior fudgy texture: These pockets of melted chocolate contribute to a distinctly softer, more fudgy texture in the finished cookie. You get a delightful chewiness that complements the crisp, crackly exterior beautifully.
Visually stunning results: The additional chocolate helps create more pronounced cracks, giving your cookies that professional, picture-perfect look. These are truly impressive Christmas cookies for any dessert platter.
Easy and reliable: Despite the gourmet twist, this recipe remains incredibly easy to follow. It’s perfect for both seasoned bakers and beginners looking to impress. My method ensures consistent, delicious results every time.
Perfect for holiday baking: These chocolate crinkle cookies are an absolute crowd-pleaser, making them ideal for holiday baking, gifting, or simply satisfying that deep chocolate craving. If you’re looking for other soft and chewy cookie recipes, we have plenty to explore!
Ingredients Needed
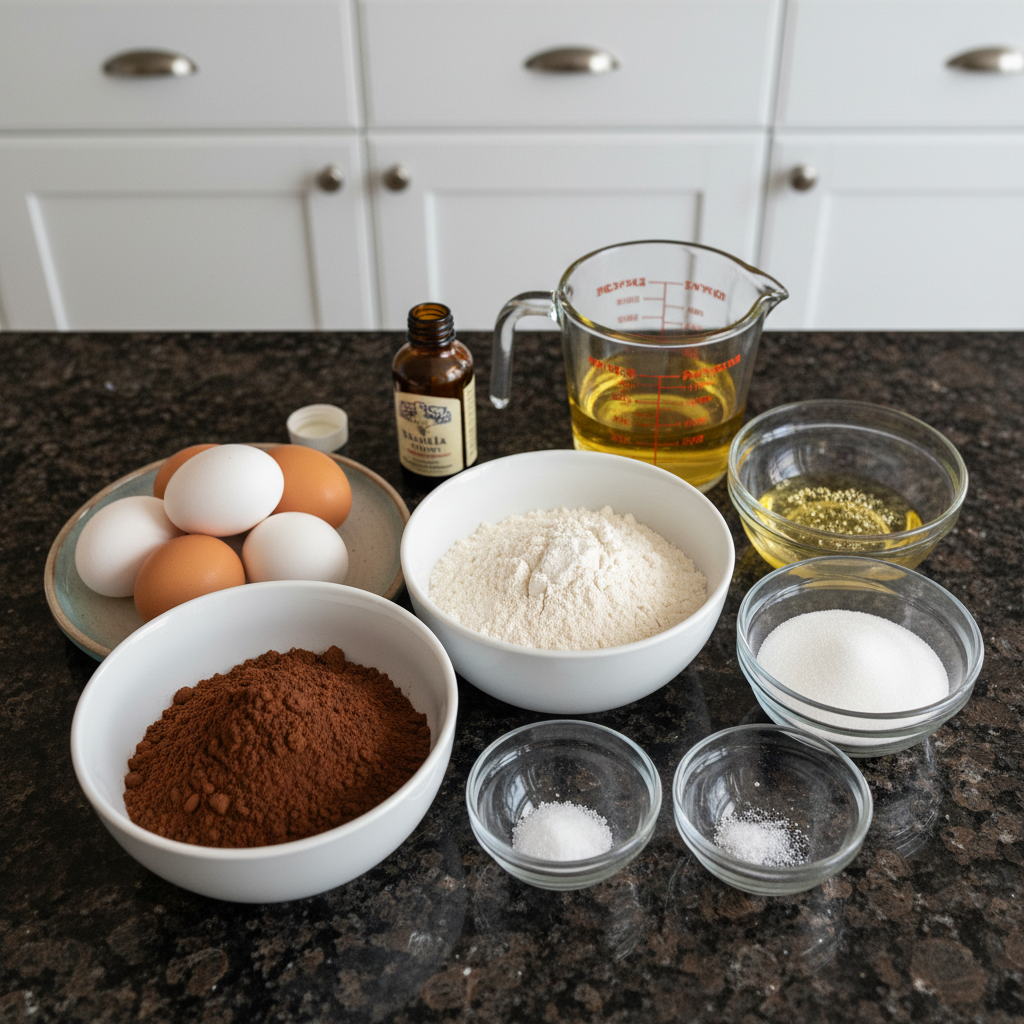
Here’s everything you will need to create these amazing chocolate crinkle cookies:
- 1 cup unsweetened cocoa powder (100g)
- 1¾ cups granulated sugar (350g)
- ½ cup vegetable oil (120mL)
- 4 large eggs (room temperature)
- 2 teaspoons vanilla extract
- 2 cups all-purpose flour (240g)
- 2 teaspoons baking powder
- ¾ teaspoon salt
- 1 cup powdered sugar (120g)
- 4 ounces semi-sweet chocolate, finely grated (optional, for the twist)
Ingredient Notes & Substitutions
Cocoa powder: For the best flavor and color, I highly recommend using a good quality Dutch-processed cocoa powder. It’s less acidic than natural cocoa and delivers a darker, richer chocolate flavor that makes these cookies extra special. Ghirardelli or Guittard are excellent choices.
Granulated sugar: This recipe relies on granulated sugar for its specific role in the cookie’s texture and spread. I avoid brown sugar here as it can alter the chewiness and moisture balance, leading to a different result.
Vegetable oil: Vegetable oil keeps these chocolate crinkle cookies wonderfully soft and moist. You can substitute with other neutral oils like canola oil. If using coconut oil, be sure it’s refined to prevent any coconut flavor from transferring to your dessert.
Eggs: Using room temperature eggs is crucial. They emulsify better with the other ingredients, creating a smoother, more cohesive dough. This also helps prevent a greasy cookie by allowing the fats to blend properly.
Vanilla extract: Always opt for pure vanilla extract. Its warm, sweet notes truly enhance the chocolate flavor. Imitation vanilla just doesn’t compare.
All-purpose flour: Standard all-purpose flour works perfectly for these cookies. If you need a gluten-free option, a 1-to-1 gluten-free baking blend can be used, though the final texture might vary slightly.
Baking powder: Ensure your baking powder is fresh. It’s responsible for the cookie’s lift and contributes to those beautiful cracks. Test its freshness by adding a teaspoon to hot water; it should fizz immediately.
Salt: A small amount of salt is vital for balancing the sweetness and enhancing the deep chocolate flavors in any dessert. Don’t skip it!
Powdered sugar: This is non-negotiable for the classic crinkled appearance. A generous coating creates that snowy, crackled finish. Sifting your powdered sugar before rolling can help ensure an even, clump-free coating.
Optional finely grated chocolate: For my unique twist, I recommend using good quality semi-sweet chocolate, such as a baking bar. Grate it very finely using a microplane grater or the fine side of a box grater. This ensures it melts seamlessly into the dough.
How to Make Chocolate Crinkle Cookies
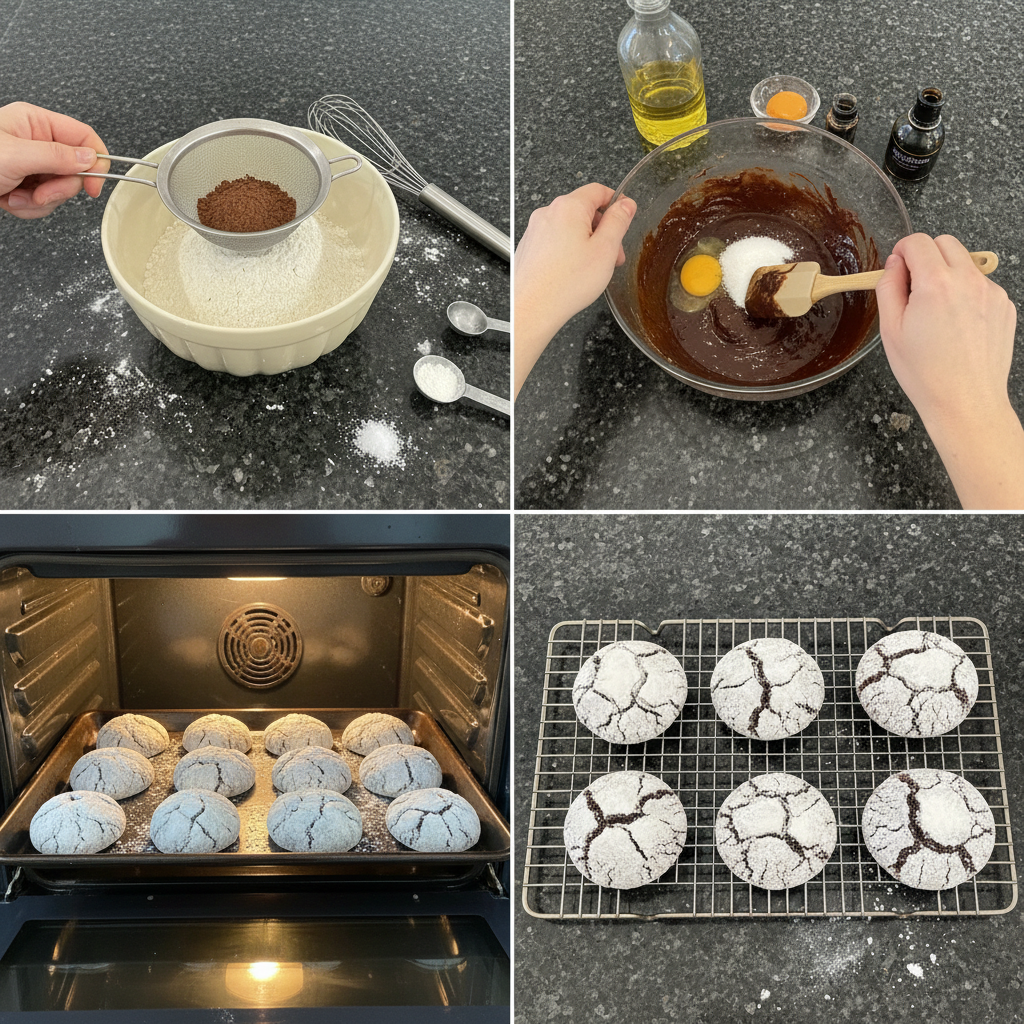
Let’s get baking! Follow these steps closely to create your perfect batch of fudgy, chewy chocolate crinkle cookies.
Step 1: Combine Wet Ingredients
In a large mixing bowl, or the bowl of your stand mixer fitted with the paddle attachment, combine the granulated sugar, unsweetened cocoa powder, and vegetable oil. Beat on medium speed with a hand mixer or stand mixer until all ingredients are thoroughly combined and the mixture looks consistently shiny and dark. Use a rubber spatula to scrape down the sides of the bowl to ensure everything is incorporated.
Step 2: Add Eggs and Vanilla
Add the large eggs one at a time, beating well after each addition until fully incorporated. This staggered addition ensures proper emulsification, leading to a smoother dough. Finally, beat in the pure vanilla extract. The kitchen will begin to fill with its comforting aroma.
Step 3: Combine Dry Ingredients
In a separate medium bowl, whisk together the all-purpose flour, baking powder, and salt. Stir gently to combine these dry ingredients evenly. This step is important to ensure proper distribution of the leavening agent and to avoid overmixing the dough later, which can lead to tough cookies.
Step 4: Combine Wet and Dry
Gradually add the flour mixture to the cocoa mixture. Mix on low speed, just until the dry ingredients are combined and no streaks of flour remain. Stop mixing as soon as the dough comes together; overmixing can develop the gluten too much, resulting in a tougher, less tender cookie texture.
Step 5: Chill the Dough (and add the twist!)
Cover the dough tightly with plastic wrap and refrigerate for at least 4 hours. Chilling is absolutely crucial for preventing the cookies from spreading too thin during baking and for developing the perfect fudgy texture. The dough will become much firmer and easier to handle after chilling. After the dough has thoroughly chilled, take it out of the refrigerator and mix in the finely grated semi-sweet chocolate until evenly distributed throughout the cold dough. Then, re-cover and return to the refrigerator for a brief 30 minutes if the dough has warmed significantly.
Step 6: Preheat and Prep
Once your dough is chilled and ready, preheat your oven to 350°F (175°C). Line two large baking sheets with parchment paper. Parchment paper is excellent for preventing sticking and ensures easy removal of your delicate chocolate crinkle cookies. Place the powdered sugar in a small, shallow bowl, ready for coating.
Step 7: Roll and Coat
Using a small ice cream scoop or a tablespoon, scoop portions of the chilled dough and roll them into roughly one-inch balls between your palms. This ensures uniform size for all your chocolate crinkle cookies and even baking. Immediately roll each dough ball generously in the powdered sugar until it is completely coated. The more powdered sugar, the more dramatic and beautiful your cracks will be. Place the coated dough balls on the prepared baking sheet about 2 inches apart. Remember to only coat as many dough balls as you can fit on your baking sheets at one time. Keep the remaining dough balls in the refrigerator and coat them just before baking each batch to maintain their chill.
Step 8: Bake
Bake the chocolate crinkle cookies for 10 to 12 minutes. You’ll know they’re done when the edges are set and firm, but the center still appears slightly puffed and perhaps a little moist. Avoid overbaking, as this will lead to dry cookies. A good oven thermometer can help you maintain an accurate oven temperature for consistent results.
Step 9: Cool
Once baked, let the cookies cool on the baking sheets for a few minutes. This allows them to set up properly without breaking. As they cool, their texture will transform from tender to perfectly chewy. After a few minutes, carefully transfer them to a wire rack to cool completely. Enjoy the enticing aroma as they finish cooling!
Troubleshooting Crinkle Cookies
Even seasoned bakers sometimes encounter issues. Here’s how to tackle common problems with your chocolate crinkle cookies:
Why are my cookies flat? Flat cookies often stem from dough that isn’t chilled long enough, or dough that gets too warm before baking. Ensure your dough is firm from at least 4 hours of refrigeration, and keep unbaked dough cold while baking in batches. An oven that isn’t preheated to the correct temperature can also cause spreading.
Why didn’t my cookies crack? The crackle comes from the contrast between the moist dough and the powdered sugar coating reacting to the oven’s heat. Insufficient oven temperature, too much flour making the dough stiff, not enough chilling, or even high humidity can hinder cracking. Make sure your cookies are completely coated in powdered sugar.
Why are my cookies dry? Overbaking is the number one culprit for dry chocolate crinkle cookies. Pull them from the oven when the edges are set but the centers still look slightly moist. Too much flour or not enough fat (oil) can also contribute to a crumbly, dry texture.
Why are my cookies too puffy? If your cookies are overly puffy, it’s often a sign of too much baking powder. Double-check your measurements carefully. An oven that is too cool can also cause them to puff excessively before setting.
Cookies spreading too much: This almost always points back to not chilling the dough for a sufficient amount of time. The fat in the dough needs to solidify to prevent excessive spreading when introduced to the hot oven. Also, ensure your baking powder isn’t old or overly active.
Pro Tips & Troubleshooting
Pro Tips
For an even deeper chocolate flavor, try using a dark cocoa powder. It intensifies the richness of these chocolate crinkle cookies.
Do not skip the chilling time! This is crucial for preventing the cookies from spreading too thin and for creating those beautiful, deep cracks.
Use a cookie scoop to ensure uniform size for all your dough balls. This leads to even baking and a professional presentation.
For an extra touch of chocolate decadence, gently press a few chocolate chips into the tops of the cookie dough balls just before baking.
Always refrigerate any remaining dough balls while you bake each batch. This keeps the dough cold and prevents spreading, ensuring every cookie has that perfect crinkle.
Ensure the cookies are completely coated in powdered sugar. The generous coating is essential for achieving the maximum crackle effect on your chocolate crinkle cookies.
Common Mistakes to Avoid
Overmixing the dough: This is a common pitfall. Overmixing develops the gluten in the all-purpose flour, resulting in tough, less tender chocolate crinkle cookies.
Not chilling the dough long enough: Insufficient chilling time is a recipe for disaster. It causes the cookies to spread and flatten, losing their signature thick and fudgy texture.
Using old baking powder: Old baking powder loses its leavening power, which prevents the cookies from rising properly and contributing to those lovely cracks.
Overbaking the cookies: This is another major mistake. Overbaking leads to dry, crumbly cookies rather than the desired fudgy and chewy texture.
Not using enough powdered sugar: Skimping on the powdered sugar coating will result in fewer and less pronounced cracks, diminishing the classic appearance of chocolate crinkle cookies.
Serving & Storage
Serving Ideas
These fudgy chocolate crinkle cookies are delightful on their own, but I love serving them warm from the oven with a scoop of creamy vanilla ice cream. The contrast of warm cookie and cold ice cream is divine.
Pair them with a tall glass of cold milk or a steaming mug of hot cocoa for the ultimate cozy treat. They are also fantastic with a strong cup of coffee or an espresso.
Chocolate crinkle cookies are a staple for any festive holiday dessert platter. Their snowy appearance makes them perfect for Christmas cookies spreads.
Package these beautiful cookies in decorative tins or bags for a thoughtful homemade gift during the holiday season. For another delightful treat, consider our vegan chocolate chip cookies.
Storage and Make-Ahead
Short-term storage: Store baked chocolate crinkle cookies in an airtight container at room temperature for up to 5-7 days. To maintain freshness, you can place a slice of bread in the container to absorb excess moisture and keep them soft.
Freezing unbaked dough: You can easily freeze the unbaked dough. Roll the dough into balls, but do not coat in powdered sugar. Place them on a baking sheet and freeze until solid. Transfer the frozen dough balls to a freezer-safe bag or container and freeze for up to 3 months. When ready to bake, thaw the dough balls in the refrigerator overnight, then roll in powdered sugar and bake as directed.
Freezing baked cookies: Baked chocolate crinkle cookies freeze beautifully. Once completely cooled, place them in an airtight, freezer-safe container, separating layers with parchment paper. Freeze for up to 3 months. Thaw at room temperature or gently warm in a low oven for a few minutes before serving.
Thawing methods: For frozen dough, thaw slowly in the refrigerator to maintain texture. For frozen baked cookies, simply let them come to room temperature on the counter for about an hour, or warm them for a few minutes in a 250°F (120°C) oven.
Shelf life optimization: Always ensure cookies are completely cool before storing to prevent condensation, which can make them soggy. An airtight container is key to keeping them fresh and chewy.
Conclusion
I genuinely believe this recipe delivers the best chocolate crinkle cookies you’ll ever make. My unique twist of adding finely grated semi-sweet chocolate after chilling ensures an unparalleled depth of flavor and that perfectly fudgy, chewy texture you crave. Even if you’re new to baking, my detailed steps and troubleshooting tips will guide you to success.
Feel free to experiment with flavor variations! A hint of peppermint extract can make them festive Christmas cookies, or a dash of espresso powder can further intensify the chocolate. Print the recipe and bake up a batch of these delightful Chocolate Crinkle Cookies today!
FAQ
How do I know when the cookies are done baking?
The cookies are done baking when their edges appear firm and set, but the centers still look slightly puffed and might have a soft, slightly wet appearance. They will firm up further as they cool on the baking sheet.
Why are my cookies flat?
Flat cookies are usually a sign that the dough wasn’t chilled long enough, or it became too warm before baking. Ensure your dough chills for at least 4 hours and keep unbaked portions refrigerated while you work in batches.
Why didn’t my cookies crack?
The characteristic cracks come from the powdered sugar coating. If your cookies didn’t crack, it might be due to not enough powdered sugar, an oven temperature that was too low, or dough that wasn’t sufficiently chilled.
Can I freeze these cookies?
Yes, absolutely! You can freeze the unbaked dough balls (without powdered sugar) for up to 3 months, thawing them in the refrigerator before rolling and baking. Baked cookies can also be frozen in an airtight container for up to 3 months.
Can I make these ahead of time?
Yes, this recipe is perfect for making ahead. The dough requires at least 4 hours of chilling but can be prepared up to overnight. This makes it a great option for holiday baking preparations.
How should these cookies be stored?
Store baked chocolate crinkle cookies in an airtight container at room temperature for 5-7 days. For longer storage, both the unbaked dough and baked cookies can be frozen.
“`

Best Chocolate Crinkle Cookies Recipe: Fudgy & Chewy!
Ingredients
Equipment
Method
- In a large mixing bowl, or the bowl of your stand mixer fitted with the paddle attachment, combine the granulated sugar, unsweetened cocoa powder, and vegetable oil. Beat on medium speed with a hand mixer or stand mixer until all ingredients are thoroughly combined and the mixture looks consistently shiny and dark. Use a rubber spatula to scrape down the sides of the bowl to ensure everything is incorporated.
- Add the large eggs one at a time, beating well after each addition until fully incorporated. Finally, beat in the pure vanilla extract.
- In a separate medium bowl, whisk together the all-purpose flour, baking powder, and salt. Stir gently to combine these dry ingredients evenly.
- Gradually add the flour mixture to the cocoa mixture. Mix on low speed, just until the dry ingredients are combined and no streaks of flour remain. Stop mixing as soon as the dough comes together; avoid overmixing.
- Cover the dough tightly with plastic wrap and refrigerate for at least 4 hours. After the dough has thoroughly chilled, take it out of the refrigerator and mix in the finely grated semi-sweet chocolate until evenly distributed throughout the cold dough. Then, re-cover and return to the refrigerator for a brief 30 minutes if the dough has warmed significantly.
- Once your dough is chilled and ready, preheat your oven to 350°F (175°C). Line two large baking sheets with parchment paper. Place the powdered sugar in a small, shallow bowl, ready for coating.
- Using a small ice cream scoop or a tablespoon, scoop portions of the chilled dough and roll them into roughly one-inch balls between your palms. Immediately roll each dough ball generously in the powdered sugar until it is completely coated. Place the coated dough balls on the prepared baking sheet about 2 inches apart. Only coat as many dough balls as you can fit on your baking sheets at one time, keeping the remaining dough in the refrigerator.
- Bake the chocolate crinkle cookies for 10 to 12 minutes. They are done when the edges are set and firm, but the center still appears slightly puffed and a little moist. Avoid overbaking.
- Once baked, let the cookies cool on the baking sheets for a few minutes to set up properly. After a few minutes, carefully transfer them to a wire rack to cool completely.
Notes

Sophie Reynolds is a baking specialist and dessert contributor at YumEasyMeals. She develops approachable, family-friendly dessert recipes focused on flavor, simplicity, and reliable results for everyday home cooks.