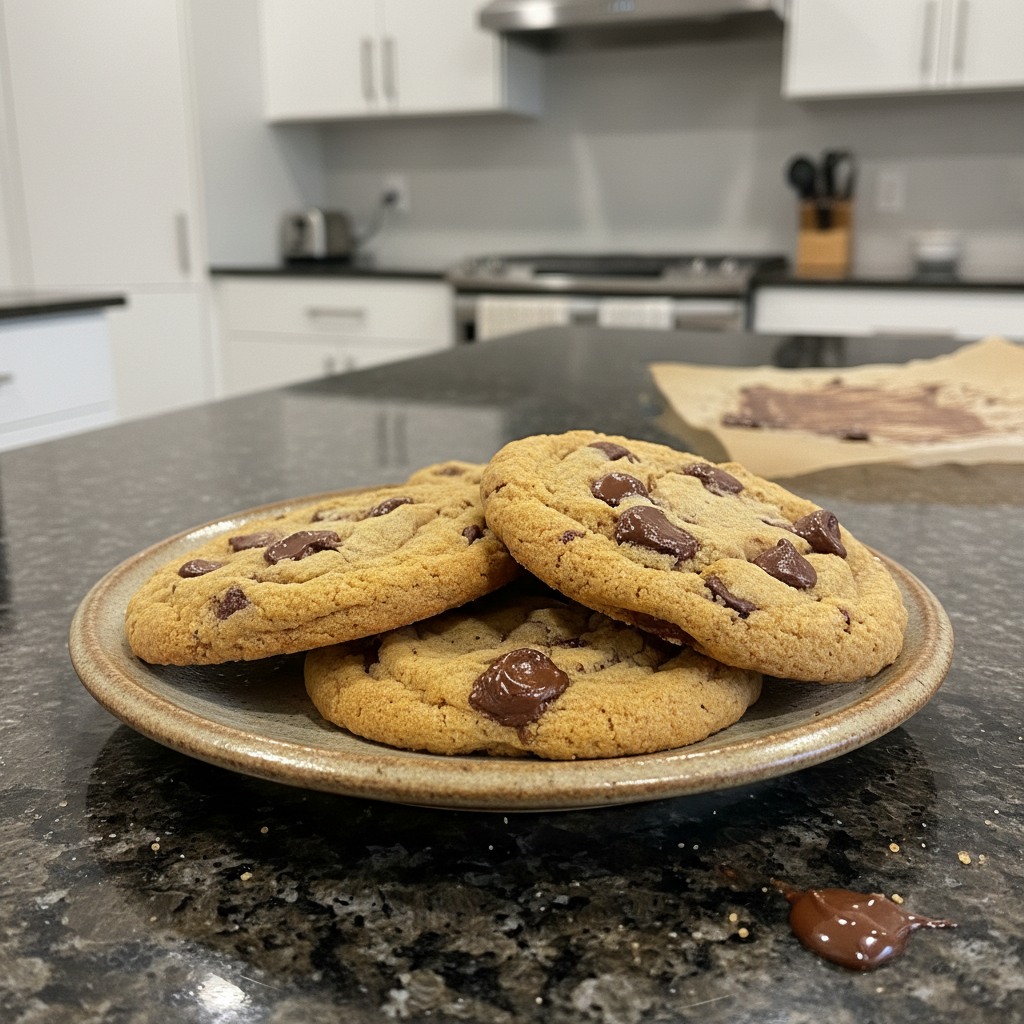
For too long, the quest for truly phenomenal gluten free brownies has felt like searching for a mythical beast. We have all experienced the disappointment of dry, crumbly, or cakey versions that just do not hit the mark. That familiar fudgy chew and that signature crackly top often seem out of reach in gluten-free baking. I am here to tell you that the search ends today. My recipe for the best fudgy gluten free brownies delivers on every promise. Prepare for a delightful, easy baking journey that results in bakery-worthy brownies right in your own kitchen.
Why You’ll Love These Gluten-Free Brownies
You will absolutely adore these gluten-free brownies because they do not taste gluten-free at all. My secret is a special blend of almond flour and tapioca starch. This combination creates ultra-fudgy, crackly-top gluten-free brownies that are simply irresistible.
Almond flour adds incredible richness and moisture to every bite. It contributes a luxurious depth of flavor that gluten-free chocolate desserts often lack. Tapioca starch is the magic ingredient for that perfect chewiness and the coveted crackly top. These textures are usually difficult to achieve in gluten-free baked goods.
This recipe offers an incredibly fudgy texture that melts in your mouth. It is also surprisingly easy to make, even for beginner bakers. These brownies are a perfect treat for anyone with dietary needs and are a delicious, family-friendly dessert everyone will enjoy.
Ingredients Needed
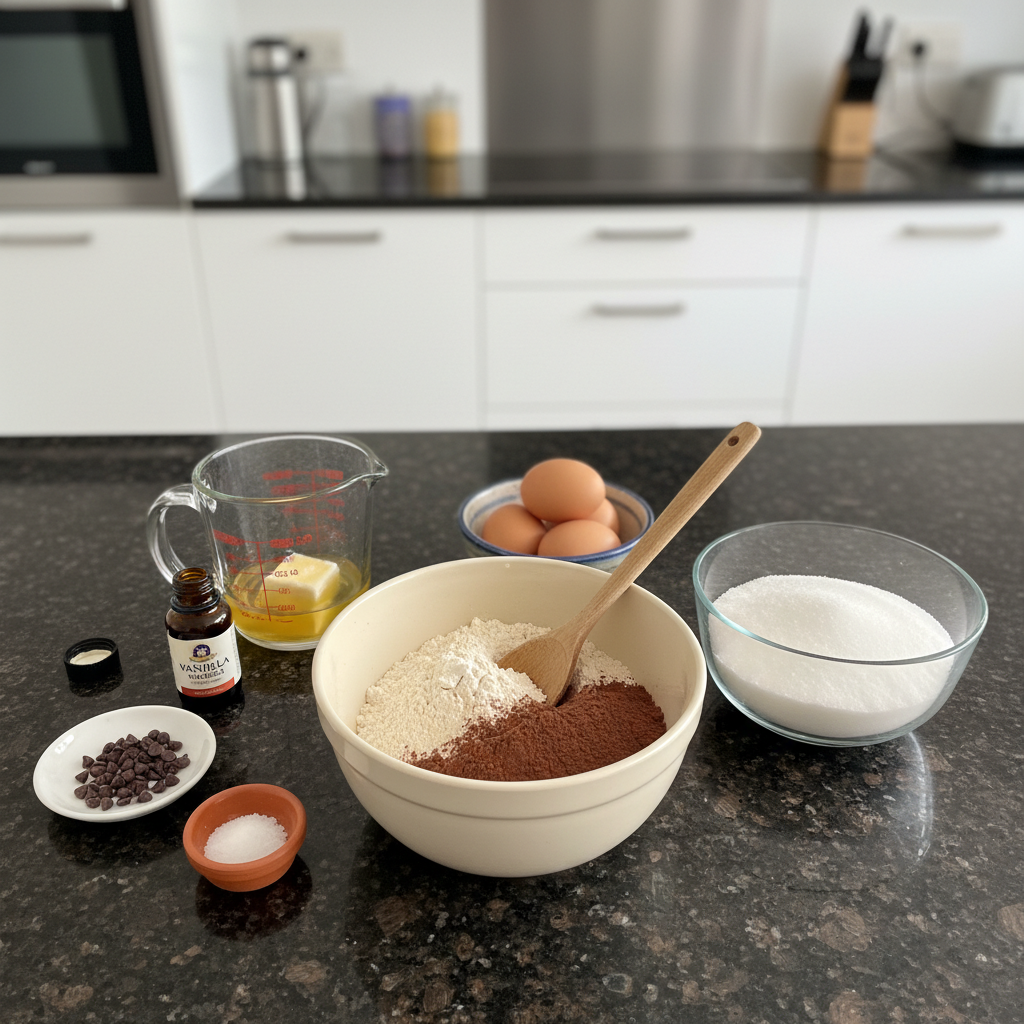
- 1 cup (2 sticks) unsalted butter, melted
- 2 cups granulated sugar
- 4 large eggs
- 1 teaspoon vanilla extract
- 1 cup almond flour
- 1/2 cup tapioca starch
- 3/4 cup unsweetened cocoa powder, sifted
- 1/2 teaspoon baking powder
- 1/4 teaspoon salt
- 1 cup chocolate chips (optional)
Ingredient Notes & Substitutions
For the butter, I always recommend a good quality unsalted butter. If you need dairy-free gluten-free brownies, simply swap in a plant-based butter alternative that measures cup for cup. Most major brands work wonderfully here.
The sugar provides sweetness and helps create that wonderful crackly top. Do not reduce the amount unless you are truly comfortable with the resulting texture changes.
Eggs are crucial for structure and richness. Ensure they are large eggs for consistent results.
Vanilla extract enhances the chocolate flavor. Use pure vanilla extract for the best taste.
Almond flour is key to the fudgy texture of these almond flour brownies. It adds moisture and tenderness. Do not substitute with coconut flour or standard gluten-free all-purpose blends without significant recipe adjustments, as they absorb liquids very differently.
Tapioca starch is essential for the chewiness and that desirable crackly top brownies feature. It also helps with the structure of these tapioca starch baking beauties. Arrowroot starch can be used as a direct substitute if needed.
Unsweetened cocoa powder is where the deep chocolate flavor comes from. I suggest using a high-quality natural cocoa powder for the best results, rather than Dutch-processed. For rich fudgy gluten-free brownies, the type of cocoa powder types really makes a difference.
Baking powder gives a little lift, preventing the brownies from being too dense. Salt balances the sweetness and enhances all the other flavors.
Chocolate chips are optional but highly recommended for an extra chocolate boost. Use your favorite type, whether semi-sweet, dark, or milk chocolate. For dairy-free gluten-free brownies, ensure your chocolate chips are dairy-free gluten-free certified.
How to Make The BEST Fudgy Gluten-Free Brownies
Making these gluten free brownies is a straightforward process that yields incredible results. Follow these steps carefully for success.
Prepare for Baking
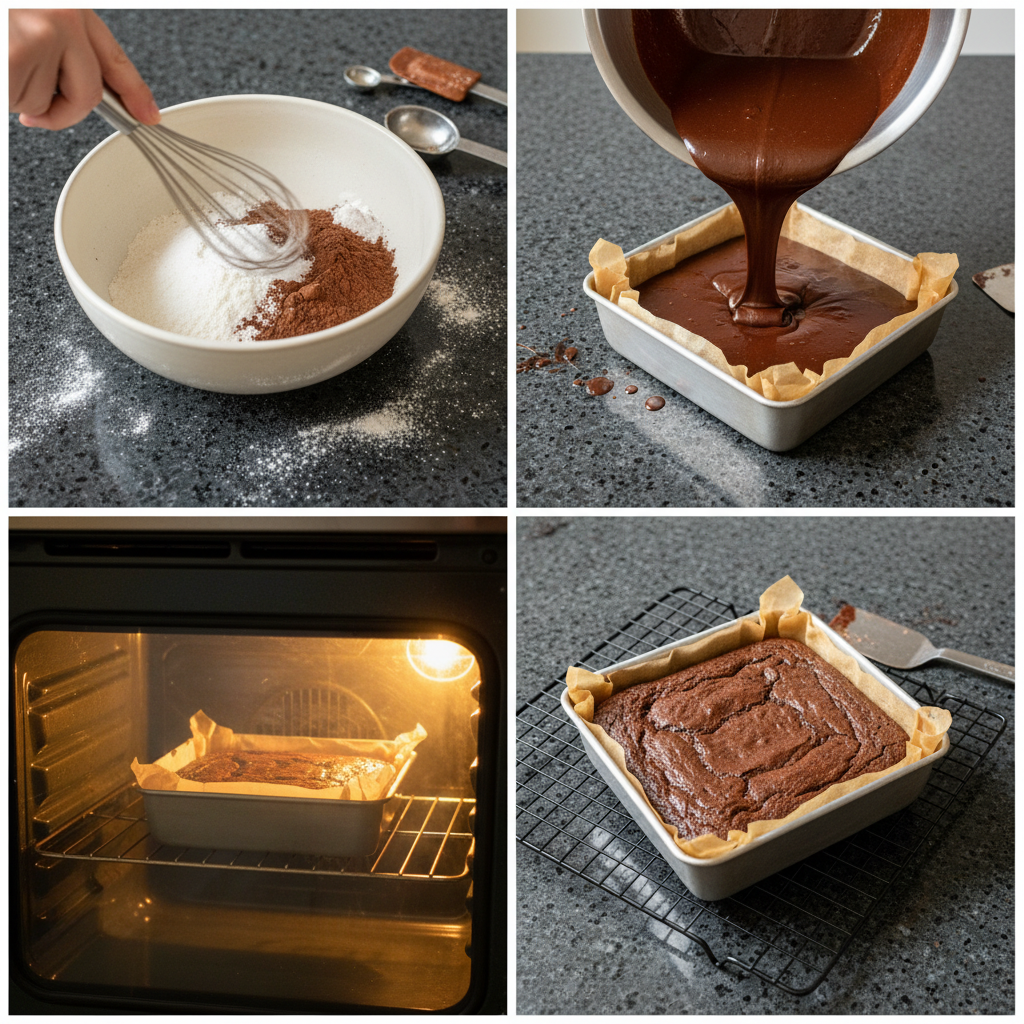
Preheat your oven to 350 degrees Fahrenheit, which is 175 degrees Celsius. Line a 9×13 inch baking pan with parchment paper, leaving an overhang on the sides. This will make it much easier to lift the brownies out of the pan once they are cooled. Lightly grease the parchment paper.
Combine Wet Ingredients
In a large mixing bowl, combine the melted butter and granulated sugar. Whisk these together until they are well combined and smooth. This step is important for dissolving some of the sugar. Add the large eggs one at a time, whisking well after each addition. Continue whisking until the mixture becomes lighter in color and slightly thickened. This aeration helps create a tender crumb. Stir in the vanilla extract until it is fully incorporated.
Mix Dry Ingredients
In a separate medium bowl, whisk together the almond flour, tapioca starch, sifted unsweetened cocoa powder, baking powder, and salt. Make sure there are no lumps, especially in the cocoa powder, to ensure a smooth batter.
Combine Wet and Dry
Gradually add the dry ingredients to the wet ingredients. Mix on low speed, or gently fold by hand, until just combined. The key to fudgy gluten-free brownies is not to overmix the batter. Overmixing can develop the starches too much, leading to a tougher, more cakey texture. Once you see no more streaks of dry flour, stop mixing.
Add Chocolate Chips
If you are using chocolate chips, gently fold them into the batter now. Distribute them evenly throughout the mixture for bites of melty chocolate in every piece.
Bake to Perfection
Pour the brownie batter into the prepared 9×13 inch baking pan. Spread it evenly with a spatula. Bake for 25-30 minutes. You want the edges to be set, but the center should still look slightly underbaked and jiggle a little when gently shaken. A toothpick inserted into the center should come out with moist crumbs, not wet batter, and certainly not completely clean. This baking time brownies guide is crucial for achieving that fudgy interior. Overbaking is a common mistake that leads to dry brownies.
Cool Completely
Once baked, remove the pan from the oven and let the brownies cool completely in the pan on a wire rack. This cooling period is vital. Warm brownies are still setting up and will be very delicate and prone to crumbling. For the cleanest slices and best texture, I recommend chilling the brownies in the refrigerator for at least an hour, or even overnight, before cutting.
Mastering Gluten-Free Brownie Texture & Dietary Adaptations
Achieving the ideal brownie texture can feel like a science, but with these gluten-free baking techniques, you will master it every time.
Achieving That Perfect Fudgy, Crackly Top
The secret to these amazing fudgy gluten-free brownies lies in our specific ingredient blend and careful technique. Almond flour is naturally higher in fat and protein and lower in carbohydrates compared to traditional wheat flour. This composition contributes significantly to the rich, moist, and dense fudgy interior. It helps to create a brownie that is tender and deeply satisfying.
Tapioca starch plays a crucial role in developing that sought-after chewiness and the signature crackly top brownies are famous for. When tapioca starch is baked at the right temperature, it forms a delicate, shiny crust on the surface of the brownie. This combination of ingredients ensures a luxurious texture that is often missing in other gluten-free chocolate desserts. Avoid overmixing the batter, as this can lead to too much air incorporated, resulting in a cakey rather than fudgy outcome. Precise baking time brownies ensure the center remains gooey while the edges set beautifully.
Adapting for Different Dietary Needs
This recipe inherently caters to gluten-free needs due to the use of almond and tapioca flours. Making these brownies dairy-free is also very simple. Substitute the unsalted butter with your favorite plant-based butter sticks or margarine. Look for brands that are specifically labeled for baking and measure cup for cup. Ensure your chocolate chips are dairy-free gluten-free certified. Many excellent brands are available in most grocery stores today. For those with nut allergies, adapting this specific recipe is more challenging since almond flour is a core component. A completely nut-free gluten-free brownie would require a different base flour blend altogether.
Pro Tips & Troubleshooting
Here are some of my best tips to ensure your gluten-free brownies turn out perfectly every time, along with common pitfalls to avoid.
Pro Tips for GF Brownie Perfection
Use high-quality cocoa powder for a truly deep, intense chocolate flavor. The better the cocoa, the richer your fudgy gluten-free brownies will be.
Do not skip the parchment paper. It is a game-changer for easy removal and clean-up.
Chill your brownies before cutting for incredibly clean, neat slices. This also enhances their fudgy texture.
Measure your ingredients precisely, especially the flours. Gluten-free baking is often more sensitive to exact ratios than traditional baking.
Do not be afraid to underbake them slightly. That slightly gooey center is the hallmark of truly fudgy brownies.
Allow the brownies to cool completely in the pan on a wire rack before attempting to cut them.
Common Mistakes to Avoid
Overbaking is the quickest way to end up with dry, cakey brownies. Keep a close eye on your baking time brownies and trust the moist crumb test.
Cutting warm brownies will result in a messy, crumbly experience. Patience is key for perfect squares.
Incorrect flour substitutions can drastically alter the texture. Stick to almond flour and tapioca starch as specified for this recipe’s success.
Overmixing the batter can lead to a tougher, less fudgy brownie. Mix until just combined.
Not lining your pan can make removal difficult and messy, potentially tearing your beautiful crackly top brownies.
Using low-quality ingredients, particularly cocoa and chocolate, will result in a less flavorful brownie. Invest in good quality for the best taste.
Serving & Storage
Once you have made these delicious gluten free brownies, you will want to enjoy them and store them properly to maintain their freshness.
Delicious Serving Ideas
These fudgy gluten-free brownies are incredible on their own, but a warm brownie with a scoop of vanilla bean ice cream is a classic for a reason. You can also dust them with a light layer of powdered sugar for an elegant presentation. Fresh berries like raspberries or strawberries add a lovely tart contrast. For an extra treat, add a dollop of dairy-free whipped cream or a drizzle of homemade caramel sauce. Explore different toppings to enhance your gluten-free chocolate experience.
Storage and Make-Ahead Tips
For short-term storage tips brownies, keep them in an airtight container at room temperature for up to 3-4 days. For longer freshness, store them in the refrigerator for up to a week. They are still delicious cold, but you can warm them briefly in the microwave for a just-baked feel.
These brownies freeze beautifully. Once completely cooled, cut them into individual squares. Wrap each square tightly in plastic wrap, then place them in a freezer-safe bag or container. They can be frozen for up to 2-3 months. Thaw them at room temperature or warm gently in the microwave when ready to enjoy.
Adaptations for Special Occasions
To dress up your brownies for holidays, consider adding festive sprinkles to the top before baking. For a winter treat, a touch of peppermint extract can be added to the batter, or crushed candy canes sprinkled on top. A swirl of peanut butter or a cream cheese frosting layer turns them into an extra decadent dessert for family gatherings.
Conclusion
I hope you are as excited as I am about this recipe. You now have the secret to making the best fudgy gluten-free brownies with that irresistible crackly top. My unique blend of almond flour and tapioca starch truly sets this recipe apart, delivering on both texture and rich chocolate flavor. This recipe proves that you do not have to compromise on taste or quality when baking gluten-free. I encourage you to try this foolproof method and discover how truly delicious gluten-free brownies can be. Experiment with the serving ideas or special occasion adaptations, and please, let me know how they turn out!
FAQ (Frequently Asked Questions)
What makes these brownies fudgy and not cakey?
The combination of melted butter, a high ratio of sugar, and specific gluten-free flours like almond flour and tapioca starch contribute to their fudgy texture. Minimal flour and careful mixing also prevent the development of a cake-like crumb.
Can I substitute the almond flour or tapioca starch?
Substituting the almond flour or tapioca starch in this recipe is not recommended without significant adjustments. These flours are crucial for achieving the unique fudgy and crackly texture described. Other gluten-free flours absorb liquid differently and will alter the outcome.
How do I store leftover gluten-free brownies?
Store leftover gluten-free brownies in an airtight container at room temperature for up to 3-4 days, or in the refrigerator for up to a week. They can also be frozen for 2-3 months after being individually wrapped.
Are these brownies suitable for a dairy-free diet?
Yes, these brownies can easily be made dairy-free. Simply substitute the unsalted butter with a plant-based butter alternative and use dairy-free chocolate chips. Ensure all other ingredients are dairy-free as well.
What’s the best way to know when gluten-free brownies are done?
The best way to know if your gluten-free brownies are done is to look for set edges and a slightly jiggly center. A toothpick inserted into the center should come out with moist crumbs attached, not wet batter, but also not completely clean. This indicates a fudgy interior without being raw.
Why are my gluten-free brownies dry?
Dry gluten-free brownies are most commonly caused by overbaking. Keep a close eye on the baking time and aim for a slightly underbaked center. Incorrect flour substitutions can also lead to dryness.
How do I get a crackly top on my brownies?
The crackly top on these brownies is primarily achieved by the combination of sugar, eggs, and the tapioca starch in the recipe, baked at the correct temperature. Whisking the butter and sugar thoroughly, and then incorporating the eggs well, helps create this desirable crust.

The BEST Fudgy Gluten-Free Brownies: Crackly Top & Delicious
Ingredients
Equipment
Method
- Preheat your oven to 350 degrees Fahrenheit (175 degrees Celsius).
- Line a 9x13 inch baking pan with parchment paper, leaving an overhang on the sides for easy lifting. Lightly grease the parchment paper.
- In a large mixing bowl, combine the melted butter and granulated sugar. Whisk them together until well combined and smooth to help dissolve some of the sugar.
- Add the large eggs one at a time, whisking well after each addition. Continue whisking until the mixture becomes lighter in color and slightly thickened.
- Stir in the vanilla extract until it is fully incorporated.
- In a separate medium bowl, whisk together the almond flour, tapioca starch, sifted unsweetened cocoa powder, baking powder, and salt. Ensure there are no lumps.
- Gradually add the dry ingredients to the wet ingredients. Mix on low speed, or gently fold by hand, until just combined. Stop mixing once no more streaks of dry flour are visible to prevent overmixing.
- If using chocolate chips, gently fold them into the batter now, distributing them evenly.
- Pour the brownie batter into the prepared baking pan and spread it evenly with a spatula.
- Bake for 25-30 minutes. The edges should be set, but the center should still look slightly underbaked and jiggle a little. A toothpick inserted into the center should come out with moist crumbs, not wet batter.
- Remove the pan from the oven and let the brownies cool completely in the pan on a wire rack.
- For the cleanest slices and best texture, chill the brownies in the refrigerator for at least an hour, or even overnight, before cutting.
Notes

Emily Thompson is a home cook and food enthusiast who believes that great meals bring families together. She loves exploring creative twists on classic American comfort food, always testing new ideas in her kitchen. Emily is passionate about sharing simple, practical recipes and time-saving tips to help busy people enjoy cooking at home. Her approachable style makes every dish accessible, delicious, and perfect for those seeking inspiration for everyday meals and special occasions. Find Emily’s latest creations and kitchen wisdom on yumeasymeals.com.