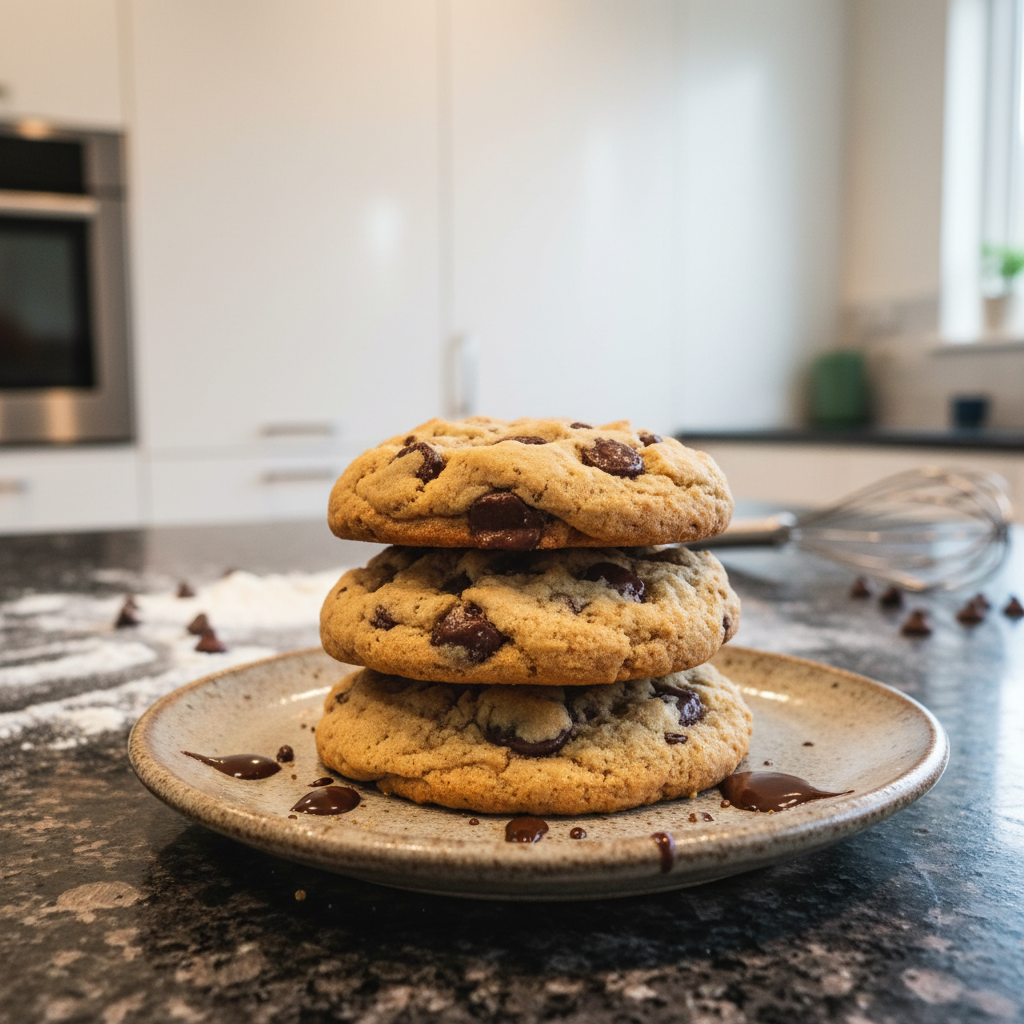
Oh, the craving for a perfectly soft and chewy chocolate chip cookie is real, isn’t it? That moment when you just need that warm, gooey bite. I know that feeling all too well. Today, I am thrilled to share with you my ultimate recipe for Soft and Chewy Chocolate Chip Cookies that will truly redefine your cookie experience. The secret ingredient? A special technique involving brown butter solids. This technique isn’t just for cookies; it can elevate many baked goods, like our Starbucks banana bread copycat recipe. Get ready to discover how to achieve the perfect texture and flavor, along with all my insider tips for success.
Why You’ll Love This Recipe
This recipe truly stands out because of its unique twist: the inclusion of two tablespoons of browned butter solids. This isn’t just a fancy trick. It is a scientific marvel that transforms your Soft and Chewy Chocolate Chip Cookies. The Maillard reaction occurs when butter is browned. This reaction caramelizes the milk solids and deepens the flavor profile significantly. By incorporating only the solids, we infuse a concentrated nutty, rich taste directly into the dough. Furthermore, the fat in the browned butter solids helps to inhibit gluten development. This results in an even chewier, more tender cookie texture that simply melts in your mouth.
Superior Flavor: The brown butter solids deliver an intensely rich, nutty, and caramelized taste that traditional chocolate chip cookies can only dream of.
Perfect Texture: Expect a cookie that is wonderfully soft, perfectly chewy, and has just the right amount of crispness at the edges.
Easy to Make: Despite the gourmet twist, this recipe is surprisingly straightforward and accessible for any home baker.
Family-Friendly: These chocolate chip cookies are a classic American dessert that everyone, from kids to adults, will adore.
Ingredients Needed

- 2 and 1/4 cups (281g) all-purpose flour (spooned & leveled)
- 1 teaspoon baking soda
- 1 and 1/2 teaspoons cornstarch*
- 1/2 teaspoon salt
- 3/4 cup (170g/12 Tbsp) unsalted butter, melted & cooled for 5 minutes
- 3/4 cup (150g) packed light or dark brown sugar
- 1/2 cup (100g) granulated sugar
- 1 large egg + 1 egg yolk, at room temperature
- 2 teaspoons pure vanilla extract
- 1 and 1/4 cups (225g) semi-sweet chocolate chips or chocolate chunks
Ingredient Notes & Substitutions
All-Purpose Flour. It is crucial to spoon and level your all-purpose flour for accurate measurement. Too much flour can lead to dry cookies. For an even chewier cookie, you can substitute a small amount of bread flour, though be aware it might result in a slightly tougher texture.
Butter. I always recommend using unsalted butter so you can control the salt content in your recipe. Using melted and cooled butter, rather than softened, is key to achieving that perfectly chewy texture.
Sugar. The combination of brown sugar and granulated sugar is essential here. Brown sugar, with its molasses content, adds moisture and chewiness, while granulated sugar contributes to crisp edges and overall sweetness.
Chocolate Chips. For the best flavor, I suggest using high-quality semi-sweet chocolate chips or chocolate chunks. You can certainly experiment with other types of chocolate, such as dark chocolate, milk chocolate, or even white chocolate chips, to customize your cookies, or try our recipe for Creme Egg Stuffed Chocolate Chip Cookies.
Gluten-Free. For a gluten-free variation of these chocolate chip cookies, I have found success using Pamela’s Baking & Pancake mix. If you choose this option, omit the baking soda as it is already included in the mix. You might also enjoy our recipe for the best fudgy gluten-free brownies.
Dairy-Free. You can use a reliable plant-based butter alternative to make these cookies dairy-free, but be sure it is one that browns well.

How to Make Soft and Chewy Chocolate Chip Cookies
This recipe for Soft and Chewy Chocolate Chip Cookies is a favorite in my kitchen. Follow these steps carefully for the best results.
Step 1: Combine Dry Ingredients
In a large bowl, whisk together the all-purpose flour, baking soda, cornstarch, and salt. Whisking ensures these dry ingredients are evenly distributed, which is important for uniform baking and texture in your dessert. Set this bowl aside.
Step 2: Combine Wet Ingredients
In a medium bowl, whisk the melted unsalted butter, brown sugar, and granulated sugar together until all lumps are gone and the mixture is smooth and glossy. Next, whisk in the large egg and egg yolk until they are fully combined. Finally, whisk in the pure vanilla extract. At this point, the mixture will appear thin, which is perfectly normal.
Step 3: Combine Wet and Dry Ingredients
Pour the wet mixture into the bowl of dry ingredients. Using a large spoon or spatula, mix them together gently until just combined. Over-mixing can over-develop the gluten in the flour, leading to tougher cookies. The dough will be noticeably soft, thick, and shiny. Fold in the semi-sweet chocolate chips. Because of the melted butter, the chocolate chips may not stick perfectly to the dough, but do your best to integrate them thoroughly.
Step 4: Chill the Dough
Cover the cookie dough tightly with plastic wrap and refrigerate it for at least 2 hours. For optimal texture and to prevent overspreading during baking, I highly recommend chilling the dough overnight. This chilling process allows the flavors to meld and the butter to solidify, leading to a much better cookie structure.
Step 5: Portion and Shape the Dough
Preheat your oven to 325°F (163°C). Line large baking sheets with parchment paper or silicone baking mats. If your dough has chilled for longer than 2 hours and is very firm, let it sit at room temperature for about 15 minutes to soften slightly. Using a cookie scoop or a Tablespoon measuring spoon, portion the chilled cookie dough. For extra-large cookies, use about 3 scant Tablespoons (roughly 2 ounces, or 60g). For medium-large cookies, use about 2 heaping Tablespoons (about 1.75 ounces, or 50g). Roll each portion into a ball. Then, use your fingers to shape the cookie dough so it is taller rather than wide, almost like a cylinder. This shaping technique is a simple trick that helps the cookies bake up thicker and chewier. Repeat with the remaining dough, arranging the cookies about 3 inches apart on the prepared baking sheets.
Step 6: Bake the Cookies
Bake the cookies for 13–14 minutes. The edges should be very lightly browned, but the centers will still look quite soft. Do not worry; the cookies will continue to set and firm up as they cool. The aroma of warm chocolate and browned butter will fill your kitchen.
Step 7: Cool and Enjoy
Allow the baked cookies to cool on the baking sheet for 10 minutes before carefully transferring them to a cooling rack to cool completely. This crucial step helps them finish setting without breaking. While the cookies are still warm, I sometimes like to press a few extra chocolate chips into the tops for an enhanced visual appeal. This step is entirely optional and just for looks!
Store your Soft and Chewy Chocolate Chip Cookies tightly covered at room temperature for up to 1 week.
The Secret to Brown Butter Solids
The magic behind my Soft and Chewy Chocolate Chip Cookies lies in a technique I’ve perfected: browning butter to extract its flavorful solids. The process is simple yet transformative. Start by melting unsalted butter in a light-colored saucepan over medium heat. Watch closely as the butter melts, foams, and then begins to bubble. Soon, tiny brown specks will appear at the bottom of the pan, and a rich, nutty aroma will fill your kitchen. This is the Maillard reaction in full swing, caramelizing the milk proteins and sugars in the butter.
The visual cue for doneness is when the butter solids turn a deep golden brown, and the scent is distinctly nutty, almost like toasted hazelnuts. Be careful not to burn it. Immediately remove the pan from the heat. To separate the brown butter solids from the browned butter liquid, carefully pour the mixture through a fine-mesh sieve lined with cheesecloth into a heatproof bowl. The solids will be caught in the sieve. These precious solids are what we will be incorporating into our cookie dough, delivering an unparalleled depth of caramelized flavor. The browned butter liquid can be saved for other uses, like drizzling over pancakes, vegetables, or even pasta. This concentrated flavor from the solids is what elevates these cookies from great to truly exceptional.
Pro Tips & Troubleshooting
Pro Tips
Always use room-temperature eggs for better emulsification and a smoother dough texture.
Measure your all-purpose flour accurately using the spoon and level method to avoid dry, crumbly dough.
Chill the dough for at least 2 hours, or preferably overnight, for the best soft and chewy texture and to prevent spreading.
Roll the cookie dough balls into extra tall columns before baking to ensure your cookies bake up thick and chewy.
If your dough is very hard after chilling, let it sit at room temperature for about 15 minutes to make it more manageable.
Adding a few extra chocolate chips to the tops of the cookies while they are warm is optional and only for looks, but it does make them picture-perfect!
Putting some chocolate chips in the dry ingredients before mixing can help prevent them from sinking or falling out when you add them into the wet ingredients.
Common Mistakes to Avoid
Not chilling the dough long enough is a common mistake that will cause your Soft and Chewy Chocolate Chip Cookies to spread too thin.
Adding too much all-purpose flour can make the dough crumbly and dry, resulting in tough cookies.
Overbaking the cookies will make them hard and crispy instead of soft and chewy. Keep an eye on those edges.
Using old baking soda can result in flat cookies that don’t rise properly. Check your expiration dates.
Using very warm melted butter directly in the dough can start melting the sugar prematurely, affecting the final texture. Make sure it is cooled.
Serving & Storage
Serving Ideas
Serve your warm Soft and Chewy Chocolate Chip Cookies with a cold glass of milk for a classic treat.
Enjoy them as a standalone dessert, perfect for satisfying any sweet craving.
Pair these delicious cookies with a scoop of your favorite vanilla bean ice cream for a truly decadent experience.
They also make a wonderful accompaniment to your morning coffee or afternoon tea.
Storage and Make-Ahead
Baked cookies can be stored in an airtight container at room temperature for up to 1 week, maintaining their soft and chewy texture.
For longer storage, freeze baked cookies in a freezer-safe bag or container for up to 2 months. Thaw them at room temperature before serving.
You can also freeze unbaked cookie dough balls for up to 3 months. Place scooped dough balls on a baking sheet and freeze until solid, then transfer to a freezer bag. Thaw overnight in the refrigerator before baking as directed.
Conclusion
I am so excited for you to try this recipe for the Soft and Chewy Chocolate Chip Cookies. With the unique twist of brown butter solids, you are guaranteed to achieve cookies that are incredibly soft, delightfully chewy, and bursting with a deep, caramelized flavor. Don’t be intimidated by the browning butter step. It is a simple technique that yields profound results, making this dessert truly special. Even beginner bakers will find this recipe achievable with my clear instructions and helpful tips. Print this recipe and share it with your friends! For more delicious cookie recipes, check out our other posts.
FAQ
What makes these cookies chewy and soft?
The combination of melted butter, brown sugar, cornstarch, and chilling the dough contributes significantly to the soft and chewy texture. Additionally, the brown butter solids inhibit gluten development, resulting in a more tender crumb.
Can I chill the dough in the freezer instead of the refrigerator to speed up the chilling process?
Yes, you can chill the dough in the freezer for about 30-60 minutes to speed things up. However, make sure to monitor it closely to prevent it from freezing solid.
Can I add nuts or different add-ins?
Absolutely! Feel free to add chopped nuts like pecans or walnuts, M&Ms, white chocolate chips, dried cranberries, or chopped peanut butter cups to customize your cookies.
How long can I store the dough and baked cookies?
You can store the dough in the refrigerator for up to 3 days or in the freezer for up to 3 months. Baked cookies can be stored in an airtight container at room temperature for up to 1 week.
What is the effect of chilling the dough?
Chilling the dough is crucial because it prevents the cookies from spreading too thin, allows the flavors to meld together more deeply, and results in a chewier, more desirable texture.
What are the best tools for baking chocolate chip cookies?
A cookie scoop ensures uniform size, parchment paper or silicone baking mats prevent sticking and make cleanup easy, and a cooling rack allows the cookies to cool evenly. These tools are invaluable for perfect Soft and Chewy Chocolate Chip Cookies.
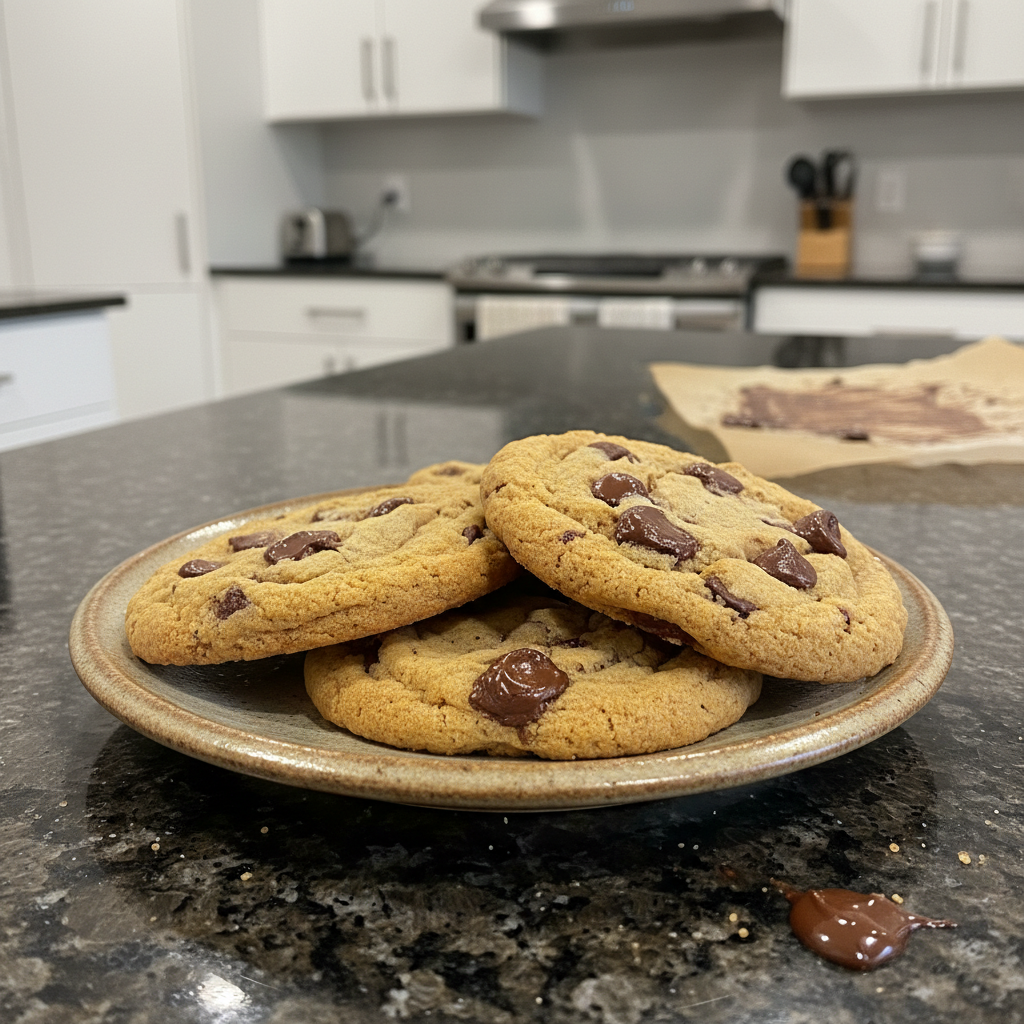
Softest Chewy Chocolate Chip Cookies: Brown Butter Secret!
Ingredients
Equipment
Method
- In a large bowl, whisk together the all-purpose flour, baking soda, cornstarch, and salt. Set this bowl aside.
- In a medium bowl, whisk the melted unsalted butter, brown sugar, and granulated sugar together until all lumps are gone and the mixture is smooth and glossy.
- Next, whisk in the large egg and egg yolk until they are fully combined. Finally, whisk in the pure vanilla extract.
- Pour the wet mixture into the bowl of dry ingredients. Using a large spoon or spatula, mix them together gently until just combined. The dough will be noticeably soft, thick, and shiny.
- Fold in the semi-sweet chocolate chips. Integrate them thoroughly.
- Cover the cookie dough tightly with plastic wrap and refrigerate it for at least 2 hours. For optimal texture and to prevent overspreading, chill the dough overnight.
- Preheat your oven to 325°F (163°C). Line large baking sheets with parchment paper or silicone baking mats.
- If your dough has chilled for longer than 2 hours and is very firm, let it sit at room temperature for about 15 minutes to soften slightly.
- Using a cookie scoop or a Tablespoon measuring spoon, portion the chilled cookie dough. For extra-large cookies, use about 3 scant Tablespoons (roughly 2 ounces, or 60g). For medium-large cookies, use about 2 heaping Tablespoons (about 1.75 ounces, or 50g).
- Roll each portion into a ball. Then, use your fingers to shape the cookie dough so it is taller rather than wide, almost like a cylinder. Repeat with the remaining dough, arranging the cookies about 3 inches apart on the prepared baking sheets.
- Bake the cookies for 13–14 minutes. The edges should be very lightly browned, but the centers will still look quite soft.
- Allow the baked cookies to cool on the baking sheet for 10 minutes before carefully transferring them to a cooling rack to cool completely.
- While the cookies are still warm, you may press a few extra chocolate chips into the tops for an enhanced visual appeal. This step is entirely optional.
Notes

Taya Bennett is the founder of YumEasyMeals, a platform dedicated to easy, delicious, and quick-to-prepare recipes for busy families. Passionate about everyday cooking, she simplifies meals with practical, accessible, and always delicious ideas.
Discover her creations at: yumeasymeals.com