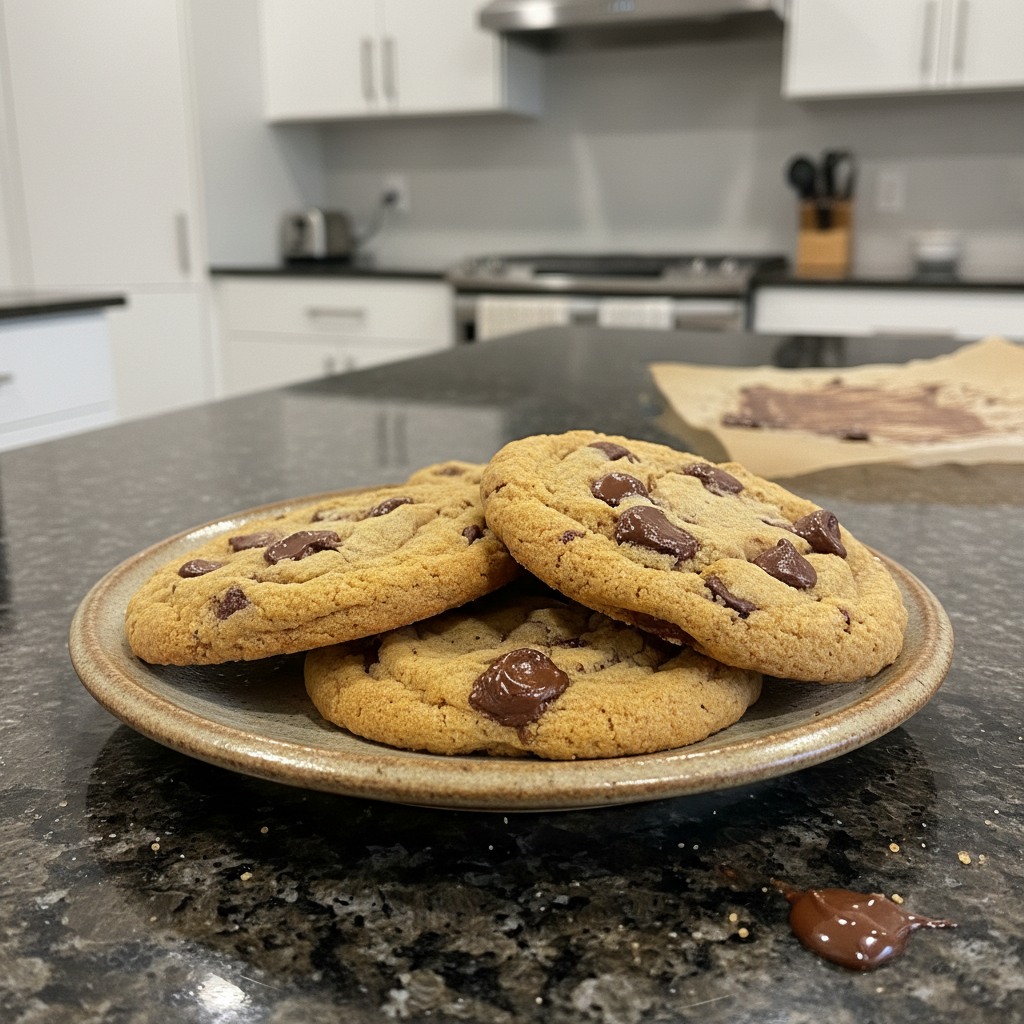
There’s something incredibly satisfying about whipping up your own healthy snacks right in your kitchen. As a chef and busy parent, I’m always looking for easy, wholesome recipes that don’t compromise on flavor or convenience. These Homemade Granola Bars are an absolute revelation, a perfectly chewy, no-bake solution that comes together in minutes. Get ready to discover your new favorite grab-and-go treat, complete with a unique flavor twist that truly elevates them beyond the ordinary.
Why You’ll Love These No-Bake Homemade Granola Bars
I designed this recipe with simplicity and incredible taste in mind, and the secret lies in a small but mighty addition that transforms these humble bars into something truly special.
* The Unique Sea Salt Twist: My favorite touch to these no-bake wonders is a generous sprinkle of flaky sea salt on top of the bars just before they chill. It’s a simple step, but it makes all the difference, adding a sophisticated, gourmet edge to every bite.
* The Scientific Logic Behind the Twist: That delicate dusting of sea salt isn’t just for show. It strategically balances the sweetness from the honey and mini chocolate chips , preventing the bars from being overly cloying. This enhances all the other flavors, from the nutty peanut butter to the wholesome quick cooking oats, creating a complex, satisfying taste that will keep you coming back for more.
* No-Bake & Quick: Life is busy, and sometimes the oven is just one more thing to manage. These bars come together in a flash, requiring zero bake time, making them perfect for your hectic schedule.
* Healthy & Customizable Snack: Say goodbye to questionable store-bought ingredients! These healthy snack bars are easily adaptable for various dietary needs and are packed with wholesome goodness.
* Family-Friendly & Delicious: They’re a guaranteed hit with both kids and adults, satisfying sweet cravings in the most wholesome way.
* Great for Meal Prep: Make a batch on Sunday, and you’ll have delicious, individually portioned snacks ready for the entire week.
Ingredients Needed
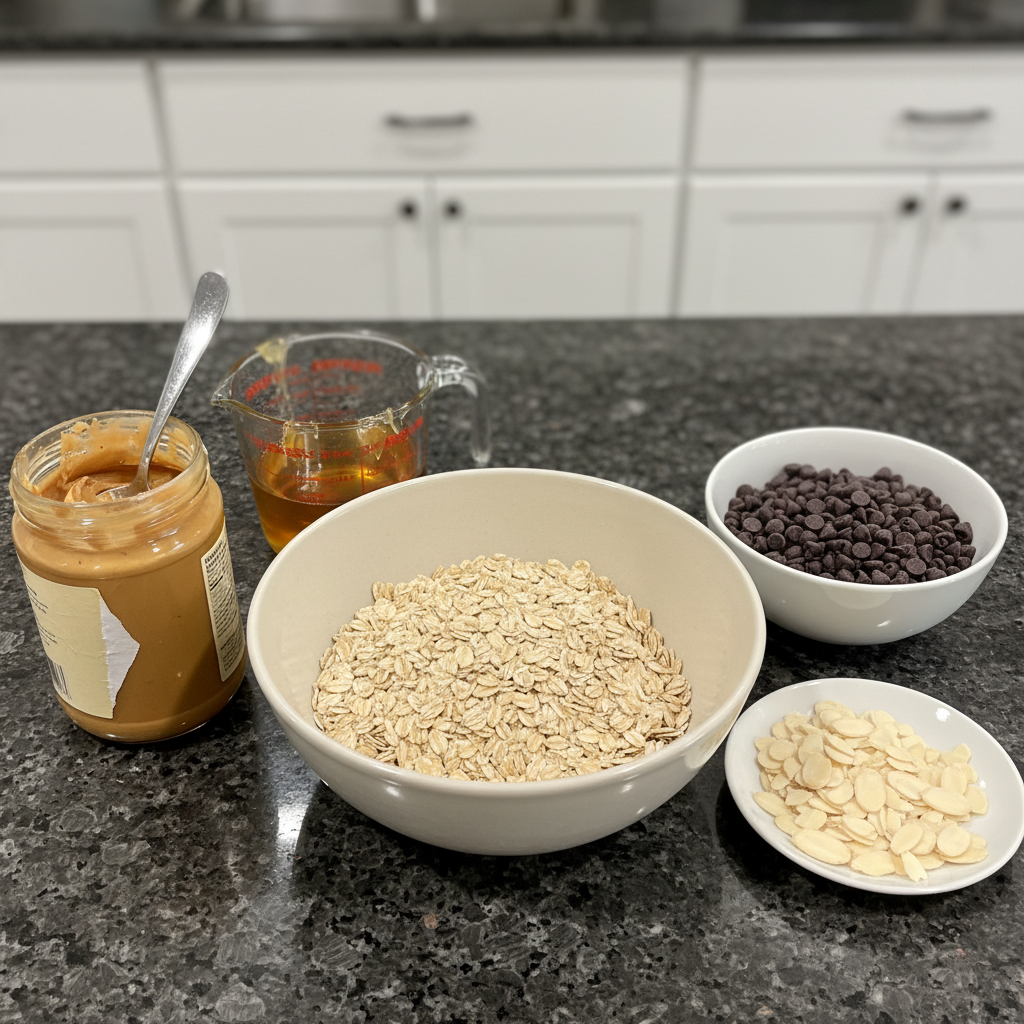
Making these delectable Homemade Granola Bars requires just a handful of simple ingredients you likely already have on hand.
- 2 cups quick cooking oats
- 1 cup creamy peanut butter or almond butter
- 1/4 cup honey (, plus more if needed)
- 1/2 cup mini chocolate chips
- 1/2 cup sliced almonds (, optional)
Ingredient Notes & Substitutions
Let’s dive a little deeper into these key ingredients and how you can adapt them to your pantry or dietary preferences.
* Oats: For this specific no-bake recipe, quick cooking oats are my top recommendation. Their smaller size helps them bind beautifully with the nut butter and honey, creating that perfectly soft and chewy texture. While you *can* use rolled oats (old-fashioned), they will result in a chewier, more rustic bar and might require a slight increase in binder to hold together as firmly.
* Nut Butter: The success of these bars hinges on a good quality, creamy peanut butter or almond butter . Look for one that’s smooth and easy to stir, not dry or firm, as it’s crucial for binding all the ingredients together. For a nut-free option, sunflower seed butter works wonderfully, offering a similar creamy texture and nutty flavor.
* Sweetener: Honey acts as both our primary sweetener and a vital binder, giving these bars their signature chew. If you’re aiming for a vegan version, agave nectar is an excellent substitute, though you might need to add an extra tablespoon to achieve the ideal binding consistency. Maple syrup can also work, but its distinct flavor might alter the taste profile slightly.
* Chocolate Chips: I love using mini chocolate chips because they distribute evenly throughout the bars, ensuring a bit of chocolate in every bite. If you’re making these vegan , be sure to choose dairy free chocolate chip varieties.
* Optional Add-ins: Sliced almonds add a lovely crunch and extra flavor. Feel free to get creative with other nuts and seeds from your pantry! Chia seeds, flaxseeds, pumpkin seeds, or sunflower seeds are all fantastic choices that boost fiber and healthy fats.
* Sea Salt: Remember, the flaky sea salt is for sprinkling on top, not mixing into the batter. This strategic placement is key to achieving that unique flavor twist we discussed!
How to Make No-Bake Granola Bars
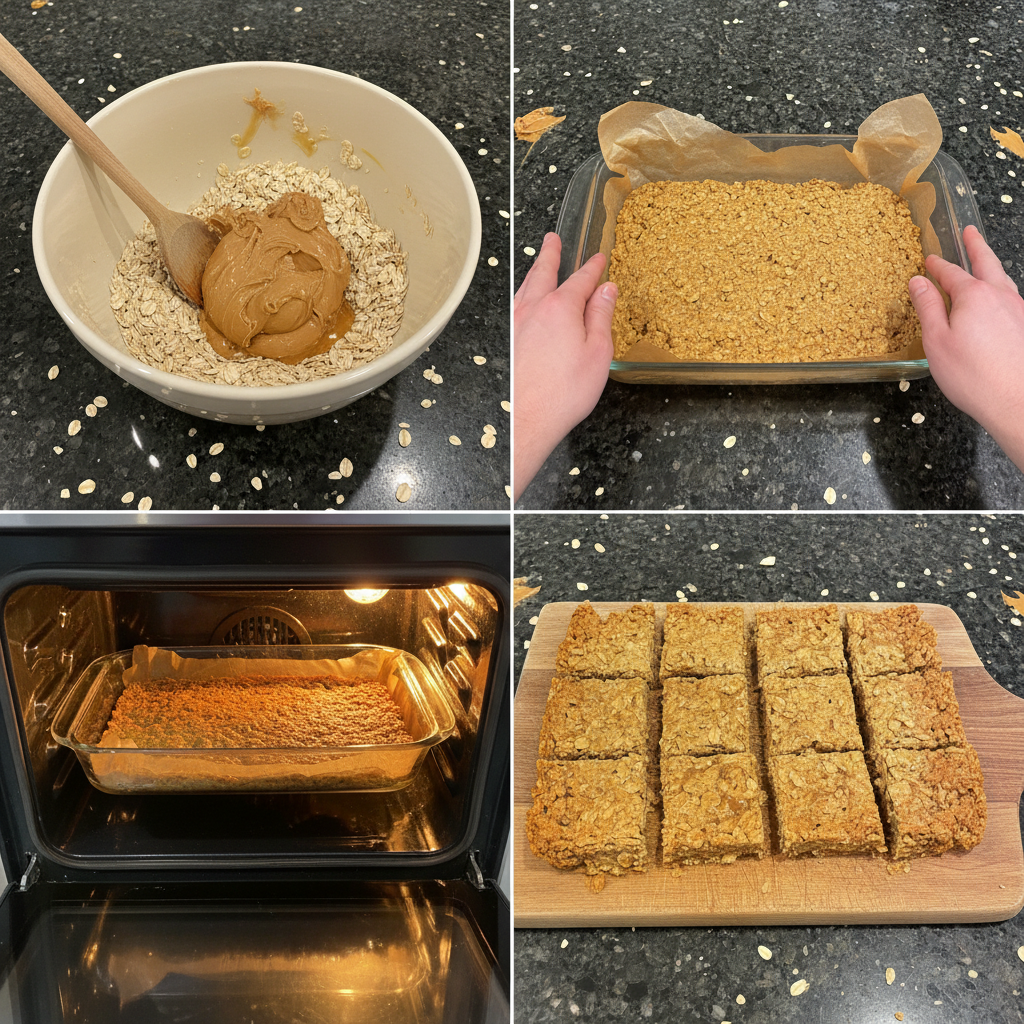
This is where the magic happens! Follow these simple steps to create perfectly chewy Homemade Granola Bars with that irresistible sea salt finish.
Step 1: Combine Ingredients
In a medium bowl, stir together 2 cups quick cooking oats , 1 cup creamy peanut butter (or almond butter), 1/4 cup honey , 1/2 cup mini chocolate chips , and 1/2 cup sliced almonds , if using, until well combined. You’ll see the mixture transform into a thick, slightly sticky dough. Ensure everything is thoroughly mixed so that all the dry ingredients are coated. If the mixture feels too dry or crumbly to hold its shape, add a little more honey, one tablespoon at a time, until it comes together. A word of caution from my kitchen: don’t overmeasure your oats and mix-ins; maintaining the correct ratio of wet to dry ingredients is essential for the bars to set properly.
Step 2: Press into Dish & Add the Unique Twist
Line an 8×8-inch baking dish with parchment paper , making sure to leave extra paper over the edges. This creates handy “handles” for easy removal. For an even smoother release later, I recommend spraying the parchment paper lightly with cooking spray. Now, press the oat mixture evenly and very firmly into the dish. Use the back of a spoon or your hands (lightly moistened or sprayed with cooking spray) to really compact it. This firm pressing is critical for dense, well-bound bars. Now for our secret weapon: before chilling, sprinkle a small amount of flaky sea salt evenly over the entire surface. This isn’t just decoration; it’s going to beautifully enhance and balance all the sweet flavors!
Step 3: Chill, Cut, and Store
Transfer your baking dish to the freezer and chill for 45 minutes to 1 hour, or until the mixture is completely firm. Seriously, don’t skip this step! It’s what allows the bars to set and hold their shape. Once firm, use the parchment paper overhang to lift the entire slab of granola from the dish and transfer it to a cutting board. Cut the slab in half, and then cut each half into 6 rectangles, yielding 12 perfectly sized bars. For ultimate convenience and freshness, wrap each bar individually with parchment paper or plastic wrap.
Choosing the Right Oats & Dietary Adaptations
Making these bars for everyone means understanding your ingredients and knowing how to adjust for different needs.
Choosing the Right Oats for Perfect Granola Bars
The type of oats you choose can significantly impact the final texture of your Homemade Granola Bars .
* Quick Cooking Oats (Recommended): For this no bake recipe, quick cooking oats are truly ideal. Their smaller, thinner flakes absorb liquids more readily and bind together beautifully, resulting in a soft, wonderfully chewy bar that holds its shape.
* Rolled Oats (Old-Fashioned): If you prefer a chewier, more rustic texture, rolled oats can be used. However, their larger size means they might not bind as tightly. You might need to add an extra tablespoon of honey or nut butter to ensure they hold together. While not strictly necessary for this recipe, some enjoy pre-toasting rolled oats for an enhanced nutty flavor before mixing them in.
* Gluten-Free Oats: For those with celiac disease or gluten sensitivity, simply use certified gluten-free oats. The rest of the ingredients in this recipe are naturally gluten-free!
Dietary Adaptations: Making Granola Bars for Everyone
One of the best things about homemade recipes is the ability to customize them for various dietary needs and allergies.
* Vegan Version: To make these bars vegan, simply swap the honey for an equal amount of agave nectar or maple syrup. Ensure your mini chocolate chips are certified dairy free chocolate chip varieties.
* Gluten-Free Version: As mentioned above, the easiest way to make these gluten-free is to use certified gluten-free oats . All other ingredients listed are typically gluten-free, but always double-check labels to be safe.
* Nut-Free Version: For those with nut allergies, substitute the peanut butter or almond butter with sunflower seed butter . Be sure to also omit the sliced almonds and check all other ingredient labels (oats, chocolate chips) for potential cross-contamination if severe allergies are a concern.
* Adding Protein Powder: If you want to boost the protein content, you can certainly add protein powder. However, protein powder can absorb moisture, potentially making the bars drier or more crumbly. If you add it, I recommend also adding an extra tablespoon or two of honey or nut butter to maintain the desired binding and chewiness.
Pro Tips & Troubleshooting
Even the simplest recipes benefit from a few expert insights and knowing how to navigate common hiccups.
Pro Tips for Perfect Granola Bars
Follow these tips from my kitchen to ensure your Homemade Granola Bars turn out perfect every time.
* Creamy Nut Butter is Key: Make sure the nut butter you’re using has a smooth and creamy consistency, not dry and firm. This will help the mixture bind together beautifully and prevent crumbly bars.
* Don’t Skimp on Chilling: Do not skip this step! These no bake bars need to chill in the freezer for about an hour so that the mixture has time to set and firm up. This is essential for easy cutting and preventing them from falling apart.
* Grease Your Parchment: For easier release of the entire slab, lightly spray the parchment paper with cooking spray before pressing in the mixture.
* Press Firmly: When pressing the mixture into the dish, do so very firmly and evenly. This ensures dense, well-bound bars that hold their shape.
* The Sea Salt Finish: Remember to sprinkle the flaky sea salt on top *before* chilling. This allows the salt to adhere and work its magic on the flavor profile as the bars set.
Common Mistakes to Avoid
Here’s a quick guide to common pitfalls and how to steer clear of them for perfectly chewy granola bars.
* Over-Measuring Add-ins: Don’t overmeasure your ingredients, including the oats and add-ins. One cup of mix-ins (like chocolate chips and almonds combined) is recommended so you don’t throw off the crucial ratio of liquid to dry ingredients. Too many add-ins can lead to crumbly bars.
* Insufficient Binder: If your mixture feels too dry or crumbly before pressing, it likely needs a bit more binder. Add more honey or nut butter, one tablespoon at a time, until the mixture feels adequately sticky and cohesive. This is a common fix for bars being too soft or too crumbly.
* Not Chilling Long Enough: If you cut your bars too soon, they will be soft, sticky, and fall apart. Always allow the full 45-60 minutes in the freezer for optimal setting.
* Not Pressing Firmly Enough: A loose mixture will result in loose, crumbly bars that don’t hold together well. Really put some muscle into pressing them down!
* Bars Too Hard/Soft: The texture of your bars is a delicate balance. Too much binder (honey/nut butter) can make bars overly soft or sticky, while too little, or insufficient chilling, can make them crumbly. The type of oat also plays a role; quick cooking oats generally yield a softer chew, while rolled oats can create a firmer bar.
Serving & Storage
Once your Homemade Granola Bars are ready, here’s how to best enjoy and preserve them.
Serving Ideas
These versatile bars are perfect for so many occasions!
* Quick & Healthy Snack: Grab a bar for an effortless after-school snack, a mid-morning energy boost, or anytime you need a satisfying bite.
* On-the-Go Fuel: They’re ideal for packing in lunchboxes, taking on hikes, or as a convenient pre- or post-workout fuel.
* Garnish Suggestions: For an elevated touch, consider a light drizzle of melted chocolate, a sprinkle of extra mini chocolate chips , or an additional pinch of flaky sea salt just before serving.
Storage and Make-Ahead
Proper storage ensures your Homemade Granola Bars stay fresh and delicious.
* Refrigerator Storage: Store the individually wrapped bars in an airtight container in the refrigerator for up to 2 weeks. Chilling helps maintain their firmness and extends their freshness.
* Freezer Storage: For longer storage, freeze individually wrapped granola bars in an airtight container for up to 3 months. Individual wrapping prevents them from sticking together and makes grabbing a single bar super easy.
* Thawing/Eating from Frozen: You can enjoy these bars directly from the freezer for a firmer, almost candy-bar-like bite, or allow them to thaw at room temperature for a few minutes for a softer texture.
Conclusion
I hope you’re inspired to whip up a batch of these incredible No-Bake Homemade Granola Bars with Sea Salt! They are truly a testament to how easy, healthy, and utterly delicious homemade snacks can be. The customizability, coupled with that unexpected and delightful sea salt twist, makes them a standout in any kitchen. You have all the tools and tips you need to succeed, so go ahead and make these perfectly chewy, satisfying bars. Share them with your family, pack them for adventures, or simply savor one as a well-deserved treat. Enjoy, and happy snacking!
FAQ
How do I prevent the granola bars from being too crumbly?
To prevent crumbly granola bars, ensure you’re using a creamy, pliable nut butter, and don’t hesitate to add an extra tablespoon or two of honey if the mixture feels dry. Firmly press the mixture into the pan to compact it, and always allow adequate chilling time in the freezer for the bars to set properly.
What kind of oats work best for this recipe and why?
For this no-bake recipe, quick cooking oats are highly recommended. Their smaller size helps them bind effectively with the other ingredients, creating a perfectly soft and chewy texture. While rolled oats (old-fashioned) can be used, they will result in a chewier, more rustic bar and may require a bit more binder to hold their shape.
How long will these granola bars last, and what is the best way to store them?
These Homemade Granola Bars will last up to 2 weeks when stored in an airtight container in the refrigerator. For longer storage, wrap them individually and freeze them in an airtight container for up to 3 months.
What are some substitutions I can make for common allergies?
For a vegan version, substitute honey with agave nectar or maple syrup, and use dairy free chocolate chips . To make them gluten-free , simply opt for certified gluten-free oats . For a nut-free option, swap peanut butter or almond butter for sunflower seed butter and omit sliced almonds , checking all other labels for cross-contamination.
How do I make sure the granola bars are chewy, not hard?
To achieve a chewy texture, use quick cooking oats and ensure you have enough binder (nut butter and honey) in your mixture. Pressing the mixture firmly but not overly compacting it helps, and allowing the bars to chill for the recommended time (without over-chilling) is key to setting without becoming too hard.
Can I add protein powder and how does it affect the recipe?
Yes, you can add protein powder to boost the nutritional content. However, protein powder tends to absorb moisture, which can make the bars drier or more crumbly. If you add it, I recommend adding an extra tablespoon or two of honey or nut butter to compensate and maintain the desired binding and chewiness.
Do I need to boil the honey for these no-bake bars?
No, you do not need to boil the honey for these no bake bars. All the ingredients are simply stirred together in a bowl, pressed, and chilled, making it a very straightforward process.

Easy No-Bake Homemade Granola Bars with Sea Salt
Ingredients
Equipment
Method
- In a medium bowl, stir together 2 cups quick cooking oats, 1 cup creamy peanut butter (or almond butter), 1/4 cup honey, 1/2 cup mini chocolate chips, and 1/2 cup sliced almonds, if using, until well combined. The mixture should transform into a thick, slightly sticky dough. Ensure all dry ingredients are coated. If the mixture feels too dry or crumbly, add a little more honey, one tablespoon at a time, until it comes together. Do not overmeasure oats and mix-ins; maintaining the correct ratio of wet to dry ingredients is essential for the bars to set properly.
- Line an 8x8-inch baking dish with parchment paper, leaving extra paper over the edges for handles. Lightly spray the parchment paper with cooking spray for an even smoother release. Press the oat mixture evenly and very firmly into the dish, using the back of a spoon or your hands (lightly moistened or sprayed with cooking spray) to compact it. This firm pressing is critical for dense, well-bound bars. Before chilling, sprinkle a small amount of flaky sea salt evenly over the entire surface to enhance and balance the sweet flavors.
- Transfer your baking dish to the freezer and chill for 45 minutes to 1 hour, or until the mixture is completely firm. Once firm, use the parchment paper overhang to lift the entire slab of granola from the dish and transfer it to a cutting board. Cut the slab in half, then cut each half into 6 rectangles, yielding 12 perfectly sized bars. For ultimate convenience and freshness, wrap each bar individually with parchment paper or plastic wrap.
Notes

Taya Bennett is the founder of YumEasyMeals, a platform dedicated to easy, delicious, and quick-to-prepare recipes for busy families. Passionate about everyday cooking, she simplifies meals with practical, accessible, and always delicious ideas.
Discover her creations at: yumeasymeals.com