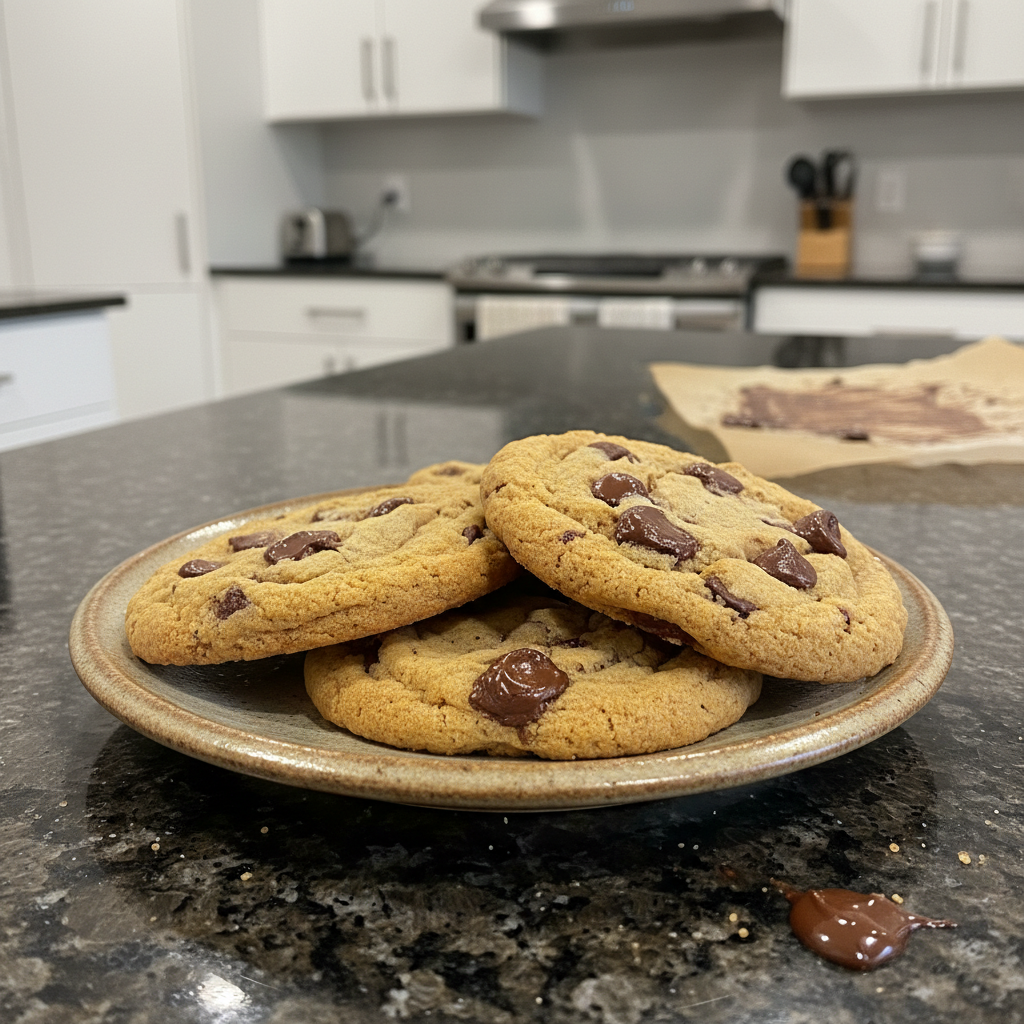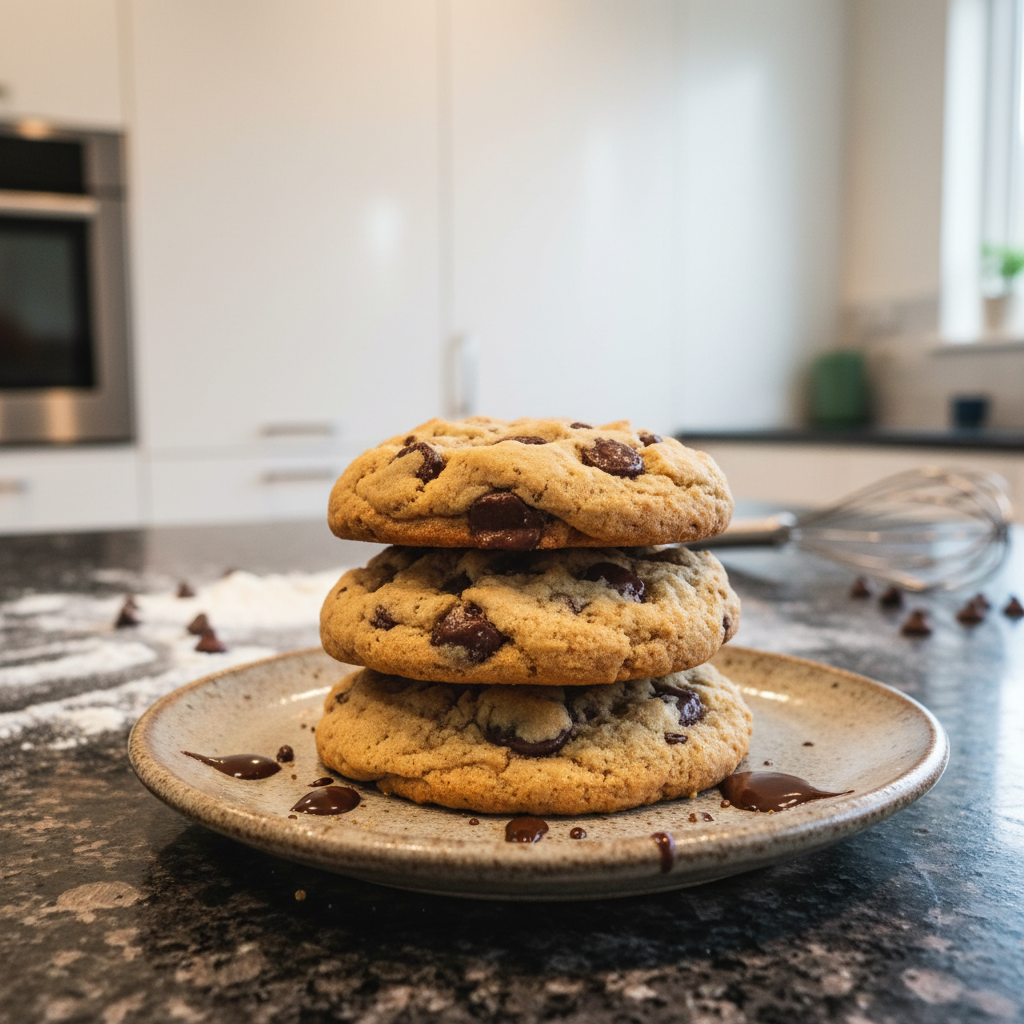
Every baker embarks on a quest for the perfect Classic Chocolate Chip Cookies. My journey has taken me through countless recipes, experimenting with different ratios, ingredients, and techniques. Today, I am thrilled to share the culmination of that search. This isn’t just another cookie recipe; it’s an elevated experience. We are taking the beloved Classic Chocolate Chip Cookies and transforming them into something truly extraordinary with one simple, yet powerful, technique. Prepare to bake the best chocolate chip cookies you have ever tasted, featuring a profound nutty and caramel depth of flavor that sets them miles apart. Learn more about the history of the chocolate chip cookie.
Why You’ll Love This Brown Butter Chocolate Chip Cookies Recipe
The secret ingredient that elevates these cookies is browned butter. This isn’t just melted butter; it’s butter that has undergone a magical transformation.
Browned butter creates a nutty, caramel-like flavor. This depth is something regular melted butter simply cannot match, taking your cookies beyond the ordinary.
This flavor transformation happens thanks to the Maillard reaction. This chemical process browns the milk solids in the butter, creating hundreds of new flavor compounds that are incredibly complex and delicious.
These Classic Chocolate Chip Cookies are guaranteed to impress your friends and family. The unique flavor profile will have everyone asking for your secret.
They are relatively easy to make with basic pantry ingredients. Don’t let the “browned butter” intimidate you; it’s a simple step with huge rewards.
These cookies are also fantastic for gifting or bringing to parties. They hold up well and always disappear quickly.
Ingredients Needed

- 1 cup salted butter (softened)
- 1 cup granulated sugar
- 1 cup light brown sugar (packed)
- 2 teaspoons pure vanilla extract
- 2 large eggs
- 3 cups all-purpose flour
- 1 teaspoon baking soda
- ½ teaspoon baking powder
- 1 teaspoon sea salt
- 2 cups chocolate chips ((12 oz))
Ingredient Notes & Substitutions
Butter: I specifically recommend using salted butter for this recipe because it helps balance the sweetness and enhances all the flavors. If you only have unsalted butter, simply add an extra pinch of sea salt, about 1/4 teaspoon. The key step here is browning the butter, which we will cover in detail.
Sugar: The combination of granulated sugar and light brown sugar is crucial for both flavor and texture. Granulated sugar provides crispness, while packed light brown sugar contributes moisture, chewiness, and a lovely caramel note. Always make sure your brown sugar is firmly packed into the measuring cup.
Flour: All-purpose flour is the standard here and provides the ideal structure. For those with dietary needs, a 1:1 gluten-free all-purpose flour blend can be used, though the texture might vary slightly.
Chocolate Chips: For the very best Classic Chocolate Chip Cookies, choose high-quality chocolate chips. I love a good semi-sweet chocolate chip, but feel free to experiment with dark chocolate, milk chocolate, or even large chocolate chunks for pockets of melted goodness.
Eggs: Two large eggs provide structure and moisture. For vegan bakers, some substitutes like applesauce or flax eggs can be used, but they will alter the texture of the cookie. For a truly eggless chocolate chip cookie, I recommend finding a recipe specifically designed for that substitution.
Nuts: If you enjoy a bit of crunch, feel free to add about 1 cup of chopped walnuts or pecans along with the chocolate chips.

How to Make Classic Chocolate Chip Cookies
Step 1: Prepare Your Baking Environment
Preheat your oven to 375 degrees Fahrenheit (190 degrees Celsius). A properly preheated oven ensures even heat distribution from the start. Line three baking sheets with parchment paper and set them aside. This prevents sticking and makes for easy cleanup.
Step 2: Brown the Butter
In a light-colored saucepan, melt the 1 cup of salted butter over medium heat. Watch it closely as it begins to bubble and foam. Continue to cook, stirring occasionally, until the foam subsides and the milk solids at the bottom turn a beautiful golden brown color and it smells delightfully nutty, like toasted hazelnuts. Immediately remove it from the heat to prevent burning. Pour the browned butter into a heatproof bowl to stop the cooking process and allow it to cool to a semi-solid, room-temperature consistency. This cooling step is vital for the texture of your Classic Chocolate Chip Cookies.
Step 3: Combine Dry Ingredients
In a medium bowl, whisk together the 3 cups of all-purpose flour, 1 teaspoon of baking soda, ½ teaspoon of baking powder, and 1 teaspoon of sea salt. Using fresh leavening agents, baking soda and baking powder, is important for proper cookie rise. Set this mixture aside.
Step 4: Cream Butter and Sugars
Once your browned butter has cooled to a semi-solid state, cream it together with the 1 cup of granulated sugar and 1 cup of light brown sugar in a large mixing bowl until they are well combined and light and fluffy. This process incorporates air, which contributes to the cookies’ texture.
Step 5: Beat in Eggs and Vanilla
Beat in the 2 large eggs and 2 teaspoons of pure vanilla extract until the mixture is light and creamy, about 1 minute. Scrape down the sides of the bowl to ensure everything is fully incorporated.
Step 6: Mix in Dry Ingredients
Gradually add the dry ingredients mixture to the wet ingredients. Mix on low speed until just combined. Be careful not to overmix the dough, as this can develop the gluten too much and lead to tough cookies.
Step 7: Add Chocolate Chips
Fold in the 2 cups of chocolate chips. Mix until they are evenly distributed throughout the dough. I love seeing those generous pockets of chocolate in every bite.
Step 8: Portion the Dough
Using a cookie scoop for uniform size, roll 2-3 Tablespoons of dough at a time into balls. Place them evenly spaced on your prepared cookie sheets. Uniform size ensures even baking.
Step 9: Bake to Perfection
Bake in the preheated oven for approximately 8-10 minutes. Look for cookies that are just barely starting to turn golden brown around the edges, with centers that still look slightly soft. This indicates a perfectly chewy Classic Chocolate Chip Cookie, not an overbaked one.
Step 10: Cool
Let them sit on the baking pan for 5 minutes before removing to a cooling rack. This allows the cookies to set up properly and prevents them from breaking when transferred. Cooling on the rack finishes the baking process gently.
Mastering the Browned Butter Technique
Browned butter, also known as beurre noisette, is simply butter that has been cooked past its melting point until the milk solids caramelize and turn golden brown. This process imparts an incredible nutty, toasted, and deeply aromatic flavor that elevates dishes, especially baked goods like our Classic Chocolate Chip Cookies.
To brown butter correctly, start with a light-colored saucepan. This allows you to easily see the color changes of the butter solids. Melt the butter over medium heat. It will foam and sizzle, indicating the water content is evaporating. Keep stirring occasionally to ensure even cooking.
As the foam subsides, you will see tiny brown bits forming at the bottom of the pan. These are the milk solids browning. Continue cooking until the butter smells nutty and the solids turn a deep amber to golden brown. Remove it from the heat immediately. If it cooks too long, it will burn and taste bitter.
Crucially, pour the hot browned butter into a separate, cool bowl. This stops the cooking process. Then, let it cool completely to a semi-solid, room-temperature state, similar to softened butter. This usually takes about 30-60 minutes, or you can speed it up in the refrigerator, stirring occasionally. If it is too warm, your cookies will spread excessively; if it is too hard, it won’t cream properly with the sugar. The right consistency is like soft peanut butter.
Pro Tips & Troubleshooting
Pro Tips
Measure flour correctly: For the most accurate results, I always recommend using a kitchen scale. If you do not have one, use the scoop and level method: fluff the flour in its container, then gently spoon it into your measuring cup and level off the top with a straight edge. Do not pack it down or scoop directly from the bag.
Use a cookie scoop for uniform size and even baking. This ensures all your Classic Chocolate Chip Cookies bake at the same rate and have a consistent appearance.
Don’t over-bake: The cookies will still look slightly doughy and underdone in the center when removed from the oven. They continue to set up as they cool on the baking sheet.
Chill the dough for 30 minutes to prevent spreading, especially if your kitchen is warm. This allows the butter to firm up and the flavors to meld.
Use parchment paper to prevent sticking and ensure easy cleanup. It also promotes even baking.
Rotate the baking sheets halfway through baking for even browning. Ovens often have hot spots, and rotating helps.
Add a sprinkle of sea salt flakes on top of the baked Classic Chocolate Chip Cookies for extra flavor and a beautiful finish. This enhances the chocolate and caramel notes.
Common Mistakes to Avoid
Using expired leavening agents (baking soda or baking powder). Always check the expiration dates for proper rise.
Over-mixing the dough, which can result in tough, dense Classic Chocolate Chip Cookies. Mix until just combined.
Using butter that is too warm or too melted when creaming with the sugars. This leads to excessive spreading.
Inaccurate oven temperature. An oven thermometer is a great investment to ensure your oven is baking at the temperature you set.
Not measuring ingredients accurately. Baking is a science, and precise measurements are important.
Using too much flour. This is a common mistake that leads to dry, crumbly Classic Chocolate Chip Cookies. Refer to the flour measuring tip above.
Skipping the browned butter cooling step. This is crucial for the correct cookie texture and to prevent over-spreading.
Serving & Storage
Serving Ideas
Serve these Classic Chocolate Chip Cookies warm with a tall glass of cold milk. It’s a timeless and perfect pairing. For a fun twist on the classic, try our creme egg stuffed chocolate chip cookies.
Enjoy them with a scoop of creamy vanilla ice cream for an indulgent dessert.
For a truly decadent treat, make cookie sandwiches with your favorite ice cream or buttercream filling.
These are always a hit when served as a dessert at parties or gatherings. They are universally loved.
Pair them with a hot cup of coffee or tea for a cozy afternoon pick-me-up.
Don’t forget to garnish with a few delicate sea salt flakes for an extra pop of flavor and visual appeal.
Storage and Make-Ahead
Store baked Classic Chocolate Chip Cookies in an airtight container at room temperature for up to 3 days. They remain wonderfully soft and chewy.
For longer storage, freeze baked cookies for up to 2 months. Thaw them at room temperature before serving, or warm them slightly in the microwave for a fresh-from-the-oven experience.
You can also freeze cookie dough balls for up to 3 months. Arrange them on a baking sheet and flash freeze until solid, then transfer to a freezer-safe bag. Bake from frozen, adding a few minutes to the baking time, usually 2-4 minutes more.
Conclusion
I genuinely believe that these browned butter Classic Chocolate Chip Cookies are the best you will ever make. The unparalleled flavor that comes from the browned butter technique creates a cookie experience that is truly unforgettable. It is deeply nutty, rich with caramel notes, and perfectly balanced.
I encourage you to try this recipe and experience the difference for yourself. Don’t be afraid to experiment with different types of chocolate or a sprinkle of nuts. Even if you are a beginner baker, the steps are straightforward and easy to follow.
Once you’ve baked your batch of these incredible cookies, I would love to see your creations! Share your photos on social media using the hashtag #BestChocolateChipCookies.
FAQ
How do you make gooey chocolate chip cookies? To achieve gooey chocolate chip cookies, slightly underbake them, taking them out when the edges are set but the center still looks soft. Chilling the dough also helps control spread and results in a thicker, chewier cookie. Using slightly less flour can also contribute to a gooier texture.
Why do cookies spread and flatten? Cookies spread and flatten due to a few common reasons: butter that is too warm or melted, too much sugar in relation to flour, or an oven temperature that is too low. Chilling the dough helps firm up the butter, which reduces spreading.
Can you bake chocolate chip cookie dough from frozen? Yes, absolutely! Place frozen cookie dough balls directly on a prepared baking sheet and bake as usual, adding an extra 2-4 minutes to the baking time to ensure they cook through evenly.
What can I substitute for eggs in chocolate chip cookies? For a vegan alternative, applesauce (1/4 cup per egg) or a flax egg (1 tablespoon ground flaxseed + 3 tablespoons water, per egg) can be used. However, be aware that these substitutes will change the texture of the cookie. For a truly excellent eggless variation, I recommend seeking out a recipe specifically formulated for that.
Can I use different types of chocolate chips? Yes, you can! Feel free to experiment with dark chocolate chips, milk chocolate chips, white chocolate chips, or even chopped chocolate bars. For another delicious chocolate cookie, consider our chocolate crinkle cookies.
How do I measure flour correctly for this recipe? The most accurate way to measure flour is with a kitchen scale. If using measuring cups, use the scoop and level method: gently spoon the flour into the measuring cup until overflowing, then level it off with the back of a knife or straight edge. Avoid scooping directly from the bag, as this compacts the flour and results in too much.

Brown Butter Chocolate Chip Cookies: Best Ever Recipe
Ingredients
Equipment
Method
- Preheat your oven to 375 degrees Fahrenheit (190 degrees Celsius). Line three baking sheets with parchment paper and set them aside.
- In a light-colored saucepan, melt the 1 cup of salted butter over medium heat. Watch closely as it bubbles and foams. Continue to cook, stirring occasionally, until the foam subsides and the milk solids at the bottom turn a golden brown color and smell nutty. Immediately remove from heat. Pour the browned butter into a heatproof bowl to stop cooking and allow it to cool to a semi-solid, room-temperature consistency.
- In a medium bowl, whisk together the 3 cups of all-purpose flour, 1 teaspoon of baking soda, ½ teaspoon of baking powder, and 1 teaspoon of sea salt. Set this mixture aside.
- Once your browned butter has cooled to a semi-solid state, cream it together with the 1 cup of granulated sugar and 1 cup of light brown sugar in a large mixing bowl until well combined, light, and fluffy.
- Beat in the 2 large eggs and 2 teaspoons of pure vanilla extract until the mixture is light and creamy, about 1 minute. Scrape down the sides of the bowl to ensure everything is fully incorporated.
- Gradually add the dry ingredients mixture to the wet ingredients. Mix on low speed until just combined. Be careful not to overmix the dough.
- Fold in the 2 cups of chocolate chips. Mix until they are evenly distributed throughout the dough.
- Using a cookie scoop for uniform size, roll 2-3 Tablespoons of dough at a time into balls. Place them evenly spaced on your prepared cookie sheets.
- Bake in the preheated oven for approximately 8-10 minutes. Look for cookies that are just barely starting to turn golden brown around the edges, with centers that still look slightly soft.
- Let them sit on the baking pan for 5 minutes before removing to a cooling rack. Cooling on the rack finishes the baking process gently.
Notes

Sophie Reynolds is a baking specialist and dessert contributor at YumEasyMeals. She develops approachable, family-friendly dessert recipes focused on flavor, simplicity, and reliable results for everyday home cooks.