In my kitchen, there’s nothing quite like a homemade treat that marries deliciousness with genuine health benefits. These Elderberry Popsicles are precisely that – a vibrant, refreshing, and incredibly simple way to support your immune system, especially during colder months or when you just need a little boost. Forget those sugary store-bought options; my recipe elevates this classic idea with a special twist that ensures not only a brighter flavor but also a wonderfully smooth, crystal-free texture. Get ready for a delightful frozen treat that’s perfect for kids and adults alike!
Why You’ll Love This Elderberry Popsicles Recipe
I’ve crafted this Elderberry Popsicles recipe with a secret ingredient that truly sets it apart: a squeeze of fresh lemon juice in each mold before freezing. This isn’t just a whim; it’s a game-changer! The citric acid in lemon juice brightens the elderberry and fruit flavors, making every bite taste incredibly fresh and vibrant. More importantly, it acts as a natural preservative, disrupting the formation of ice crystals. The result? A silky-smooth, less icy popsicle that melts beautifully in your mouth. You’ll adore how quick and easy these are to prepare, making them an ideal immune support snack for the whole family. They’re also incredibly budget-friendly , especially if you use homemade elderberry syrup, offering a much healthier and tastier alternative to highly processed, sugary treats from the store, much like making your own gourmet herb-infused fruit leather.
Ingredients Needed
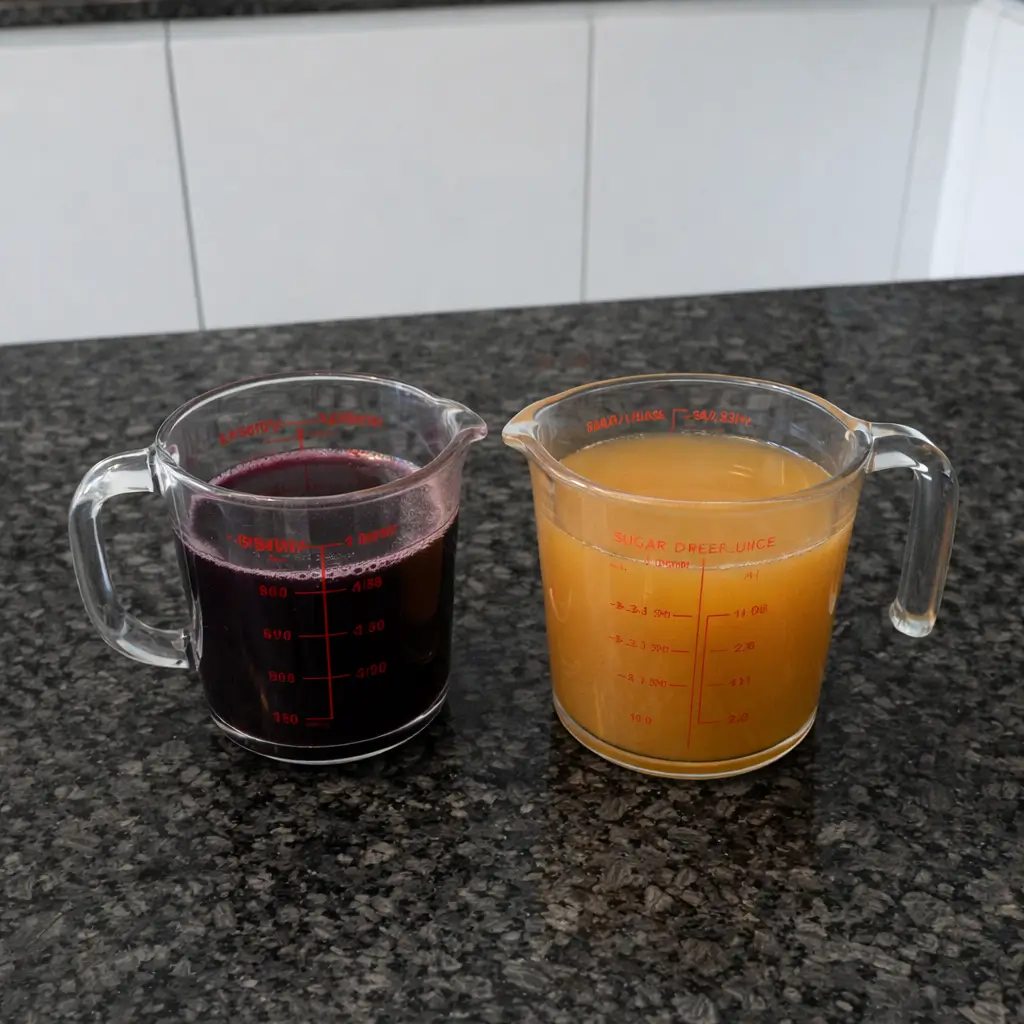
- 6 tbsp elderberry syrup
- 2 cups sugar-free juice (more or less depending on the size of your popsicle molds)
Ingredient Notes & Substitutions
Crafting the perfect elderberry popsicle starts with choosing quality ingredients. Here’s what I recommend for the best results:
- Elderberry Syrup: The heart of our popsicles! I recommend using a high-quality elderberry syrup, whether it’s store-bought from a trusted brand or homemade from dried elderberries. Elderberry is a fantastic herbal remedy renowned for its immune support properties, packed with antiviral properties and beneficial polyphenols .
- Juice Selection: The recipe calls for sugar-free juice, and your options are vast! While I often reach for organic apple juice for its classic sweetness, orange juice adds a citrusy punch, tart cherry juice brings a delightful tang and additional antioxidants, and pomegranate juice offers a rich, complex flavor. Experiment to find your favorite combination! For a completely different but equally refreshing blend, you might enjoy a tropical pineapple banana smoothie. Consider the Nutritional value of juice when making your selection; some juices offer more Vitamin C or other beneficial compounds.
- The Lemon Twist (Crucial Ingredient Note): Don’t skip the fresh lemon juice! This small addition is vital for achieving that bright, clean flavor and wonderfully smooth texture. It truly acts as a natural preservative against those pesky ice crystals, making all the difference in the final product.
How to Make Elderberry Popsicles
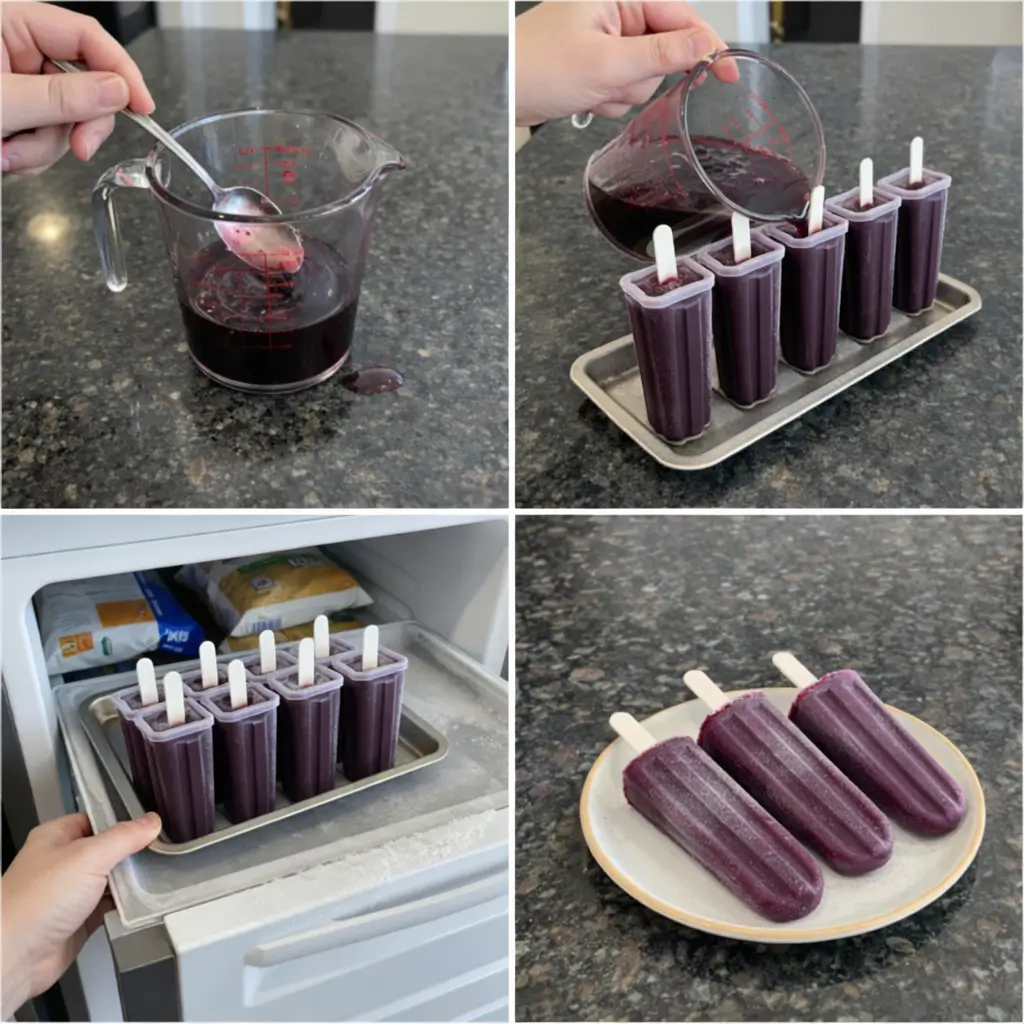
Making these Elderberry Popsicles is incredibly straightforward, perfect for a fun kitchen project with the family or a quick meal prep session. Follow these simple steps for a truly delightful and immune-boosting treat.
Prepare Your Molds
Start by putting 1 tablespoon of elderberry syrup into each of your popsicle molds . I like to ensure it settles nicely at the bottom; this creates a lovely layer of concentrated elderberry flavor at the tip of your popsicle.
Add the Juice
Next, gently fill the popsicle molds with your chosen sugar-free juice. As I mentioned, organic apple juice is a go-to for me, but feel free to explore orange , tart cherry , or pomegranate juice . The quantity will depend on the specific size of your molds, so fill them almost to the top, leaving a little room for the stick.
Introduce the Unique Twist
Here’s my secret! *Before swirling*, add a small squeeze, about 1/2 teaspoon, of fresh lemon juice into each mold. This seemingly tiny addition is precisely what gives these Elderberry Popsicles their bright, fresh flavor and that wonderfully smooth, crystal-free texture. It’s truly a game-changer!
Combine & Insert Sticks
Now, take a popsicle stick or a thin skewer and give the elderberry syrup, juice, and lemon mixture a little swirl in each mold. This ensures everything combines evenly, creating a consistent flavor throughout. Once mixed, insert the popsicle sticks firmly into the top of the molds.
Freeze Until Solid
Carefully transfer your filled popsicle molds to the freezer. Freezing for several hours, typically 4-6 hours, or until they are completely frozen solid, is key. Patience here pays off for perfectly firm popsicles!
Enjoy Your Treat
When you’re ready to indulge, run some cold water over the outside of the popsicle mold for just a few seconds. This simple trick helps to loosen the popsicle, making it easy to remove and enjoy your refreshing, immune-boosting treat!
Elderberry Safety, Benefits & Choosing Molds
Diving into homemade Elderberry Popsicles is a fantastic way to enjoy a healthy treat. Let’s explore the powerful benefits of elderberry and ensure you’re using the best tools for the job.
Elderberry Benefits and Precautions
Elderberry is truly a powerhouse when it comes to natural health. It’s renowned for its impressive immune system boost , often used to help alleviate cold and flu symptom relief. These berries are rich in polyphenols , powerful antioxidants that help protect your cells. The antiviral properties of elderberry are particularly highlighted during cold and flu season, making it a popular choice for families looking to support their wellness.
However, it’s crucial to understand elderberry safety. While the cooked elderberry syrup in this recipe is generally safe for most, raw elderberries contain lectins and cyanogenic glycosides, which can cause digestive upset like nausea or vomiting if consumed uncooked. Always use processed forms like syrup or jelly. Certain individuals should exercise caution or avoid elderberry entirely: pregnant or nursing individuals, those with autoimmune conditions, and children under one year old. If you are on specific medications, especially immunosuppressants or diuretics, consult with a healthcare professional before incorporating elderberry into your routine.
Selecting the Best Popsicle Molds
Choosing the right popsicle molds can make a big difference in your homemade frozen treat experience. Here’s what I look for:
- Types of Molds: You’ll primarily find silicone and plastic popsicle molds . Silicone molds are fantastic for easy removal; they’re flexible and often lead to less sticking. Plastic molds, while sometimes requiring a quick rinse under water to release, are often very durable and come in a wide array of fun shapes.
- Size and Shape: Consider who will be eating them. Smaller molds are perfect for children’s portions, while larger ones are great for adults. Fun shapes can also make these Elderberry Popsicles even more appealing to younger palates. Ensure the molds are designed to hold popsicle sticks securely.
- Features to Look For: I appreciate molds with a sturdy base to prevent tipping in the freezer. Drip guards integrated into the stick design are a bonus for mess-free enjoyment. Also, check for molds that are easy to clean – nobody wants to spend ages scrubbing crevices!
Pro Tips & Troubleshooting
Even the simplest recipes can benefit from a few expert insights and solutions to common hiccups. Here are my top tips for perfect Elderberry Popsicles every time.
Pro Tips for Perfect Popsicles
- Dosage Guidance: For adults, one or two popsicles are equal to one dose of elderberry syrup, so two can be taken per day as needed for immune support . For a child, one elderberry popsicle per day during times of illness is perfectly sufficient.
- Fresh Squeezed Juice: While store-bought juice works well, using fresh squeezed juice for even better results. It enhances the vibrancy of the flavors and can offer additional nutrients.
- The Lemon Advantage: Remember our unique twist! The small amount of lemon juice not only brightens the overall flavor profile but also actively prevents the formation of ice crystals , giving you that wonderfully smooth, almost sorbet-like texture.
- Even Distribution: After adding all ingredients, make sure to swirl thoroughly. This ensures the elderberry syrup is well-mixed throughout the juice , leading to consistent flavor and even dosage in every popsicle.
- Pre-Chill Molds: For an extra edge, try briefly chilling your empty popsicle molds in the freezer for about 15-20 minutes before filling them. This can help the mixture freeze faster and further prevent any ingredient separation.
Common Mistakes to Avoid
Even with simple recipes, a few pitfalls can lead to less-than-perfect results. Here’s how to avoid them:
- Too Many Ice Crystals: If your popsicles turn out more icy than smooth, you likely skipped our lemon twist or used a juice with a very high water content. The lemon juice is key to disrupting those ice crystals for a superior texture.
- Popsicles Not Freezing Solid: If your popsicles remain too soft or don’t set completely, ensure your freezer is at its optimal temperature (0°F / -18°C or colder). Also, allow adequate freezing time – while 4-6 hours is a good starting point, some freezers or larger molds might require overnight freezing for complete solidity.
- Difficulty Removing from Molds: Don’t force them out! Running your popsicle molds under cold tap water for just a few seconds is usually all it takes to loosen them up for an easy release.
- Syrup Settling: If you find all the elderberry flavor has sunk to the bottom, it means you didn’t swirl the mixture enough. Ensure a good, thorough mix with your popsicle stick to distribute the elderberry syrup evenly.
Serving & Storage
These Elderberry Popsicles are such a versatile and delicious treat. Here are my favorite ways to enjoy them and keep them fresh.
Serving Ideas
- Hydration Boost: On a hot day, there’s nothing more refreshing! These popsicles are also a gentle and tasty way to stay hydrated when you’re feeling under the weather, thanks to their immune support properties.
- Kids’ Favorite: Present these as a fun and healthy alternative to sugary desserts for children. They love the vibrant color and sweet-tart flavor, and you’ll love the hidden benefits!
- Post-Workout Refresh: After a good workout, a cool and fruity snack like an elderberry popsicle can be incredibly satisfying, tapping into the Health & Nutrition benefits of the juice and elderberry.
- Garnish: For a touch of elegance, serve your Elderberry Popsicles with a fresh mint leaf or a tiny sprinkle of lemon zest on the side. It adds visual appeal and a burst of aroma.
Storage and Make-Ahead
These elderberry popsicles are excellent for making ahead, ensuring you always have a delicious, immune-boosting treat on hand.
- Freezer Storage: Once completely frozen, remove the popsicles from their molds. They will stay fresh in the freezer for up to 2-3 months when stored properly.
- Preventing Freezer Burn: To maintain optimal freshness and prevent freezer burn , I highly recommend wrapping individual popsicles tightly in parchment paper or plastic wrap. Then, place the wrapped popsicles into an airtight container or a freezer bag. This extra step is crucial for long-term storage and maintaining that smooth texture.
- Make-Ahead Tips: With their long freezer life, these popsicles are perfect for batch cooking. Make a large quantity at the beginning of the week or month, and you’ll have a ready supply of healthy, flavorful treats whenever a craving strikes or your immune system needs a little extra love.
Conclusion
There you have it – my go-to recipe for the most delightful and genuinely beneficial Elderberry Popsicles ! I truly believe this recipe stands out due to its incredible ease, irresistible flavor, and powerful immune support properties. That secret squeeze of lemon juice, our unique twist, truly makes all the difference, delivering a superior texture free from ice crystals and a wonderfully bright taste. Don’t be shy about experimenting with different juice varieties; the possibilities are endless! Whether you’re a seasoned chef or a beginner in the kitchen, these popsicles are simple to master and a joy to share. So, whip up a batch, pop them in your popsicle molds , and enjoy a truly refreshing and healthy frozen treat!
FAQ
What are the specific health benefits of elderberry popsicles?
Elderberry popsicles offer a wonderful blend of deliciousness and wellness. They provide a significant immune system boost thanks to the elderberry’s natural antiviral properties and high concentration of polyphenols . Many people find them effective for cold and flu symptom relief , especially during peak season, making them a great addition to your family’s health routine.
How many elderberry popsicles should I consume per day for immune support?
For adults, one or two popsicles are equivalent to one dose of elderberry syrup, so you can enjoy up to two per day as needed. For children, one elderberry popsicle per day during times of illness is usually the perfect amount to provide gentle immune support .
What kind of juice is best to use in elderberry popsicles?
I recommend using sugar-free juices to keep the sweetness balanced. Organic apple juice is a classic choice, but orange juice , tart cherry juice , or pomegranate juice all work exceptionally well. Your choice depends on your personal flavor preference and desired nutritional profile. Feel free to mix and match!
How long will elderberry popsicles stay fresh in the freezer?
When properly stored, your homemade elderberry popsicles will stay fresh in the freezer for about 2-3 months. To prevent freezer burn and maintain their quality, make sure to wrap each popsicle individually in plastic wrap or parchment paper before placing them in an airtight container or freezer bag.
Are there any precautions or contraindications for using elderberry?
Yes, while generally safe in processed forms, raw elderberries contain compounds like lectins that can cause digestive upset. Always use cooked or processed elderberry, such as the syrup in this recipe. Additionally, pregnant or nursing individuals, those with autoimmune conditions, and children under one year old should avoid elderberry. If you are taking any medications, particularly immunosuppressants, consult your doctor before consuming elderberry products.
Can I use fresh elderberries instead of elderberry syrup?
I strongly advise against using raw fresh elderberries directly in these popsicles due to potential toxicity from lectins and other compounds. Fresh elderberries must be cooked and processed (e.g., made into syrup or jelly) to neutralize these compounds before consumption. For this recipe, stick to high-quality elderberry syrup.
Is it safe to use honey instead of sugar for sweetness?
If your chosen juice isn’t sweet enough for your liking, honey can be a wonderful natural sweetener, adding its own unique flavor profile. However, it’s crucial to remember that honey should never be given to children under one year old due to the risk of infant botulism.
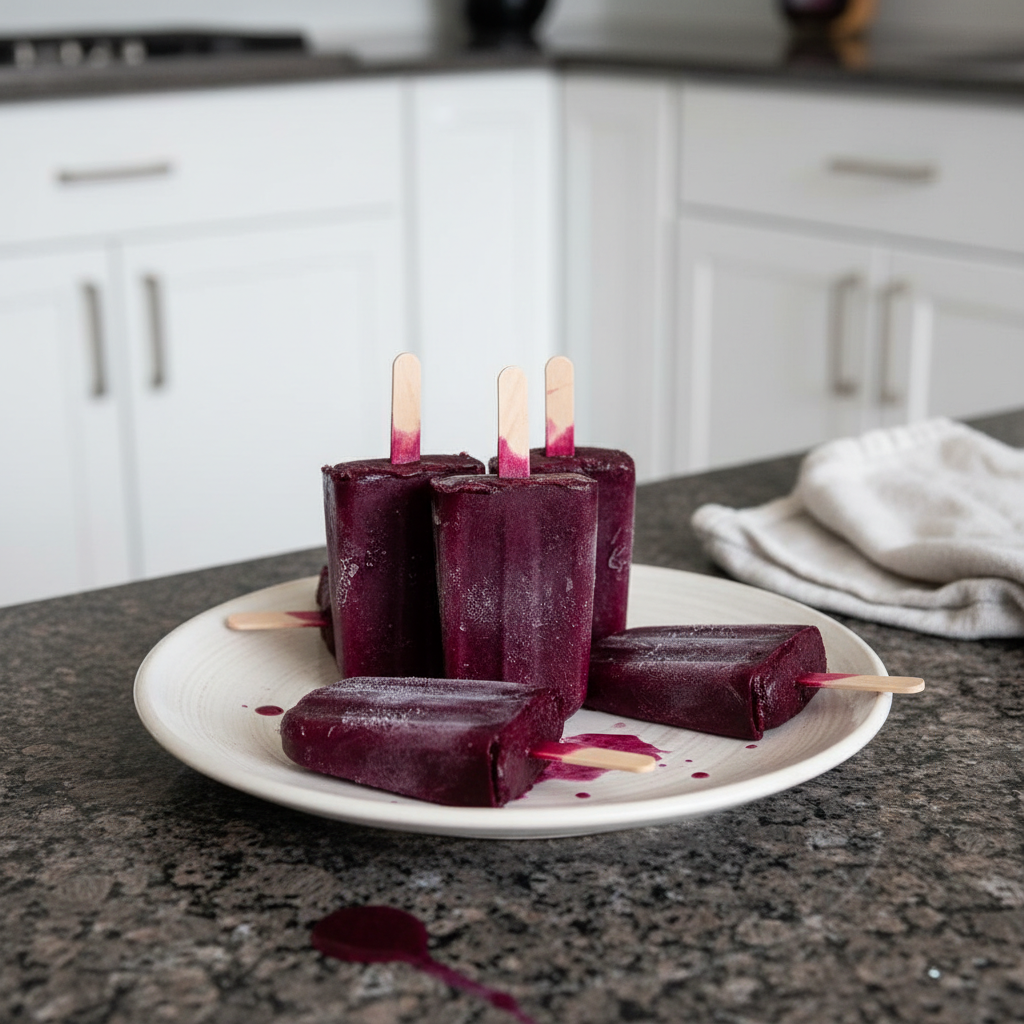
Elderberry Popsicles: Easy Immune-Boosting Treat (Lemon Twist!)
Ingredients
Equipment
Method
- Start by putting 1 tablespoon of elderberry syrup into each of your popsicle molds. Ensure it settles nicely at the bottom to create a lovely layer of concentrated elderberry flavor at the tip of your popsicle.
- Gently fill the popsicle molds with your chosen sugar-free juice, such as organic apple, orange, tart cherry, or pomegranate. Fill them almost to the top, leaving a little room for the stick.
- Add a small squeeze, about 1/2 teaspoon, of fresh lemon juice into each mold before swirling. This addition provides a bright, fresh flavor and ensures a wonderfully smooth, crystal-free texture.
- Take a popsicle stick or a thin skewer and give the elderberry syrup, juice, and lemon mixture a little swirl in each mold. This ensures everything combines evenly for a consistent flavor. Insert the popsicle sticks firmly into the top of the molds.
- Carefully transfer your filled popsicle molds to the freezer. Freeze for several hours, typically 4-6 hours, or until completely frozen solid for perfectly firm popsicles.
- When ready to enjoy, run some cold water over the outside of the popsicle mold for just a few seconds. This simple trick helps to loosen the popsicle, making it easy to remove and enjoy your refreshing, immune-boosting treat.
Notes

Taya Bennett is the founder of YumEasyMeals, a platform dedicated to easy, delicious, and quick-to-prepare recipes for busy families. Passionate about everyday cooking, she simplifies meals with practical, accessible, and always delicious ideas.
Discover her creations at: yumeasymeals.com