Welcome to my kitchen, where I believe healthy eating should always be exciting and convenient. If you are searching for the ultimate solution to delicious and fresh meals on the go, then look no further than these vibrant Mason Jar Salads. They are a game-changer for anyone looking to simplify their meal prep, offering endless versatility and flavor. I will guide you through mastering the layering technique, exploring diverse flavor combinations, and revealing my special twist for enhanced taste and texture.
Why You’ll Love This Mason Jar Salad Recipe
This recipe truly shines because of a unique twist I have developed. I incorporate a layer of marinated artichoke hearts into the Mediterranean and Caprese salad jars. Their briny, slightly tangy flavor and acidity perfectly complement the fresh vegetables and creamy cheeses. This addition provides a wonderful depth of flavor, extra moisture, and beneficial micronutrients, all while preventing the layer above from drying out.
Mason Jar Salads are a fantastic time-saving meal prep solution for busy weeks. They simplify healthy eating by preparing several meals at once.
These salads are incredibly versatile, catering to almost any taste. We will explore exciting variations like Tex Mex, Greek, Caprese, Ranch, and Green Goddess.
Enjoy fresh, crisp, and healthy meals effortlessly, whether you are heading to work, school, or a picnic.
Ingredients Needed
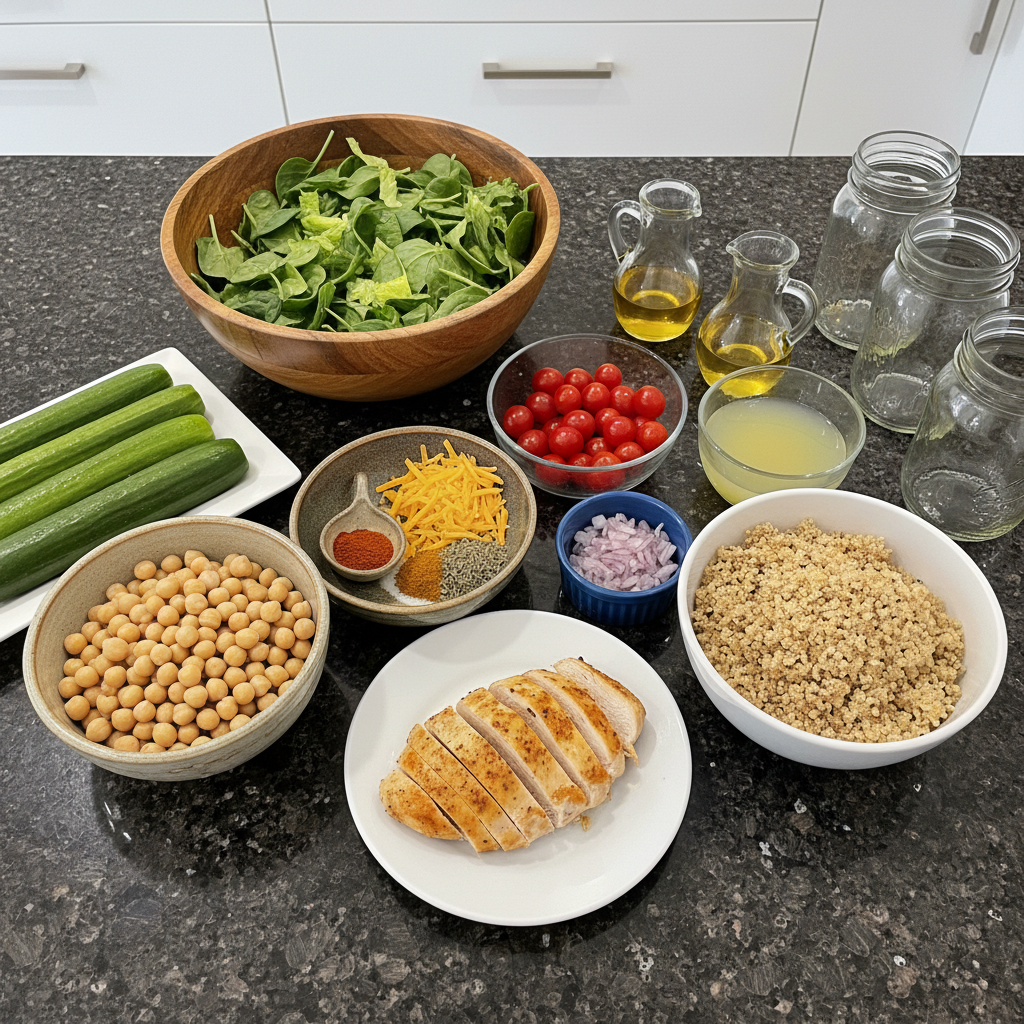
Here are the ingredients you will need to create your delicious Mason Jar Salads:
For Make-Ahead Components:
1-2 chicken breasts (depends on how many jars you’re making – 1 breast per two jars is standard)
1 cup quinoa (dry)
For Tex Mex Mason Jar Salad:
chicken
cherry tomatoes, sliced
red onion, diced
grated cheddar cheese
lettuce, chopped
1 tbsp olive oil
1 tbsp lime juice
1 clove garlic, minced
1 tsp chili powder
1/2 tsp cumin
1 pinch each salt and pepper
For Greek Mason Jar Salad:
chickpeas
cucumber
cherry tomatoes, sliced
red onion, diced
baby spinach
1 tbsp olive oil
1 tbsp lemon juice
1 clove garlic, minced
1 tsp oregano
1 pinch each salt and pepper
For Caprese Mason Jar Salad:
quinoa
cherry tomatoes, sliced
bocconcini cheese
red onion, diced
baby spinach
1 tbsp olive oil
1 tbsp balsamic vinegar
1 tsp Dijon mustard
1 pinch each salt and pepper
For Ranch Mason Jar Salad:
chicken
cucumber
cherry tomatoes, sliced
grated cheddar cheese
lettuce, chopped
1-2 tbsp bottled ranch dressing
For Green Goddess Mason Jar Salad:
chickpeas
quinoa
cucumber
edamame
spinach
1 tbsp olive oil
1 tbsp lime juice
1 tbsp packed cilantro or parsley, finely chopped
1 tbsp sour cream
1 clove garlic, minced
1 pinch each salt & pepper
Ingredient Notes & Substitutions
When preparing your mason jar creations, feel free to adapt the ingredients to your preferences and dietary needs.
Proteins: For excellent high-protein and vegetarian options, you can substitute grilled salmon, hard-boiled eggs, baked tofu or tempeh, lentils, or additional chickpeas instead of chicken breasts.
Grains: Beyond quinoa, consider using other hearty grains such as farro, couscous, or brown rice for variety and different textures.
Cheeses: If you need dairy-free alternatives for cheddar cheese and bocconcini cheese, many excellent plant-based options are available. You can also experiment with other cheeses like feta for a Greek twist or cotija for Tex Mex.
Greens: The beauty of these salads is their flexibility. Lettuce, baby spinach, and other mixed greens can be swapped easily based on your taste and what you have on hand.
Dressings: I always emphasize using quality olive oil, fresh lemon juice, lime juice, and good quality balsamic vinegar for the best flavor. However, store-bought ranch dressing or other bottled options are perfectly fine time-savers for busy days.
Unique Twist Integration: Remember, the marinated artichoke hearts are a key component for elevating the Mediterranean and Caprese versions, adding that special tangy touch.
Produce Quality: Always select fresh, vibrant produce. Look for firm cherry tomatoes, crisp cucumber, and fragrant red onion to ensure the best flavor and texture in your salads.

How to Make Mason Jar Salads
Creating these convenient mason jar salads involves a few simple, sequential steps. Following this process ensures your salads stay fresh and delicious for days.
Step 1: Cook Make-Ahead Components
I start by baking chicken breasts with a little bit of olive oil, salt, and pepper in my oven at 400 degrees Fahrenheit for about 20 minutes, until they are golden brown and cooked through. Once the chicken is done, I let it cool completely before dicing it into 1-inch pieces. Meanwhile, I make the quinoa in my rice cooker by combining 1 cup of dry quinoa with 2 cups of water and cooking until all the liquid is absorbed and the grains are fluffy. It is crucial for meal prep to ensure both the chicken and quinoa are completely cooled before moving to the next steps; this prevents condensation and maintains freshness.
Step 2: Prepare Your Dressings
Next, I mix together my dressing of choice. You can use the homemade versions listed in the ingredients section, blending olive oil, lime juice, garlic, chili powder, cumin, lemon juice, oregano, balsamic vinegar, Dijon mustard, cilantro or parsley, and sour cream as specified for each flavor profile. If I am short on time, I often reach for quality store-bought options like a bottled ranch dressing. Each salad jar typically requires only about 1 to 2 tablespoons of dressing.
Step 3: Master the Mason Jar Layering Technique
This is where the magic happens! I add 1 to 2 tablespoons of my chosen dressing to the very bottom of a clean 16-ounce mason jar. Then, I layer in the ingredients strictly following the order listed for each salad variation. For instance, for my Mexican jars, I layer chicken, then sliced cherry tomatoes, diced red onion, grated cheddar cheese, and finally, chopped lettuce. For the Mediterranean and Caprese variations, I make sure to specifically add the well-drained marinated artichoke hearts right above the dressing or the harder vegetables. This layering rule is essential: dressing first, then hard veggies, grains, or protein, followed by softer vegetables, and finally the delicate greens at the very top. This strategic layering prevents sogginess and keeps everything crisp.
Step 4: Storage for Freshness
Once assembled, these vibrant jars will keep beautifully in the fridge for up to 4 or 5 days. For incredibly easy meal prep, I always recommend cooking your chicken and quinoa up to 24 hours in advance. This way, on assembly day, all you have to do is quickly layer everything into the jars.
Step 5: Serve and Enjoy!
When you are ready to enjoy your masterpiece, simply give the mason jar a good shake to thoroughly distribute the dressing, then dump the entire salad into a large bowl. You will be greeted with a perfectly dressed, fresh, and crisp salad that is ready to savor.
Mastering Layering & Diverse Grains
Achieving the perfect mason jar salad means understanding a few key principles, especially when it comes to layering and selecting your grains. These insights will help you avoid soggy salads and expand your culinary horizons.
The Science Behind Smart Layering
The order in which you layer your ingredients is not just a suggestion; it is a critical technique to prevent sogginess and maintain freshness. The fundamental principle is to create a barrier between the salad dressing and the delicate greens. I always place the salad dressing at the very bottom of the jar. This ensures it coats the ingredients when you shake the jar, but does not directly touch the greens, keeping them crisp until you are ready to eat.
Next, I layer hard, non-absorbent ingredients. Think chickpeas, crisp cucumber, and firm cherry tomatoes. This layer acts as a sturdy shield, further protecting the upper layers from the dressing. The marinated artichoke hearts, my unique twist, also fit perfectly here due to their firm texture and ability to withstand the dressing.
Following these hard ingredients, I add grains like quinoa and proteins such as chicken. These ingredients are more absorbent than the bottom layer but still hearty enough to create a buffer. Then come softer vegetables and cheeses, such as diced red onion, bocconcini cheese, or grated cheddar cheese.
Finally, delicate greens like lettuce and baby spinach always go right at the top. This placement ensures they remain dry, crisp, and vibrant, directly addressing how to keep greens crisp and preventing sogginess.
Beyond Quinoa: Exploring Grain Alternatives for Your Mason Jar Salad
While quinoa is an excellent choice for mason jar salads due to its nutrient profile and texture, there is a whole world of grains you can explore to add variety and new flavors. I often experiment with different options.
Consider cooked brown rice for a nutty flavor and satisfying chew. Farro is another fantastic choice, offering a hearty texture and slightly chewy bite. Couscous, with its quick cooking time and light texture, works wonderfully as well. Bulgur wheat can provide a pleasant chewiness, especially in a Mediterranean-inspired jar. You can even use small pasta shapes like orzo for a different take on a grain layer.
When using any alternative grain, always ensure it is thoroughly cooked and, most importantly, completely cooled before adding it to your jars. Warm grains will create condensation, which can lead to premature spoilage and sogginess. Proper cooling is key to maintaining freshness.
Customizing Your Mason Jar Salads for Dietary Needs
One of the greatest joys of making mason jar salads is their incredible adaptability. I frequently adjust recipes to accommodate different dietary preferences without sacrificing flavor or convenience.
Vegan & Vegetarian Swaps
For those following vegan or vegetarian diets, it is incredibly easy to customize these recipes. Instead of chicken, I recommend using extra chickpeas, edamame, black beans, lentils, or baked tofu or tempeh as your protein source. For cheese, simply opt for your favorite dairy-free alternatives to cheddar cheese and bocconcini cheese. When preparing dressings, ensure they are vegan by using plant-based sour cream or an egg-free Dijon mustard.
Gluten-Free Adaptations
If you are maintaining a gluten-free diet, you will be happy to know that quinoa is naturally gluten-free, making it a safe and nutritious grain choice for these salads. For all other ingredients, especially bottled dressings and marinades, I always advise carefully checking the labels to ensure there are no hidden gluten-containing ingredients.
Low-Carb & Keto Options
For those aiming for low-carb or keto-friendly meals, mason jar salads can be easily adjusted. Simply omit grains like quinoa entirely or significantly reduce their quantity. Instead, focus on increasing your protein sources, such as more chicken, hard-boiled eggs, or chickpeas, and generously adding non-starchy vegetables like lettuce, cucumber, and baby spinach. There are also many excellent keto-friendly salad dressings available, or you can make your own with a base of olive oil and vinegar or lemon juice.
Pro Tips & Troubleshooting
Making perfect mason jar salads is simple with a few expert insights. Here are my best tips and common pitfalls to avoid for consistently delicious results.
Pro Tips for Perfect Mason Jar Salads
Prep Ahead, Cool Completely: Always cook your proteins and grains, such as chicken and quinoa, in advance. Make absolutely certain they are fully cooled to room temperature, or even chilled, before you start assembling your jars. This step is crucial for preventing condensation and maintaining freshness and crispness, avoiding sogginess.
Layering is King: Reiterate the critical importance of the correct layering order. Placing salad dressing at the bottom, followed by hard vegetables, proteins, softer ingredients, and finally greens at the top, is the golden rule to keep ingredients fresh and prevent sogginess.
Pack Tightly: When layering, gently compress your ingredients to reduce air pockets. This helps to extend the refrigeration life of your salads.
Store Cold: Always keep your assembled mason jar salads refrigerated until you are ready to eat them. Consistent cold storage is key to food safety and freshness.
Shake & Serve: Before eating, give your mason jar a good shake. This distributes the dressing evenly throughout the ingredients. Then, simply dump the salad into a large bowl for easier enjoyment.
Keep Toppings Separate: For crispy elements like nuts, seeds, or croutons, add them just before eating to maintain their crunch and prevent them from getting soggy.
Embrace Variety: Do not be afraid to switch up your salad dressing, protein, and vegetable ingredients. This keeps your meals exciting and is a great way to use up whatever fresh produce you have on hand.
Leverage the Artichoke Twist: If you are using marinated artichoke hearts for that tangy twist, make sure they are well-drained before layering. Placing them after the dressing and any hard vegetables ensures optimal flavor distribution without adding excess moisture.
Common Mistakes to Avoid
Warm Ingredients: Never layer warm or even slightly warm ingredients into your jar. Always ensure everything is thoroughly chilled before assembly.
Incorrect Layering Order: This is a major culprit for soggy salads. Avoid putting greens or other absorbent ingredients directly into the salad dressing.
Overfilling: Leave a small space at the top of your jar. This allows for easy shaking without spillage when you are ready to eat.
Not Cooling Properly: Ingredients that are not fully cooled will create condensation inside the jar, which drastically reduces shelf life and causes spoilage faster.
Forgetting to Shake: If you skip shaking, your salad dressing will remain at the bottom, and your salad will be unevenly dressed.
Adding Crispy Toppings Too Early: Adding nuts, seeds, or croutons when you assemble the jar will make them soggy by the time you eat your salad.
Serving & Storage
Making the most of your mason jar salads involves smart serving practices and diligent storage to ensure every bite is as fresh as possible.
Serving Ideas
I always recommend serving your mason jar salad by first giving it a good shake to distribute the dressing, then dumping it into a large bowl. This makes for a much easier and more enjoyable eating experience than trying to eat directly from the narrow jar. To round out your meal, consider pairing your salad with a crusty baguette, a light and warming soup, or a piece of fresh fruit. For an extra flourish, you can garnish your salads with fresh herbs like cilantro or parsley, or a sprinkle of extra cheddar cheese for added flavor.
Storage and Make-Ahead
For optimal storage conditions, your assembled mason jar salads should be kept in the refrigerator. When properly layered and sealed, they will maintain their freshness for up to 4-5 days. To streamline your meal prep timeline, I suggest cooking your proteins, like chicken, and grains, such as quinoa, up to 24 hours in advance. Store these components separately in airtight containers in the fridge, then assemble your jars on your dedicated meal prep day. The airtight seal of the mason jar is absolutely crucial for extending shelf life guidelines and keeping your ingredients crisp and delicious.
Conclusion
Mason Jar Salads are truly a game-changer for healthy eating, offering unparalleled convenience for meal prep, incredible freshness, and vast versatility. I hope you have seen how my unique twist of adding marinated artichoke hearts enhances both the flavor and texture, taking these salads to the next level. Even beginners can achieve success with these recipes. I encourage you to try the different flavor combinations presented or to experiment with your own dietary adaptations. Share your favorite variations with me and discover more healthy recipes on my blog!
FAQ
How long will salad last in a mason jar?
Properly layered mason jar salads will last 4-5 days when stored in the refrigerator. The key to this shelf life is correct layering, with dressing at the bottom and greens at the top, along with an airtight seal from the mason jar.
What size mason jar is best for salads?
I recommend using 16-ounce wide-mouth mason jars as they are the ideal size for a single-serving salad. They offer ample space for layering all your ingredients and a wide opening for easy access when assembling and serving.
How do I prevent my salad from getting soggy?
The crucial rule to prevent sogginess is correct layering. Always put the salad dressing at the very bottom of the jar. Follow with hard, non-absorbent ingredients like chickpeas, cucumber, or marinated artichoke hearts. Then add grains and proteins, followed by softer vegetables and cheeses. Finally, place delicate greens like lettuce and baby spinach at the very top. This creates a barrier that keeps your greens crisp.
Can I use different types of protein?
Absolutely! Mason jar salads are incredibly versatile. You can use cooked chicken, grilled fish, hard-boiled eggs, chickpeas, black beans, edamame, or baked tofu and tempeh to create high-protein and vegetarian options.
Can I use different greens than what’s listed?
Yes, you can definitely use different greens. I encourage variety! Feel free to swap in baby spinach, romaine lettuce, kale, or any of your favorite mixed greens based on your preference and what is available.
How can I adapt these recipes for different dietary needs?
These recipes are highly adaptable. For vegan options, swap chicken for plant-based proteins like chickpeas or tofu, and use dairy-free cheeses and dressings. For gluten-free, quinoa is naturally gluten-free, but always check labels on bottled ingredients. For low-carb or keto diets, reduce or omit grains and increase protein and non-starchy vegetables.

Mason Jar Salad Mastery: Fresh Meal Prep with a Tangy Twist
Ingredients
Equipment
Method
- Preheat your oven to 400 degrees Fahrenheit (200°C). Lightly season chicken breasts with olive oil, salt, and pepper. Bake for about 20 minutes, or until golden brown and cooked through. Once cooked, let the chicken cool completely before dicing it into 1-inch pieces.
- While the chicken bakes, prepare the quinoa. In a rice cooker, combine 1 cup of dry quinoa with 2 cups of water. Cook until all the liquid is absorbed and the grains are fluffy. Ensure the quinoa is completely cooled before proceeding to the next steps.
- Mix together your chosen dressing. For homemade options, combine olive oil, lime juice, garlic, chili powder, cumin, lemon juice, oregano, balsamic vinegar, Dijon mustard, cilantro or parsley, and sour cream as specified for each salad variation in the ingredients list. Alternatively, use a quality store-bought dressing like bottled ranch. Each salad jar will require approximately 1 to 2 tablespoons of dressing.
- Add 1 to 2 tablespoons of your chosen dressing to the very bottom of a clean 16-ounce mason jar.
- Layer the ingredients strictly following this order for each salad variation: dressing first, then hard vegetables (like chickpeas, cucumber), grains (quinoa), or protein (chicken). For Mediterranean and Caprese variations, add well-drained marinated artichoke hearts right above the dressing or hard vegetables.
- Next, layer softer vegetables (e.g., cherry tomatoes, red onion) and cheeses (grated cheddar, bocconcini). Finally, place delicate greens like lettuce and baby spinach at the very top. This strategic layering prevents sogginess and keeps everything crisp.
- Once assembled, seal the mason jars tightly. Store the vibrant jars in the refrigerator, where they will keep beautifully for up to 4 or 5 days. For incredibly easy meal prep, cook your chicken and quinoa up to 24 hours in advance and cool completely before assembling.
- When you are ready to enjoy your masterpiece, simply give the mason jar a good shake to thoroughly distribute the dressing. Then, dump the entire salad into a large bowl. You will be greeted with a perfectly dressed, fresh, and crisp salad that is ready to savor.
Notes

Taya Bennett is the founder of YumEasyMeals, a platform dedicated to easy, delicious, and quick-to-prepare recipes for busy families. Passionate about everyday cooking, she simplifies meals with practical, accessible, and always delicious ideas.
Discover her creations at: yumeasymeals.com