There’s something truly magical about homemade Valentine’s Day treats, and my kitchen’s latest creation, these beautiful Valentine Meringue Cookies, are no exception. Imagine delicate, airy hearts that melt in your mouth, infused with a hint of lemon and adorned with festive sprinkles. These aren’t just any meringue cookies; I’m going to guide you through the secret to achieving a stable, glossy finish using the Swiss meringue method. Get ready to create light, airy, and utterly beautiful Valentine Meringue Cookies that will steal hearts!
Why You’ll Love This Recipe
My unique twist for these Valentine Meringue Cookies lies in using the Swiss meringue method. This technique involves gently warming the egg whites and granulated sugar together before whipping them.
This process is the key to creating a stable, smooth, and incredibly glossy meringue. It ensures the sugar dissolves completely, eliminating any graininess and significantly reducing the risk of your beautiful meringues cracking or collapsing during baking.
More stable than traditional meringues, meaning fewer failures in your kitchen.
Perfect for gifting, these meringue cookies look professional and hold their heart-shaped form beautifully.
They are incredibly fun and festive for Valentine’s Day, bringing a smile to everyone’s face.
Ingredients Needed

4 egg whites (room temperature)
1 cup granulated sugar
¼ tsp lemon juice
Red gel food coloring
Red sprinkles
Piping bags
Wilton piping tip (, 1m)
Parchment paper
Ingredient Notes & Substitutions
Egg Whites: Always use room temperature egg whites for your meringue. They whip up to a much greater volume than cold ones, giving you that wonderfully airy texture.
Granulated Sugar: Granulated sugar is perfect for Swiss meringue because its fine crystals dissolve easily when gently heated with the egg whites. This prevents a gritty texture in your finished meringue.
Lemon Juice: A small amount of lemon juice acts as a stabilizer for the egg whites. It helps them whip up faster and maintain their structure, contributing to those perfect stiff peaks.
Food Coloring: I highly recommend using gel food coloring over liquid varieties. Gel colors are much more concentrated and won’t add excess liquid to your meringue, which could destabilize it. For a natural option, a tiny bit of beet powder or freeze-dried raspberry powder can create a lovely pink hue.
Dietary Options: A wonderful thing about meringue cookies is that they are naturally gluten-free, dairy-free, and nut-free. This makes them a fantastic dessert option for many dietary needs.
How to Make Valentine Meringue Cookies
Prep Your Baking Area
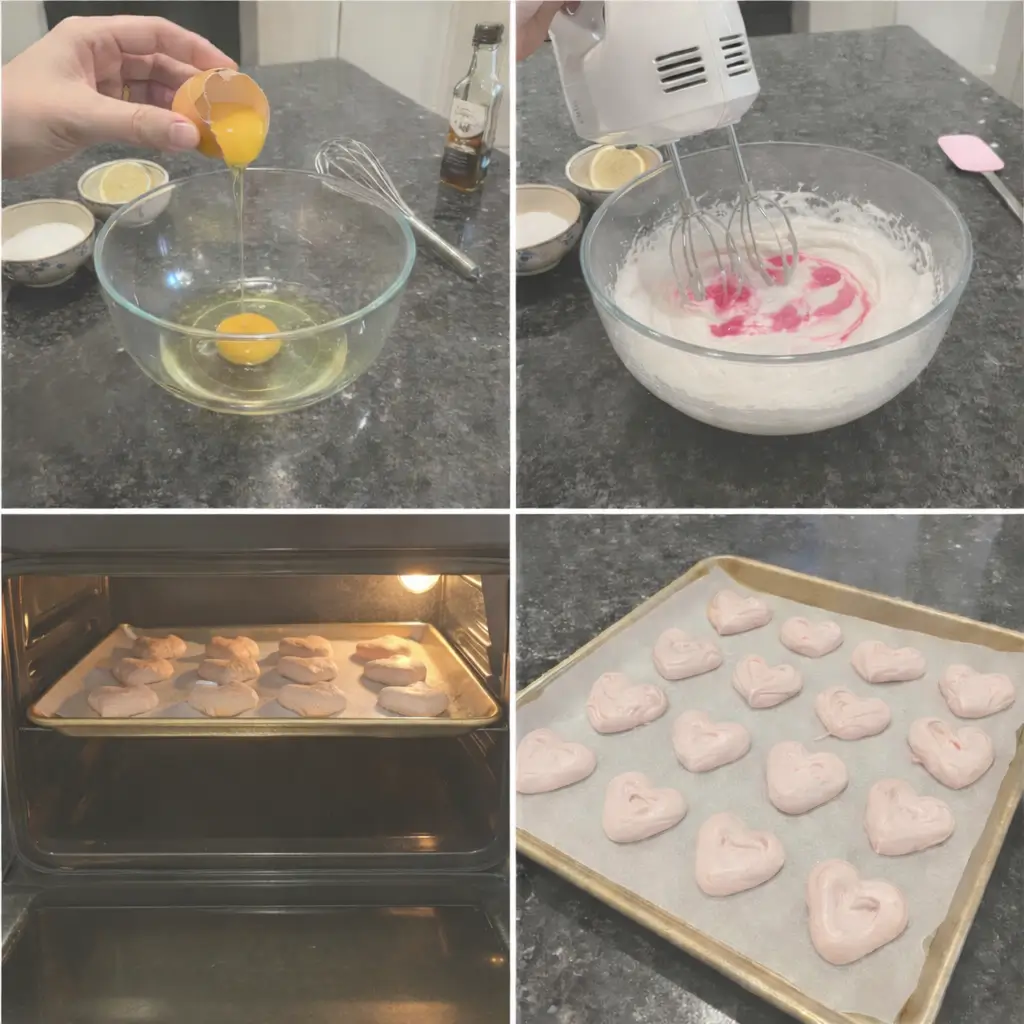
First, I always begin by lining a baking sheet with parchment paper. This prevents sticking and makes cleanup a breeze. Then, I preheat my oven to a low 200 degrees F (93 degrees C). Remember, we are drying these beautiful meringue cookies, not baking them in the traditional sense, so a low temperature is absolutely crucial.
Whip the Egg Whites
Next, I attach the whisk beater to my electric mixer. I add the room temperature egg whites to a clean, dry bowl and begin beating them on medium speed. As they start to foam, I add the ¼ tsp of lemon juice. The lemon juice is vital here; it helps to stabilize the egg whites, ensuring a strong, stable meringue.
Incorporate the Sugar
Gradually, I increase the mixer speed to high. Now, I slowly add the granulated sugar, little by little, letting it incorporate fully. I watch closely as the mixture transforms, becoming wonderfully glossy and smooth. It’s important to ensure all the sugar dissolves completely for the best texture.
Achieve Stiff Peaks
I continue mixing on high speed until beautiful, stiff, glossy peaks form. I know they’re ready when I lift the whisk, and the meringue stands straight up, holding its shape firmly without drooping.
Add a Touch of Color
With my stiff peaks achieved, I gently add just one small drop of red gel food coloring. I mix it very gently, just enough to swirl the color through the meringue, being careful not to deflate all that lovely air I’ve whipped in. The color comes alive, swirling beautifully through the white meringue.
Pipe Heart Shapes
Now for the fun part! I attach my 1M Wilton tip to a piping bag. On my prepared baking sheet, I carefully pipe out heart outlines and then fill them in. If you’re new to piping hearts, a quick video search can offer great visual guidance; it’s easier than you think!
Decorate with Sprinkles
Before baking, I garnish my heart-shaped meringue cookies generously with festive red sprinkles. This adds that extra touch of Valentine’s Day charm and a delightful crunch.
Bake to Perfection
I slide the baking sheet into the preheated oven and bake the meringue cookies for two full hours. This long, slow bake is essential for even drying and helps prevent any unsightly cracks from forming.
Cool Slowly in the Oven
Once the two hours are up, I turn off the oven heat but leave the meringue cookies inside for an additional 35-45 minutes. This slow cooling process is a crucial step to prevent cracking, allowing them to gently come to room temperature while maintaining their integrity.
Final Cooling
Finally, I remove the meringue cookies from the oven and carefully transfer them to a wire rack. I let them cool completely before I even think about enjoying them. This ensures they are perfectly crisp and ready for a sweet celebration!
Mastering the Swiss Meringue: A Step-by-Step Guide
When I’m making delicate Valentine Meringue Cookies, I always turn to the Swiss meringue method. I find it far superior for these particular treats because it guarantees a stable, smooth, and glossy meringue every time. Unlike French meringue, where egg whites are simply whipped with sugar at room temperature, the Swiss method introduces gentle heat.
Here’s how it works: I combine the egg whites and granulated sugar in a heatproof bowl set over a pot of simmering water, creating a double boiler. I whisk this mixture continuously until the sugar is completely dissolved and the mixture reaches about 160 degrees F (71 degrees C). The mixture should feel warm to the touch, and when I rub a bit between my fingers, I shouldn’t feel any sugar crystals. This gentle heating process dissolves the sugar more effectively and partially cooks the egg whites, creating a much more stable and less grainy meringue.
This stability means your heart-shaped meringue cookies are less likely to crack or weep during baking. The result is a meringue that whips up incredibly thick, smooth, and glossy, holding intricate piped shapes beautifully. It’s a fundamental step in ensuring your meringue cookies are picture-perfect for Valentine’s Day.
Achieving Stiff Peaks: The Ultimate Guide
Achieving the perfect stiff peaks is foundational to any successful meringue, and especially for delicate meringue cookies. I always start by ensuring my mixing bowl and whisk beaters are impeccably clean and completely grease-free. Any trace of fat can prevent the egg whites from whipping properly.
As I whip the egg whites, I observe them progressing through several stages. First, I see soft peaks; when I lift the whisk, the peaks barely hold their shape and droop immediately. As I continue, they reach firm peaks, where the meringue holds its shape better but the tip still curls over. Finally, I look for stiff peaks. At this stage, the meringue is wonderfully glossy and holds its shape perfectly straight up when I lift the whisk, without any flopping over. It should look like a bright white cloud, firm and resilient.
A little tip: if you ever feel your egg whites are struggling to reach stiff peaks, a pinch of cream of tartar, added at the beginning, can act as an excellent stabilizer, giving them an extra boost.
Pro Tips & Troubleshooting
Pro Tips
Use room temperature egg whites for maximum volume. This is a non-negotiable step for me.
Ensure your bowl and beaters are completely clean and grease-free. Even a tiny bit of fat can ruin your meringue.
Dissolve the sugar completely during the warming process of Swiss meringue. This prevents a grainy texture.
Do not overmix the meringue after adding color. Mix just enough to incorporate the color gently.
Pipe the cookies close together on the baking sheet to help them bake evenly. This helps create a more consistent temperature around them.
Cool the cookies completely in the oven after baking to prevent cracking. Patience is a virtue here.
Store the cookies in an airtight container at room temperature. This is key for preserving their crispness. For another delightful option, consider trying the best soft and chewy snickerdoodle cookie recipe.
Common Mistakes to Avoid
Using cold egg whites. They simply won’t whip up as well.
Not dissolving the sugar completely. This leads to a gritty meringue and can cause weeping.
Overmixing the meringue after adding color. You risk deflating all that precious air.
Opening the oven door during baking. This causes temperature fluctuations that can lead to cracking.
Cooling the cookies too quickly. Sudden temperature changes will make them crack.
Storing the cookies in a humid environment. Humidity is the enemy of crisp meringues.
Serving & Storage
Serving Ideas
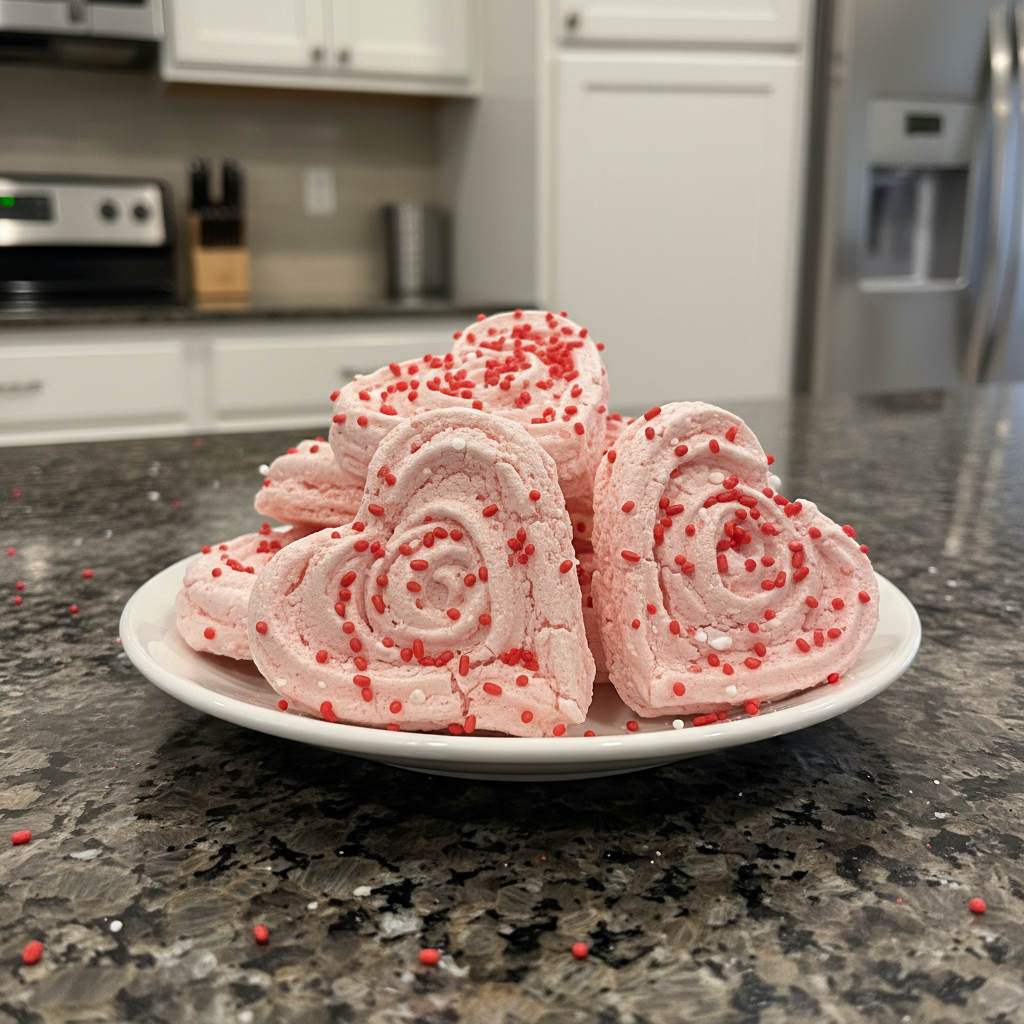
These Valentine Meringue Cookies are absolutely perfect as a standalone Valentine’s Day treat. Their delicate texture and sweet flavor make them a delightful bite.
I also love using them as elegant cake decorations or charming cupcake toppers, adding a whimsical touch to any dessert.
For a lovely gift, package them in clear cellophane bags and tie with a pretty ribbon. They look so professional and thoughtful.
Pair them with a warm cup of hot chocolate or coffee for a cozy and comforting experience.
Storage and Make-Ahead
To keep your meringue cookies crisp and delicious, always store them in an airtight container at room temperature. Exposure to air, especially humid air, is their arch-nemesis, as it will make them sticky.
For optimal crispness, I recommend consuming these meringue cookies within 2-3 days. While they will last longer, their texture starts to degrade after this time.
Never, ever refrigerate meringue cookies! The cold, moist environment of a refrigerator is guaranteed to make them sticky and chewy, ruining their delicate crunch. Humidity is a major factor that affects meringue cookies. If you live in a very humid climate, consider placing a small desiccant packet (food-safe silica gel) in your storage container to absorb excess moisture.
Conclusion
I truly hope you’ll find as much joy as I do in making these beautiful Valentine Meringue Cookies. The Swiss meringue method, while requiring a little patience, offers unparalleled stability and a gorgeously glossy finish that makes all the difference. It’s truly a fool-proof way to create stunning heart-shaped meringues.
Don’t be afraid to experiment with different shades of red or pink food coloring, or even mix in different colored sprinkles for a personalized touch. With a little practice, you’ll be whipping up batches of these delightful, airy desserts with confidence.
Print this recipe and share your creations with us! I can’t wait to see your sweet masterpieces.
FAQ
What is the best way to store meringue cookies?
Store them in an airtight container at room temperature, away from any humidity, to maintain their crispness.
Why are my meringue cookies sticky?
Stickiness usually occurs due to exposure to moisture. Ensure proper storage in an airtight container and never refrigerate them.
How do I prevent meringue cookies from cracking?
Bake them at a very low temperature and allow them to cool slowly inside the oven after baking. This gradual cooling is key to preventing cracks.
What temperature should the oven be?
The oven should be set to a low 200 degrees F (93 degrees C). This temperature is ideal for drying them out slowly.
How long do meringue cookies last?
For optimal crispness and flavor, meringue cookies are best consumed within 2-3 days when stored correctly.
What is the difference between French, Swiss and Italian meringue?
French meringue is made by whipping raw egg whites with sugar. Swiss meringue involves gently heating egg whites and sugar over a double boiler before whipping. Italian meringue is made by slowly pouring hot sugar syrup into whipping egg whites. Swiss and Italian methods are generally more stable than French.
Why do my meringues weep?
Meringues can weep due to undissolved sugar or overbeating. The Swiss method, by ensuring the sugar dissolves completely with gentle heat, largely solves this problem, creating a more stable meringue.
Valentine Meringue Cookies: A Sweetheart’s Delight
Ingredients
Equipment
Method
- Line a baking sheet with parchment paper. Preheat your oven to a low 200 degrees F (93 degrees C).
- Attach the whisk beater to your electric mixer. Add the room temperature egg whites to a clean, dry bowl and begin beating them on medium speed. As they start to foam, add the ¼ tsp of lemon juice.
- Gradually increase the mixer speed to high. Slowly add the granulated sugar, little by little, letting it incorporate fully. Continue mixing until the mixture becomes wonderfully glossy and smooth, ensuring all the sugar dissolves completely.
- Continue mixing on high speed until beautiful, stiff, glossy peaks form. The meringue should stand straight up, holding its shape firmly when the whisk is lifted.
- Gently add just one small drop of red gel food coloring. Mix very gently, just enough to swirl the color through the meringue, being careful not to deflate the air.
- Attach a 1M Wilton tip to a piping bag. On the prepared baking sheet, carefully pipe out heart outlines and then fill them in.
- Before baking, garnish your heart-shaped meringue cookies generously with festive red sprinkles.
- Slide the baking sheet into the preheated oven and bake the meringue cookies for two full hours.
- Once the two hours are up, turn off the oven heat but leave the meringue cookies inside for an additional 35-45 minutes. This slow cooling prevents cracking.
- Remove the meringue cookies from the oven and carefully transfer them to a wire rack. Let them cool completely before enjoying.
Notes

Emily Thompson is a home cook and food enthusiast who believes that great meals bring families together. She loves exploring creative twists on classic American comfort food, always testing new ideas in her kitchen. Emily is passionate about sharing simple, practical recipes and time-saving tips to help busy people enjoy cooking at home. Her approachable style makes every dish accessible, delicious, and perfect for those seeking inspiration for everyday meals and special occasions. Find Emily’s latest creations and kitchen wisdom on yumeasymeals.com.