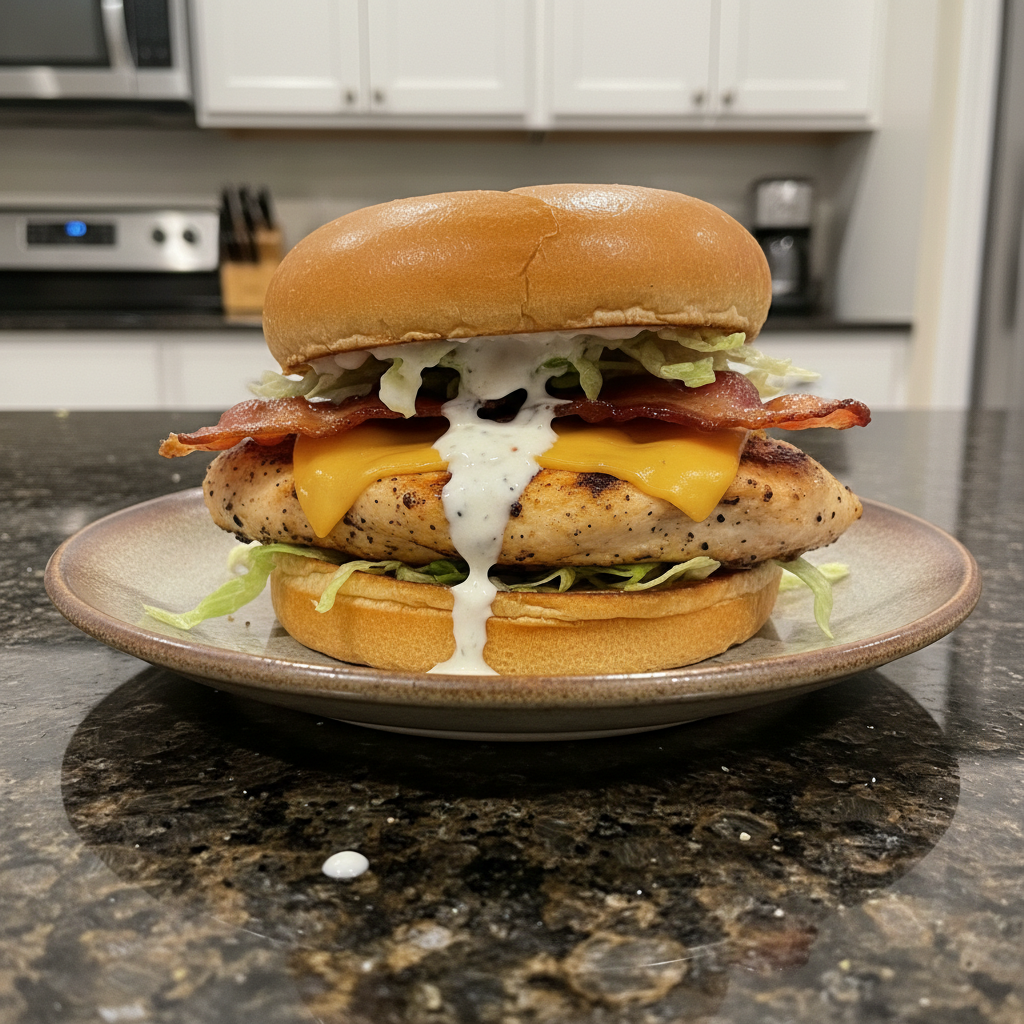
Oh, the joy of a perfectly delicate crepe! That whisper-thin texture, ready to embrace any filling, sweet or savory. But for those of us navigating the world of gluten-free baking, achieving that elusive pliability without the frustration of tearing can often feel like a culinary quest. I know the struggle – flimsy, easily broken Gluten Free Crepes that crumble under the weight of even the lightest topping. That’s why I’m so excited to share my go-to recipe for the most reliable, delicious Gluten Free Crepes you’ll ever make. This article isn’t just a recipe; it’s your comprehensive guide to mastering the art, ensuring every crepe is a success, from mixing the batter to perfecting the flip. Get ready for perfectly pliable, delicious glutenfree crepes that are resistant to tearing, thanks to a unique, scientifically-backed ingredient.
Why You’ll Love This Gluten Free Crepes
In my kitchen, I’m always looking for ways to elevate gluten-free baking, and this crepes recipe delivers a game-changing solution. The secret to our success lies in a simple addition that makes all the difference: psyllium husk powder .
The No-Tear Promise: We add a tablespoon of psyllium husk powder to the dry ingredients, dramatically improving the crepe’s structure and flexibility. This genius trick prevents tearing, especially crucial when using gluten-free flours which often lack the natural binding capacity of wheat.
Mimicking Gluten, Naturally: Psyllium husk is an incredible source of fiber that acts as a powerful binder in gluten-free baking . When it absorbs water, it forms a gel-like consistency that beautifully mimics the elasticity of gluten. This means your gluten-free crepes will be significantly more pliable, easier to handle, and wonderfully resistant to breaking.
Unrivaled Reliability: Say goodbye to frustrating, torn crepes! This recipe guarantees tear-free results, boosting confidence for both beginners and experienced gluten-free bakers alike.
Superior Texture: Get ready for crepes that are light, tender, and subtly sweet (or savory, depending on your preference!). The psyllium husk ensures a delightful mouthfeel that truly rivals traditional crepes.
Versatile Foundation: This sturdy and flexible base is perfect for a wide array of serving ideas for any meal. From a decadent breakfast to an elegant dessert, these crepes simplify meal planning and encourage your culinary creativity.
Ingredients Needed
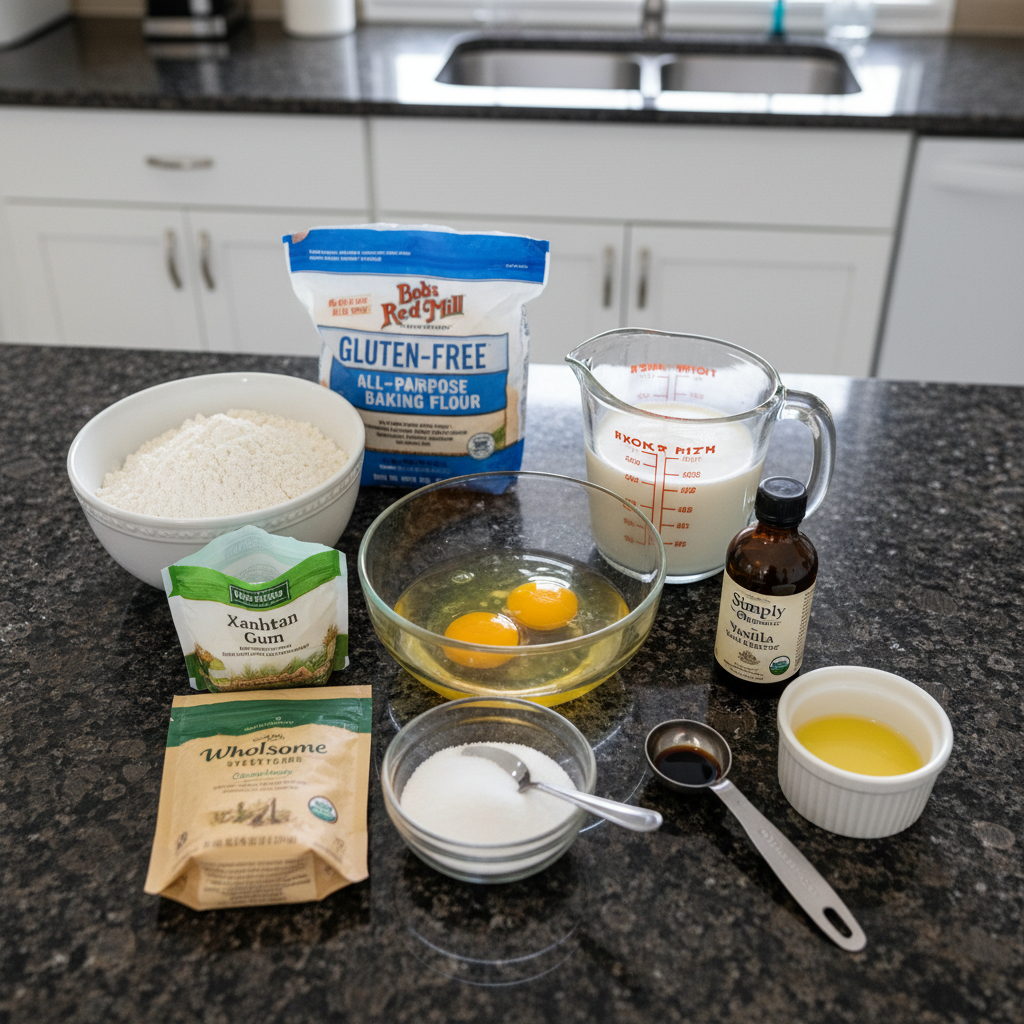
Here’s what you’ll need to create these fantastic gluten free crepes in your own kitchen:
- 2 large eggs
- ¾ cup milk (for a dairy-free option, use plain unsweetened almond, cashew, or coconut milk)
- ½ cup water
- 1 cup gluten-free all-purpose flour with xanthan gum
- ¼ tsp xanthan gum (leave out if your flour already has it)
- 2 tbsp granulated sugar (omit for savory crepes*)
- 1 tsp pure vanilla extract (omit for savory crepes)
- 3 tbsp unsalted butter (melted, for a dairy-free option, use Smart Balance butter)
- 1 tbsp psyllium husk powder (the secret ingredient for no-tear crepes!)
Ingredient Notes & Substitutions
Understanding your ingredients is key to any great recipe. Here are a few insights to ensure your glutenfree crepes turn out perfectly every time:
* Gluten-Free Flour: The choice of your gluten-free all-purpose flour blend is important. Different blends can vary in absorbency and texture, impacting your batter . Always check if your blend already contains xanthan gum ; if so, omit the extra ¼ tsp. Most good blends contain a mix of flours like rice flour, tapioca starch, and potato starch, which all contribute to the final batter consistency. Our psyllium husk twist is specifically designed to help compensate for the inherent variability of these blends, ensuring a consistent, pliable crepe.
* Milk: For a dairy-free option, plain unsweetened almond milk , cashew milk, or coconut milk (the beverage kind, not canned) work beautifully. Consider the subtle flavor profile each brings.
* Butter: I recommend unsalted butter for better control over the overall seasoning. For a dairy-free alternative, Smart Balance butter or other vegan butter sticks are excellent choices. Just make sure it’s melted for easy incorporation.
* Eggs: For the smoothest batter consistency, always aim for room temperature eggs . They emulsify better with the other liquids, leading to a more uniform final product.
* Sugar & Vanilla: These ingredients are primarily for sweet crepes. If you’re planning savory crepes , feel free to omit the sugar and vanilla extract . Instead, consider adding a pinch of salt or a touch of your favorite dried herbs to the batter .
* Psyllium Husk Powder: This is truly the star of this crepes recipe ! Do not skip it. It’s the crucial ingredient for our unique twist , playing an indispensable role in binding the gluten-free flour and preventing the crepes from tearing . It’s what makes these crepes so remarkably pliable.
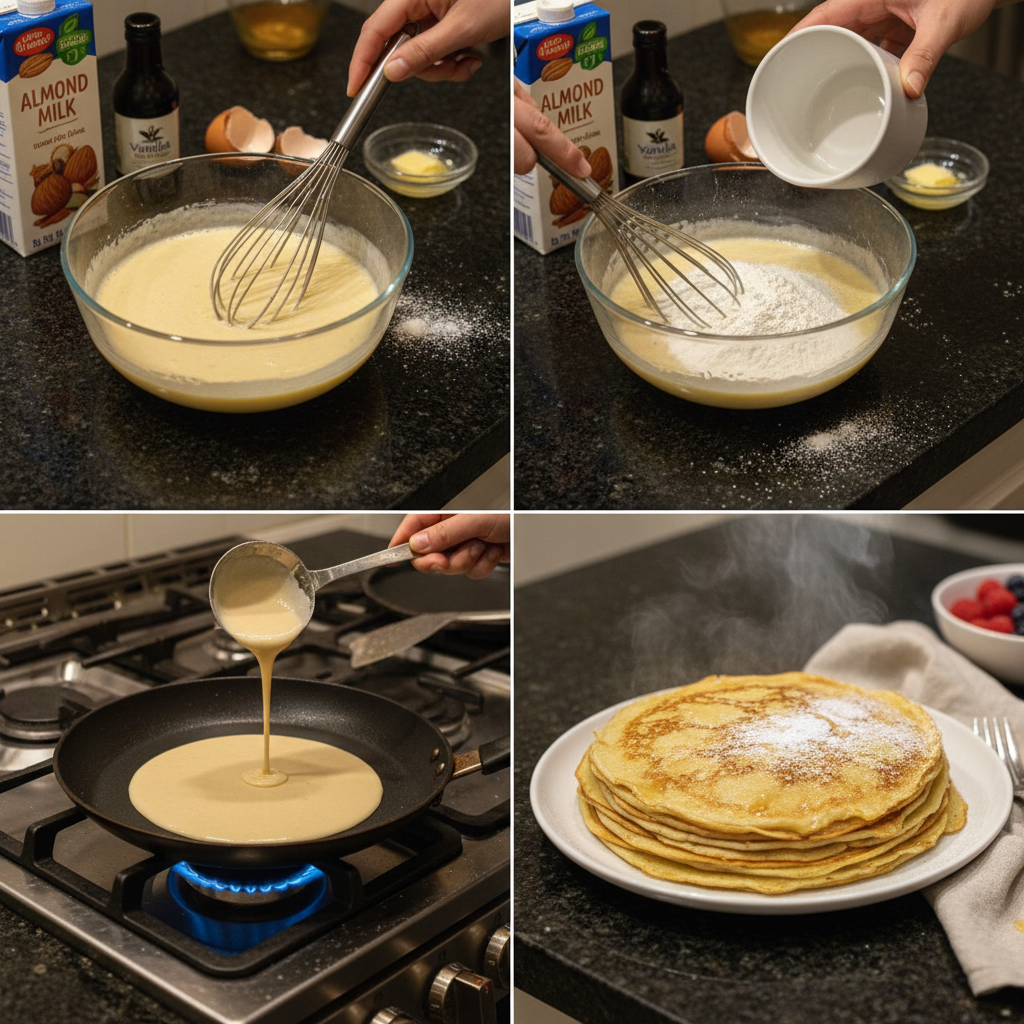
How to Make Gluten Free Crepes
Creating perfect gluten free crepes is a surprisingly simple and rewarding process. Follow these steps, and you’ll be swirling and flipping like a pro!
- Prepare the Wet Ingredients: In a large bowl, whisk the eggs thoroughly. I often use my hand mixer for this, or a stand-up mixer if I’m feeling fancy, to ensure they’re light and airy.
- Combine All Ingredients: Add all of the remaining ingredients to the bowl, including the milk, water, gluten-free all-purpose flour (with or without the extra xanthan gum depending on your blend), granulated sugar (if using), vanilla extract (if using), melted unsalted butter , and most importantly, the psyllium husk powder . Mix on medium speed for 1 minute, or until all the ingredients are fully combined and the batter is smooth. You’re looking for a consistency similar to heavy cream – thick enough to coat a spoon, but thin enough to spread easily.
- Rest the Batter: This is a crucial step! Cover the bowl and refrigerate the batter for at least 1 hour, or ideally up to 48 hours. This allows the gluten-free flour and especially the psyllium husk to fully hydrate, creating a much more pliable and tear-resistant crepe . Skipping this step is a common mistake that leads to frustration.
- Preheat Your Pan: Once the batter has rested, spray a non-stick pan or a dedicated crepe pan generously with gluten-free cooking spray . It’s vital to fully preheat your pan before adding any batter . Starting with a cold pan can cause the crepe to seize up and turn rubbery – a texture we definitely want to avoid! We’re aiming for a hot pan and a quick cook for the best, most tender texture. I like to test the pan by flicking a tiny drop of water onto it; if it sizzles and evaporates immediately, you’re ready.
- Pour and Swirl the Batter: Pour exactly ¼ cup of the batter into the center of your greased, hot pan. Immediately pick up the pan from the stove and gently swirl it in a circular motion to spread the batter evenly, creating a thin, round circle.
- Cook the First Side: Cook the crepe over medium heat for 30-45 seconds. You’ll know it’s ready to flip when the edges look set and slightly crispy, the surface appears dull with tiny, dry bubbles, and the bottom is lightly browned . Gently loosen the edges with a thin spatula.
- Flip and Finish: Carefully flip the crepe over and cook for about 30 more seconds, until the other side is also lightly browned . Repeat this process with the remaining batter , greasing the pan lightly between each crepe as needed.
- Serve and Enjoy: Slide each cooked crepe onto a plate, laying it flat. Serve the crepes rolled or folded into triangles with your favorite fillings or toppings. The finished crepes should be wonderfully tender and flexible. Enjoy!
Mastering Gluten-Free Flours & Preventing Common Crepe Issues
Navigating gluten-free baking can sometimes feel like a puzzle, especially when it comes to delicate items like crepes. Here’s a deeper dive into understanding your ingredients and troubleshooting common hiccups.
Choosing Your Gluten-Free Flour Blend
The world of gluten-free flour is vast, and different types behave quite uniquely. Flours like brown rice, white rice, tapioca starch, potato starch, and sorghum each contribute distinct characteristics. For crepes, an all-purpose gluten-free flour blend is generally recommended for ease and consistency. These blends are formulated to provide a balanced structure. Crucially, many of these blends already contain xanthan gum , which acts as a binder, mimicking gluten. Always check your blend’s label: if it has xanthan gum , you can omit the extra ¼ tsp in the recipe. If not, add it in! Our inclusion of psyllium husk is a brilliant complement to any gluten-free flour blend, further enhancing elasticity and ensuring those dreaded tears are a thing of the past.
Troubleshooting Your Gluten Free Crepes
Even with the best recipe, sometimes things go awry. Don’t worry, I’ve got you covered with a quick troubleshooting guide for common crepe-making problems .
* Crepes Tearing/Breaking: This is often the biggest frustration. Causes include insufficient binding, batter that’s too thick or too thin, improper pan temperature, or not enough batter rest time. Our psyllium husk twist and the essential batter resting period are your primary defenses here. Always ensure the edges are set and you can gently loosen them before attempting to flip .
* Crepes Sticking to the Pan: This usually points to improper non-stick pan seasoning, inadequate cooking spray or butter , or a pan that isn’t sufficiently hot. Ensure your pan is hot (aim for medium heat ) and well-greased between each crepe.
* Batter Too Thick/Thin: If your batter is too thick , your crepes will be stiff and not spread well. Slowly whisk in a tablespoon of milk or water at a time until you reach that ideal heavy cream consistency. If your batter is too thin, your crepes might tear easily. You can try adding a teaspoon of gluten-free flour or, if necessary for structure, a tiny pinch more psyllium husk (but caution: too much psyllium husk can make it gummy).
* Rubberiness: This is a classic sign of starting with a cold pan or overcooking. Remember, gluten free crepes cook quickly! Emphasize a quick cooking time over medium heat for the best tender texture.
Achieving the Perfect Pan Temperature and Doneness
The right pan temperature is paramount for delicate crepes. For this recipe, medium heat is ideal. What does that mean exactly? Your crepe pan or non-stick pan should be hot enough that a drop of water sizzles and evaporates immediately, or a tiny bit of butter melts and foams gently without browning too quickly.
For visual cues for doneness on the first side (30-45 seconds), look for:
Edges that look set and slightly crispy, possibly pulling away from the pan.
The surface of the crepe will appear dull and have small, dry bubbles.
The bottom should be lightly browned, peek with your spatula!
Once you see these signs, it’s time to flip . The second side will cook even faster, usually about 30 seconds more, until it’s also lightly browned . Don’t overcook, or they can become brittle!
Pro Tips & Troubleshooting
Making crepes can feel intimidating, but with these insider tips, you’ll be making flawless gluten free crepes in no time.
Pro Tips for Flawless Gluten Free Crepes
* Accurate Measuring is Key: Especially with gluten-free flour , the way you measure matters. Use the “spoon & level” method: spoon the flour into your measuring cup, then level it off with a straight edge. This prevents compaction, which can lead to a batter is too thick .
* The Power of Resting: I can’t stress this enough! Refrigerating the batter for at least 1 hour (and up to 48) is absolutely crucial. This rest allows the psyllium husk to fully hydrate and the flour to absorb all the liquid, resulting in a significantly more pliable and tear-resistant crepe . This is the secret to our unique twist working its magic.
* Pan Perfection: While a good non-stick pan works, if you make crepes often, investing in a dedicated crepe pan can make a big difference. Its low sides make flipping a breeze. Always ensure proper greasing with cooking spray or a quick swipe of butter between crepes.
* Room Temperature Ingredients: Make sure your eggs , milk , and melted butter are all at room temperature before you begin mixing. This helps everything combine smoothly, resulting in a lump-free, uniform batter .
* The First Crepe is a Test: Don’t get discouraged if your first crepe isn’t perfect. It often serves as a test run. Use it to adjust your pan temperature or batter consistency as needed. It’s the cook’s treat!
* Swirl and Pour with Precision: Pour a precise ¼ cup of the batter into the hot pan. Immediately pick up the pan and quickly swirl it to create a thin, even circle. This ensures your crepes are delicate and cook evenly.
Common Mistakes to Avoid
* Starting with a Cold Pan: This is a cardinal sin of crepe making! Starting the batter in a cold pan will lead to your crepes seizing up, becoming tough, and taking on a distinctly rubbery texture. Always preheat your pan thoroughly.
* Ignoring Batter Consistency: If your batter is too thick , your crepes will be dense and unpliable. Conversely, if it’s too thin, they’ll be flimsy and tear easily. Always adjust with small additions of milk (to thin) or gluten-free flour (to thicken) as needed.
* Skipping the Psyllium Husk: This is perhaps the biggest mistake you could make with *this* recipe. Omitting the psyllium husk will compromise the crepe’s structure and dramatically increase tearing , undermining the very unique twist that makes this recipe so reliable.
* Over-mixing the Batter: While gluten-free flour doesn’t develop gluten, excessive mixing can incorporate too much air or make the psyllium husk overly gelatinous. Mix just until smooth, then let it rest.
* Impatience: Don’t flip your crepes too early! Allow sufficient cooking time for the edges to set and the bottom to brown before attempting to turn them. A premature flip usually results in a torn crepe.
Serving & Storage
One of the greatest joys of Gluten Free Crepes is their incredible versatility. They can be the star of any meal, from a leisurely Sunday breakfast to an elegant dessert .
Creative Serving Ideas
Let your imagination run wild with these ideas for your delicious crepes:
* Sweet Crepes:
* Classic: A simple dusting of powdered sugar and a squeeze of fresh lemon juice is always a winner.
* Chocoholic’s Dream: Spread generously with Nutella , or fill with chocolate sauce and sliced bananas .
* Fruity Delights: Top with fresh whipped cream and sliced strawberries, vibrant blueberries , or a warm berry compote.
* Hearty & Sweet: A dollop of peanut butter and sliced bananas makes for a satisfying treat.
* Elegant: Fill with a delicate cream cheese filling and your favorite fresh fruit.
* Savory Crepes: Remember to omit sugar and vanilla extract from the batter and add a pinch of salt and your favorite herbs like chives or parsley.
* Breakfast/Brunch: Fill with fluffy scrambled eggs and crispy bacon, perhaps topped with a rich Hollandaise sauce .
* Gourmet: Smoked salmon, gluten-free cream cheese , and fresh chives create a sophisticated dish.
* Mediterranean: Sautéed spinach, crumbled feta, and sun-dried tomatoes make a flavorful filling.
* Versatile: Fill with any of your favorite sautéed vegetables, cheeses, or even leftover roasted chicken.
Storage & Make-Ahead Tips
These gluten free crepes are perfect for meal prep and can be enjoyed later.
* Making Ahead: Cooked crepes store wonderfully and can be prepared a day or two in advance, making breakfast or dessert a breeze.
* Refrigeration: To store cooked crepes in the fridge, allow them to cool completely. Stack them with a piece of parchment paper between each crepe to prevent sticking. Place the stack in an airtight container or a zip-top bag and refrigerate for 2-3 days.
* Freezing: For longer storage, crepes freeze beautifully. Stack cooled crepes with parchment paper between each one. Wrap the entire stack tightly in plastic wrap, then an additional layer of aluminum foil. Label and date, then freeze for up to 1-2 months. This method helps maintain their tender texture and delicious flavor .
* Reheating: To reheat, gently warm refrigerated crepes in a microwave (covered with a damp paper towel to prevent drying), a lightly greased skillet over low heat (flipping once), or in a warm oven (covered with foil). The goal is to warm them through while keeping them tender and flexible.
Adaptations for Special Diets
This gluten free crepes recipe is already designed with flexibility in mind:
* Dairy-Free: As mentioned in the ingredients, simply use plain unsweetened almond milk , cashew, or coconut milk, and opt for vegan butter like Smart Balance.
* Savory Crepes: Easily adapt by omit ting the sugar and vanilla extract from the batter . You can add a pinch of salt or your preferred dried herbs to complement savory fillings.
* Vegan Variation: While this recipe uses eggs , a vegan variation would involve replacing the eggs with a “flax egg” (1 tbsp ground flaxseed meal + 3 tbsp water per egg, allow to sit for 5 minutes) and ensuring all other ingredients are dairy-free. However, the texture may vary slightly due to the egg’s unique binding properties.
Conclusion
And there you have it! The definitive guide to crafting utterly perfect Gluten Free Crepes that are not only delicious but also wonderfully robust and tear-free. With the simple addition of psyllium husk , we’ve tackled one of the biggest challenges in gluten-free baking , giving you the confidence to create light, tender, subtly sweet (or savory!) crepes every time.
I encourage you to embrace this recipe, experiment with all the delightful serving ideas , and discover your own favorite fillings. No more fragile, frustrating attempts – just beautiful, flexible crepes ready for any culinary adventure. Go forth, print this recipe card , and share your gorgeous gluten free crepes creations with the world! Happy cooking!
FAQ
Here are answers to some of the most common questions I get about making gluten free crepes :
What is the best gluten-free flour blend for this Gluten Free Crepes recipe, and why?
I recommend a high-quality all-purpose gluten-free flour blend, especially one that already contains xanthan gum . Blends made with a combination of rice flours, tapioca starch, and potato starch tend to give the best results. Our secret ingredient, psyllium husk , works to enhance the structure and pliability, compensating for any variability in your chosen blend.
How do I prevent my gluten free crepes from tearing?
The key to preventing tears is the psyllium husk powder in this recipe! It acts as a powerful binder, making the crepes pliable. Additionally, ensure your batter rests for at least an hour (or longer) in the fridge, your pan is properly preheated to medium heat , and you’re patient when flipping – wait until the edges are set and the surface is dry.
How can I adapt this Gluten Free Crepes recipe for different dietary needs (dairy-free, vegan, savory)?
For dairy-free crepes, use plain unsweetened almond milk (or cashew/coconut milk) and a vegan butter substitute like Smart Balance. For savory crepes , simply omit the sugar and vanilla extract from the batter and consider adding a pinch of salt or some dried herbs instead. A vegan variation would also require replacing the eggs with a flax egg (1 tbsp ground flaxseed meal + 3 tbsp water per egg), though texture may vary.
What are some creative sweet and savory filling ideas?
For sweet crepes, think Nutella and bananas , fresh strawberries with whipped cream , or simply a dusting of powdered sugar and lemon. For savory, consider scrambled eggs and bacon , smoked salmon with cream cheese, or a spinach and feta filling. The possibilities are endless!
How should I store and reheat gluten free crepes?
Cool cooked crepes completely, then stack them with parchment paper in between each to prevent sticking. Store in an airtight container in the fridge for 2-3 days. For longer storage, freeze stacks wrapped tightly in plastic wrap and then foil for 1-2 months. Reheat gently in a microwave (covered), a lightly greased skillet, or a warm oven until tender.
How can I adjust the batter if it’s too thick or too thin?
If your batter is too thick , slowly whisk in milk or water, one tablespoon at a time, until it reaches the consistency of heavy cream. If it’s too thin, add a teaspoon of gluten-free flour or a tiny pinch more psyllium husk (use caution with psyllium husk, as too much can make it gummy).
Can I use a blender instead of a hand mixer?
Absolutely! A blender works wonderfully for this Gluten Free Crepes recipe. Just combine all ingredients and blend on medium speed for about 30-60 seconds until the batter is completely smooth. This can even help ensure the psyllium husk is fully incorporated.
What kind of pan should I use for gluten free crepes?
A high-quality non-stick pan is essential for non-stick results. Ideally, a dedicated crepe pan with low, sloped sides makes flipping incredibly easy. Ensure it’s well-greased with cooking spray or butter between each crepe.

Perfect Gluten Free Crepes: No-Tear Recipe with Psyllium Husk
Ingredients
Equipment
Method
- In a large bowl, whisk the eggs thoroughly until light and airy.
- Add the milk, water, gluten-free all-purpose flour, xanthan gum (if using), granulated sugar (if using), vanilla extract (if using), melted unsalted butter, and psyllium husk powder to the bowl. Mix on medium speed for 1 minute until the batter is smooth and has a consistency similar to heavy cream.
- Cover the bowl and refrigerate the batter for at least 1 hour, or up to 48 hours, to allow the flour and psyllium husk to fully hydrate.
- Once the batter has rested, generously spray a non-stick or crepe pan with gluten-free cooking spray. Fully preheat the pan over medium heat until a drop of water sizzles and evaporates immediately.
- Pour exactly ¼ cup of batter into the center of the hot pan. Immediately pick up the pan and gently swirl it in a circular motion to spread the batter evenly into a thin, round circle.
- Cook the crepe over medium heat for 30-45 seconds until the edges are set and slightly crispy, the surface is dull with dry bubbles, and the bottom is lightly browned. Gently loosen the edges with a thin spatula.
- Carefully flip the crepe over and cook for about 30 more seconds until the other side is lightly browned. Repeat with the remaining batter, greasing the pan lightly between each crepe as needed.
- Slide each cooked crepe onto a plate. Serve rolled or folded into triangles with your favorite fillings or toppings. Enjoy!
Notes

Taya Bennett is the founder of YumEasyMeals, a platform dedicated to easy, delicious, and quick-to-prepare recipes for busy families. Passionate about everyday cooking, she simplifies meals with practical, accessible, and always delicious ideas.
Discover her creations at: yumeasymeals.com