Making a truly delicious gluten free pizza crust at home can feel like a challenge, but I promise you, it is absolutely achievable. My recipe delivers a wonderfully crispy yet chewy crust that stands up to all your favorite toppings, rivaling even traditional wheat-based pizzas. If you’re looking for inspiration, consider trying it with a hot sausage cast iron skillet pan pizza. This is your guide to creating a foolproof gluten free pizza crust that will make pizza night a joyous success in your kitchen.
Why You’ll Love This Gluten-Free Pizza Crust
Recipe
This recipe truly shines with a special touch. My unique twist is the optional addition of certified gluten-free diastatic malt powder to the dry ingredients. This ingredient, while optional, significantly enhances both the browning and the overall flavor of your pizza crust, making it taste truly exceptional.
The diastatic malt powder provides enzymes. These enzymes help convert starches into simpler sugars. The yeast then feeds on these sugars, which leads to a better rise and more beautiful browning in the oven. It also contributes to a wonderfully complex and slightly sweet flavor profile in the final crust.
The texture is improved. You will enjoy a crust that is both crispy and delightfully chewy.
The flavor is enhanced. Expect a slightly sweet, complex taste that complements your toppings beautifully.
It is easy to make. This recipe is straightforward, even for novice bakers.
It is family-friendly. Everyone at the table will love this pizza.
It uses simple ingredients. You will find all the necessary items readily available.
Ingredients Needed
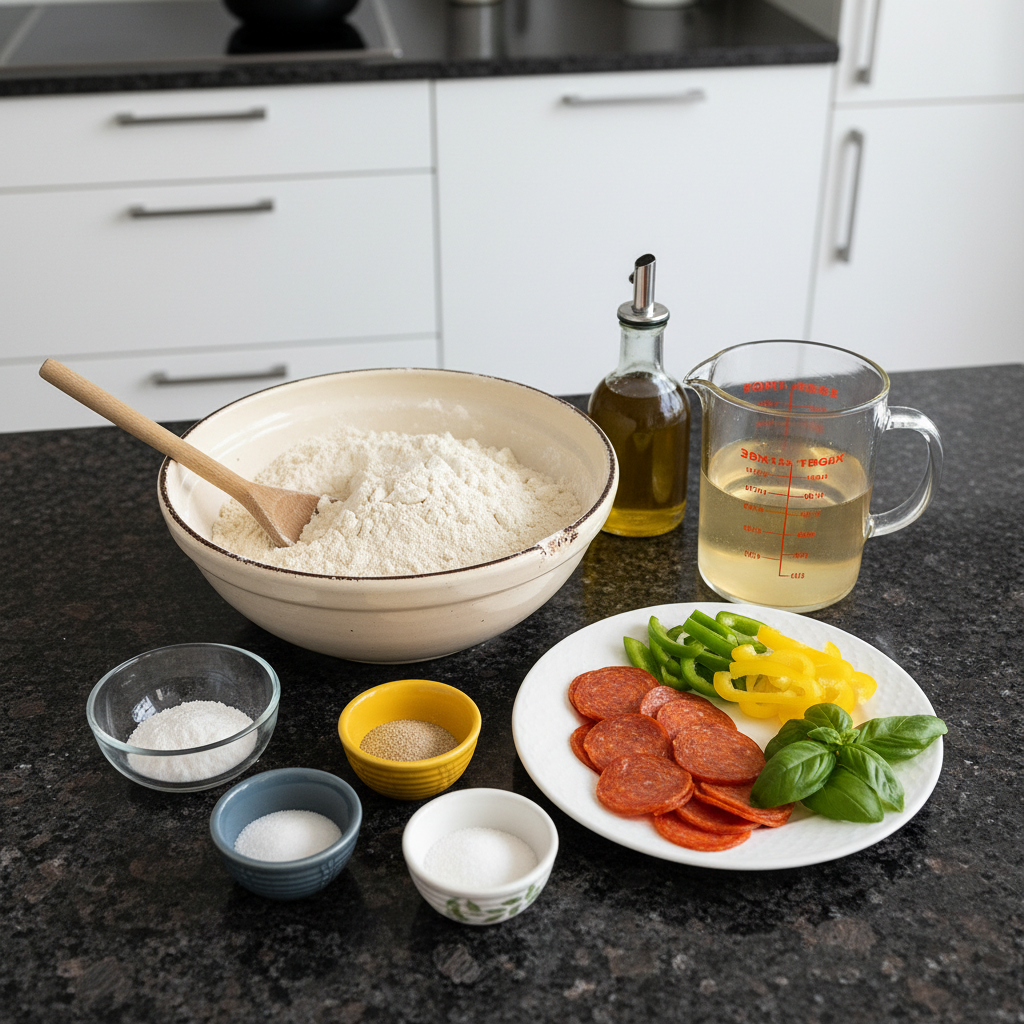
* 3 cups all purpose gluten free flour blend ((See Recipe Notes) plus more for sprinkling)
* 3 teaspoons xanthan gum (omit if your blend already contains it)
* 1 tablespoon instant yeast
* 1 1/2 teaspoons granulated sugar
* 1 1/2 teaspoons kosher salt
* 1 1/8 cups warm water ((about 95°F) (See Recipe Notes about chewier crust))
* 4.5 tablespoons extra-virgin olive oil ((plus more for brushing))
* Your favorite pizza toppings
Ingredient Notes & Substitutions
For your gluten-free flour blend, using a high-quality product is crucial for the best results. I highly recommend blends like Bob’s Red Mill 1-to-1 Baking Flour or King Arthur Gluten-Free Measure for Measure Flour, which are widely available in the US market and produce excellent texture in this gluten free pizza crust recipe. When I refer to “all-purpose” gluten-free flour, I mean a pre-mixed blend designed to mimic the properties of wheat flour, usually containing a combination of rice flours, starches, and gums.
Some gluten-free flour blends already contain xanthan gum. If your specific blend includes it, you can simply omit the separate addition of three teaspoons as listed.
For those looking to create a dairy-free or vegan pizza, there are fantastic dairy-free cheese options available. You might even want to make your own with our best vegan parmesan cheese recipe. Brands like Daiya, Miyoko’s Creamery, and Violife offer plant-based cheeses that melt beautifully.
You can enhance the chewiness of your gluten free pizza crust by including Expandex modified tapioca starch. If you do not have Expandex, regular tapioca starch or tapioca flour can also be used to a similar effect. As an alternative to xanthan gum, you could consider using konjac powder, though the ratios may need slight adjustment.
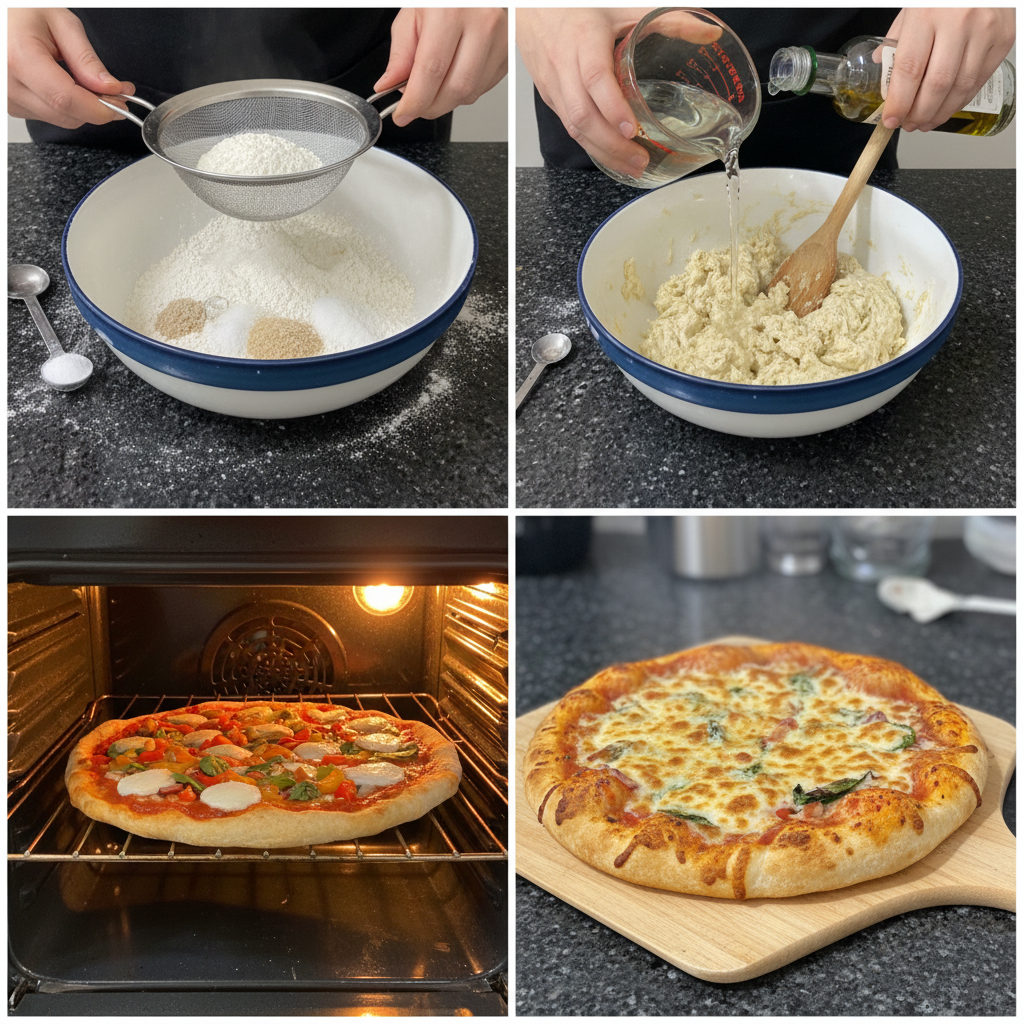
How to Make Gluten Free Pizza Crust
Creating this amazing gluten free pizza crust involves a few simple, yet specific, steps. Follow along carefully for the best results.
Preparing the Dry Ingredients
First, gather the dry ingredients. In the bowl of your stand mixer, fitted with the paddle attachment, or your food processor, fitted with the plastic blade, combine the flour, xanthan gum, and any optional Expandex. Add the instant yeast and granulated sugar. Whisk these dry ingredients together thoroughly with a separate handheld whisk to ensure they are well combined. Next, add the kosher salt and whisk again. This ensures even distribution of all the leavening and seasoning elements.
Mixing the Dough
Now it is time to add the liquids. Pour in the warm water, aiming for about 95°F, and the extra-virgin olive oil. Mix these on medium speed in your stand mixer. If you are using a food processor, pulse until the pizza dough just begins to come together into a cohesive mass.
Increase the mixer to high speed or turn on your food processor. Process the dough for about 3 minutes. The dough will transform from a shaggy ball into something that appears whipped and aerated. This whipping action is crucial as it incorporates air into the gluten-free dough, which makes it much easier to handle after chilling. It also contributes significantly to a better rise in the oven.
Rising and Chilling the Dough
Carefully transfer the whipped pizza dough to an oiled container with a tight-fitting lid or a generously greased bowl. Lightly spray the surface of the dough with cooking oil spray, then cover it tightly.
Place the covered dough in a warm, draft-free area to rise. Allow it to rise until it is about 150% of its original volume, which usually takes approximately one hour. Alternatively, you can refrigerate the dough for up to 3 days, making it a perfect make-ahead option.
Preheating the Oven and Preparing to Bake
When you are ready to make your gluten free pizza crust, begin by placing a pizza stone or an overturned rimmed baking sheet in your oven. Preheat the oven to 400°F. Ensuring your baking surface is hot is key to achieving a crispy bottom crust.
If you have refrigerated your dough, work with it straight from the refrigerator. If you are using dough that has just risen at room temperature, it is best to place the tightly sealed dough in the refrigerator to chill for at least 15 minutes before working with it. Chilled dough is significantly easier to handle and shape.
Shaping the Gluten Free Pizza Crust
Lightly flour a clean surface and gently place the chilled dough onto it. Sprinkle the top of the dough lightly with a bit more flour. Gently knead the dough until it feels smoother and is no longer sticky to the touch. Then, divide the dough into two equal portions. Remember to cover the unused portion to prevent it from drying out while you work on the first.
With floured fingers, roll the first piece of dough into a smooth ball. Press it down into a flat disk. Begin pressing the dough from the center outwards with your floured fingers, working to create a disk with a slightly raised edge. Continue pressing the dough with your floured fingers towards the edge until you have created about a 10-inch round. Move the dough frequently on your floured surface, sprinkling with more flour as necessary to prevent any sticking.
Place a large piece of unbleached parchment paper onto your pizza peel or the cutting board that you plan to use to transfer the pizza dough to the oven. Gently lift the shaped dough and place it onto the parchment paper. While the dough is on the paper, you can use a small rolling pin or a pizza roller to smooth out any uneven marks left by your fingers. The finished gluten free pizza crust will typically end up being about 11- to 12-inches in diameter.
Par-Baking and Topping
Using a pastry brush or your fingers, paint the entire top of the shaped dough with extra-virgin olive oil. Be sure to generously coat the edges; this helps with browning and flavor.
Transfer the dough on its parchment paper to the pizza peel or directly onto the preheated baking sheet in the oven. Bake the dough plain for 5 to 7 minutes, or until the crust has just begun to crisp on the underside. This is called par-baking and it provides a sturdy base.
Remove the par-baked crust from the oven using a pizza peel or a large spatula. At this stage, the par-baked crust can be cooled completely, wrapped tightly, and frozen for at least one month. Simply defrost it at room temperature when you are ready to use it, and then continue with the recipe as written.
To continue preparing your pizza, add your favorite pizza toppings to the par-baked crust. Return the pizza to the hot oven. Continue baking for another 5 to 7 minutes, or until any cheese is beautifully melted and bubbly, and the edges of the gluten free pizza crust have browned and puffed up.
Finally, remove the finished pizza from the oven using your pizza peel or large spatula. Allow it to set for 5 minutes before slicing and serving. This short resting period helps the cheese set and prevents toppings from sliding off.
Choosing the Best Gluten-Free Flour
Selecting the right gluten-free flour blend is paramount to achieving a successful gluten free pizza crust. Not all gluten-free flours are created equal, and their compositions significantly impact the texture and rise of your dough. Many all-purpose gluten-free blends combine various flours and starches to mimic the properties of wheat flour.
When I am baking a gluten free pizza crust, I often reach for specific brands known for their consistent quality. Bob’s Red Mill 1-to-1 Baking Flour is a fantastic choice, widely available and designed for easy substitution in recipes. King Arthur Gluten-Free Measure for Measure Flour is another excellent option, yielding reliable results. For those seeking a truly authentic, chewier texture similar to traditional Italian pizza, Caputo Fioreglut gluten-free flour is a premium blend that pizza enthusiasts swear by, though it might be a bit harder to find.
Individual flours play distinct roles in these blends. Rice flour, often a base ingredient, provides structure. Tapioca starch and potato starch contribute to the chewiness and crispness of the crust. These starches help create that desirable slightly elastic quality in the dough. Understanding the different flours and their impact on texture allows you to choose the best blend for your specific gluten free pizza crust and baking goals. If your blend is too heavy on just one type of flour, like solely rice flour, you might end up with a denser or more crumbly result. A good blend achieves balance.
Pro Tips & Troubleshooting
Here are some insights from my kitchen to help you master your gluten free pizza crust.
Pro Tips
For a chewier crust, consider adding Expandex modified tapioca starch. If Expandex is unavailable, regular tapioca starch or tapioca flour can also improve chewiness.
If you are using active dry yeast instead of instant yeast, adjust the quantity as directed on the package and proof it first in a little warm water with a pinch of sugar until foamy.
If your chosen gluten-free flour blend lacks xanthan gum, or if you prefer an alternative, konjac powder can be used as a substitute for xanthan gum.
Always use a pizza stone or a preheated baking sheet. This critical step ensures a beautifully crispy bottom crust for your gluten free pizza.
Par-bake the crust as directed. This creates a sturdier base, making it much easier to apply your toppings without the dough becoming soggy or difficult to handle.
Brush the edges of your gluten free pizza crust generously with olive oil. This step adds extra flavor and promotes excellent browning, giving your crust a golden finish.
Do not skip chilling the dough. Chilled dough is significantly less sticky and much easier to handle and shape, especially with gluten-free formulations.
Common Mistakes to Avoid
Avoid measuring flour incorrectly. I always recommend weighing your gluten-free flour for accuracy, as volume measurements can vary widely.
Do not use a low-quality gluten-free flour blend. The quality of your flour directly impacts the texture and flavor of your gluten free pizza crust.
Be careful not to add too much oil or water. Gluten-free dough can be sensitive to hydration levels, so stick to the recipe proportions.
Avoid over-kneading the dough. Unlike wheat flour, gluten-free dough does not develop gluten, so excessive kneading is unnecessary and can make it tough.
Ensure the dough rises properly. Giving it adequate time in a warm, draft-free place is essential for a light and airy texture.
Do not use toppings that are too wet. Excess moisture can make your gluten free pizza crust soggy, especially in the center.
Serving & Storage
Once your delicious gluten free pizza crust is baked to perfection, the possibilities are endless for serving and storage.
Serving Ideas
Enjoy a classic Margherita pizza with simple tomato sauce, fresh mozzarella, and aromatic basil.
Try a savory pepperoni and mushroom pizza for a timeless favorite, or perhaps explore other delicious additions like the meatballs and sausage found in our juicy chicken parm meatball subs.
Load up your gluten free pizza with roasted vegetables for a colorful and nutritious vegetarian option.
Serve your pizza with a crisp side salad and a glass of your favorite wine for a complete meal.
Storage and Make-Ahead
Raw pizza dough can be kept refrigerated for up to 3 days, providing flexibility for your meal planning. For longer storage, you can freeze the raw dough.
Par-baked crusts are also excellent for make-ahead convenience. They can be frozen for up to 1 month. Simply defrost at room temperature when you are ready to use it, and then continue with the recipe as written.
Leftover baked pizza can be reheated in the oven for best crispness or quickly warmed in the microwave.
Conclusion
I am thrilled to share this amazing gluten free pizza crust recipe with you. It truly redefines what is possible for gluten-free baking. The optional addition of certified gluten-free diastatic malt powder is a game-changer, enhancing both the browning and providing a wonderfully complex, slightly sweet flavor to your pizza. This method ensures a perfectly crispy yet chewy crust every single time. I encourage you to try this recipe in your own kitchen and experiment with all your favorite toppings. Get ready to elevate your pizza nights and discover the joy of a truly fantastic gluten free pizza crust. Share your creations and explore my other delicious gluten-free recipes!
FAQ
What does “all-purpose gluten-free flour” mean for this recipe?
For this recipe, “all-purpose gluten-free flour” refers to a pre-mixed commercial blend designed to be a direct substitute for wheat flour in baking. These blends typically contain a combination of different gluten-free flours and starches, such as rice flour, tapioca starch, and potato starch, often with a binder like xanthan gum.
How can I make the dough by hand if I don’t have a mixer?
You can absolutely make this dough by hand. Simply combine the dry ingredients in a large bowl, then add the water and olive oil. Mix with a sturdy spoon or your hands until a shaggy dough forms. While you cannot “whip” it as intensely as a mixer, knead the dough vigorously for about 5-7 minutes until it is smooth and well combined.
What can I do to prevent a crumbly crust?
A crumbly crust can often be a sign of too little moisture or an imbalance in your flour blend. Ensure your water measurement is accurate, and consider adding a bit more olive oil or Expandex if you find your blend tends to be dry. Using a high-quality, balanced gluten-free flour blend also makes a big difference in preventing crumbliness.
How do I know when the dough has risen enough?
The dough has risen enough when it is about 150% of its original volume, which means it has visibly increased by about half. It should look noticeably puffier and feel light. A good test is to gently poke it; if the indentation slowly springs back, it is ready.
How do I bake the pizza if I do not have a pizza stone?
If you do not have a pizza stone, a heavy-duty, overturned rimmed baking sheet works perfectly. Place it in the oven during preheating so it gets very hot. This hot surface will help create a crispy bottom crust just like a pizza stone would.
How can I prevent the dough from sticking while shaping it?
To prevent the dough from sticking, generously dust your work surface, your hands, and the top of the dough with extra gluten-free flour. Keep a small bowl of flour nearby and re-flour as needed while you are pressing and shaping the dough.
Can I make this dough by hand?
Yes, you can make this gluten free pizza dough by hand. Combine dry ingredients, then wet, and mix with a spoon or your hands until well incorporated. Knead for about 5 to 7 minutes to ensure everything is evenly distributed.
Why is my crust crumbly?
Your crust might be crumbly if there is not enough moisture in the dough or if your gluten-free flour blend lacks sufficient binding agents. Double-check your liquid measurements and ensure you included xanthan gum or a suitable substitute. Using a high-quality, balanced gluten-free flour blend designed for baking is also key.

Best Gluten-Free Pizza Crust Recipe (Easy!)
Ingredients
Equipment
Method
- In the bowl of your stand mixer, fitted with the paddle attachment, or your food processor, fitted with the plastic blade, combine the flour, xanthan gum, and any optional Expandex. Add the instant yeast and granulated sugar.
- Whisk these dry ingredients together thoroughly with a separate handheld whisk to ensure they are well combined. Next, add the kosher salt and whisk again. This ensures even distribution of all the leavening and seasoning elements.
- Pour in the warm water, aiming for about 95°F, and the extra-virgin olive oil. Mix these on medium speed in your stand mixer. If you are using a food processor, pulse until the pizza dough just begins to come together into a cohesive mass.
- Increase the mixer to high speed or turn on your food processor. Process the dough for about 3 minutes. The dough will transform into something that appears whipped and aerated. This whipping action is crucial as it incorporates air into the gluten-free dough, making it much easier to handle after chilling and contributing to a better rise.
- Carefully transfer the whipped pizza dough to an oiled container with a tight-fitting lid or a generously greased bowl. Lightly spray the surface of the dough with cooking oil spray, then cover it tightly.
- Place the covered dough in a warm, draft-free area to rise until it is about 150% of its original volume, which usually takes approximately one hour. Alternatively, you can refrigerate the dough for up to 3 days, making it a perfect make-ahead option.
- When you are ready to make your gluten free pizza crust, begin by placing a pizza stone or an overturned rimmed baking sheet in your oven. Preheat the oven to 400°F. Ensuring your baking surface is hot is key to achieving a crispy bottom crust.
- If you have refrigerated your dough, work with it straight from the refrigerator. If you are using dough that has just risen at room temperature, place the tightly sealed dough in the refrigerator to chill for at least 15 minutes before working with it, as chilled dough is significantly easier to handle and shape.
- Lightly flour a clean surface and gently place the chilled dough onto it. Sprinkle the top of the dough lightly with a bit more flour. Gently knead the dough until it feels smoother and is no longer sticky to the touch. Then, divide the dough into two equal portions, remembering to cover the unused portion to prevent it from drying out.
- With floured fingers, roll the first piece of dough into a smooth ball. Press it down into a flat disk. Begin pressing the dough from the center outwards with your floured fingers, working to create a disk with a slightly raised edge. Continue pressing the dough with your floured fingers towards the edge until you have created about a 10-inch round. Move the dough frequently on your floured surface, sprinkling with more flour as necessary to prevent any sticking.
- Place a large piece of unbleached parchment paper onto your pizza peel or the cutting board. Gently lift the shaped dough and place it onto the parchment paper. While the dough is on the paper, you can use a small rolling pin or a pizza roller to smooth out any uneven marks left by your fingers. The finished gluten free pizza crust will typically end up being about 11- to 12-inches in diameter.
- Using a pastry brush or your fingers, paint the entire top of the shaped dough with extra-virgin olive oil. Be sure to generously coat the edges; this helps with browning and flavor.
- Transfer the dough on its parchment paper to the pizza peel or directly onto the preheated baking sheet in the oven. Bake the dough plain for 5 to 7 minutes, or until the crust has just begun to crisp on the underside. This par-baking provides a sturdy base.
- Remove the par-baked crust from the oven using a pizza peel or a large spatula. At this stage, the par-baked crust can be cooled completely, wrapped tightly, and frozen for at least one month. Simply defrost it at room temperature when ready to use.
- To continue preparing your pizza, add your favorite pizza toppings to the par-baked crust. Return the pizza to the hot oven. Continue baking for another 5 to 7 minutes, or until any cheese is beautifully melted and bubbly, and the edges of the gluten free pizza crust have browned and puffed up.
- Finally, remove the finished pizza from the oven using your pizza peel or large spatula. Allow it to set for 5 minutes before slicing and serving. This short resting period helps the cheese set and prevents toppings from sliding off.
Notes

Taya Bennett is the founder of YumEasyMeals, a platform dedicated to easy, delicious, and quick-to-prepare recipes for busy families. Passionate about everyday cooking, she simplifies meals with practical, accessible, and always delicious ideas.
Discover her creations at: yumeasymeals.com