
There is something undeniably joyful about a perfectly crispy, cheesy, and savory bite-sized snack. When you are looking for that ultimate party food, game day treat, or simply a fun family appetizer, these Loaded Tater Tot Appetizers truly hit the mark. They are a guaranteed crowd-pleaser, delivering all the beloved flavors of a loaded baked potato in a convenient, crunchy cup. My recipe focuses on achieving an exceptional texture, ensuring your tater tot cups are always crispy, never soggy, and ready to be piled high with your favorite toppings.
Why You’ll Love This Recipe
My kitchen secret for these amazing Loaded Tater Tot Appetizers lies in a unique two-stage baking and pressing technique. I found that baking the tater tots until they are just firm, before pressing them into cups, creates a much sturdier base. This initial bake prepares the tots to hold their shape beautifully.
Then, after pressing, the second bake cycle is crucial. This ensures maximum crispness all the way through, particularly preventing that dreaded soggy bottom often found in other tater tot cup recipes. This method effectively minimizes moisture buildup, giving you a delightfully crunchy shell every time.
Beyond the fantastic crispiness, you will love how quick and easy these are to assemble. They are perfect for those busy weeknights or last-minute gatherings. This recipe is wonderfully family-friendly, appealing to both kids and adults, making it a guaranteed hit. Plus, using simple, readily available ingredients, it is a truly budget-friendly option for any occasion.
Ingredients Needed
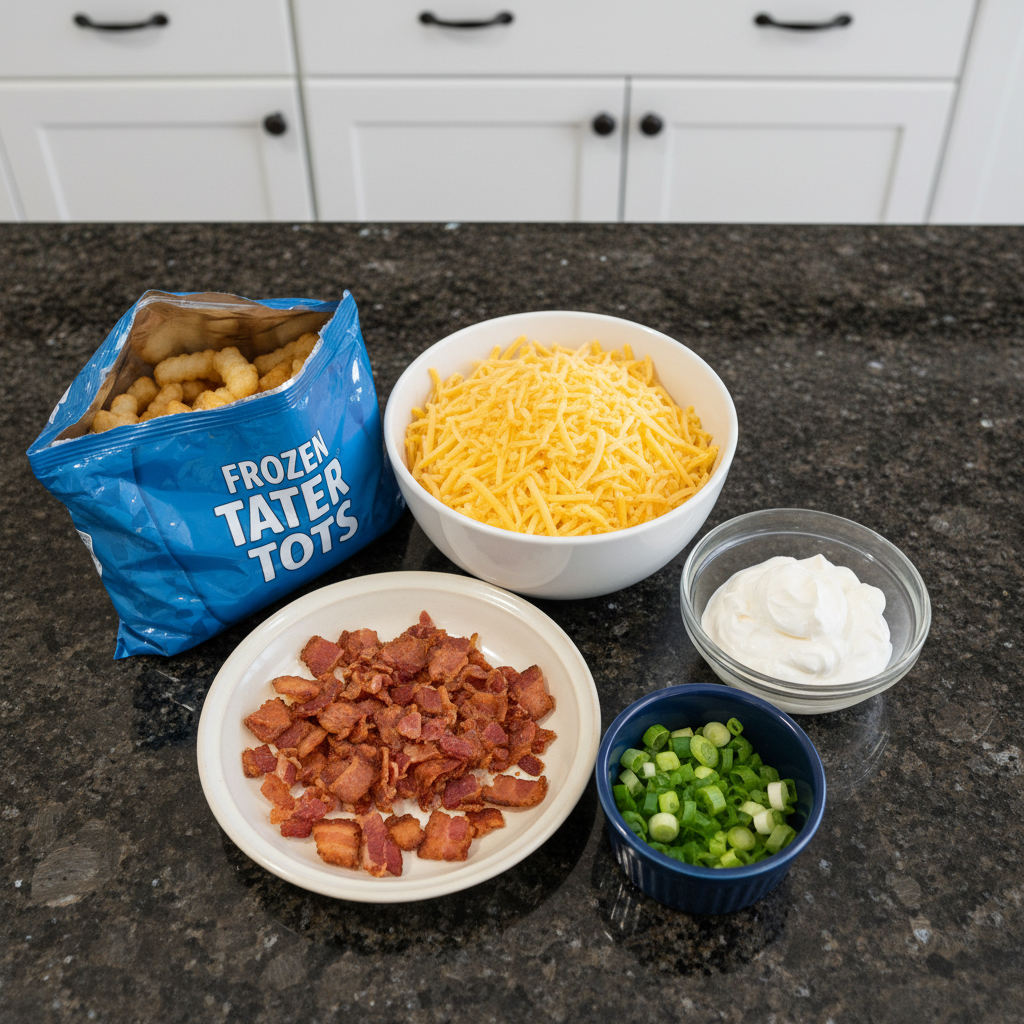
- 48-60 frozen tater tots (16-oz bag)
- 3/4 cup cheddar cheese, freshly shredded (see notes for substitutions and tips)
- 1/2 cup sour cream
- 4 slices bacon, cooked and crumbled
- 2 green onions, sliced (green part only)
Ingredient Notes & Substitutions
Cheese: I always recommend freshly shredded cheddar cheese for these loaded tater tot appetizers. Pre-shredded varieties often contain anti-caking agents that can prevent them from melting as smoothly and beautifully as fresh cheese. If cheddar is not your preference, Monterey Jack or Colby Jack are excellent alternatives. For a dairy-free option, look for a good quality plant-based shredded cheese that melts well.
Bacon: If you are looking for alternatives to traditional bacon, turkey bacon works nicely and offers a leaner option. You can also use vegetarian bacon bits for a quick and meat-free twist, though I find freshly cooked bacon adds the best flavor and texture.
Tater Tots: While this recipe is perfectly calibrated for traditional frozen tater tots, you can certainly experiment. Sweet potato tots can also be used, offering a slightly different flavor profile. Just be aware that cooking times might vary slightly depending on the brand and type of tots you choose. For other fun, potato-based side dishes, check out this crockpot hamburger potato casserole recipe.
How to Make Loaded Tater Tot Appetizers
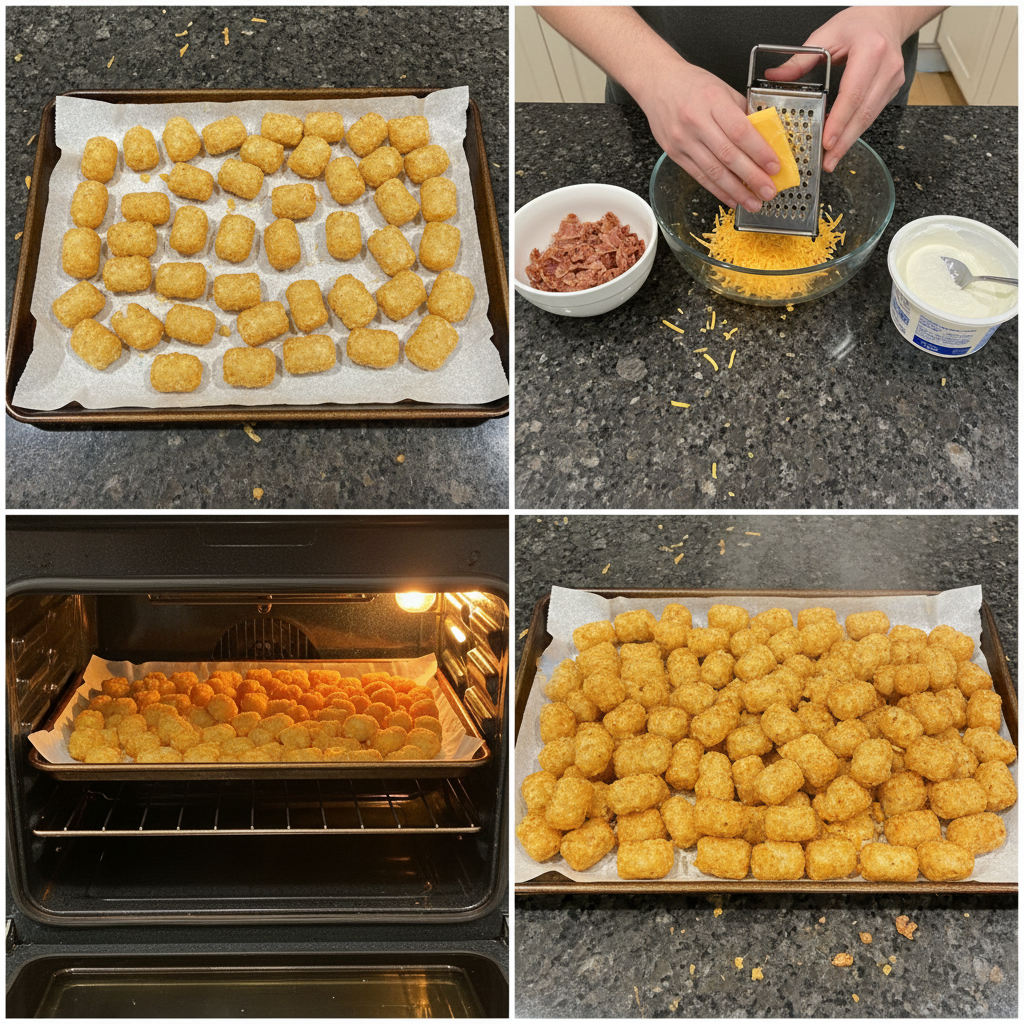
Making these crispy loaded tater tot appetizers is straightforward with my simple steps. Prepare to create perfect handheld appetizer cups for your next game day or gathering.
Prepping for Perfection
First, preheat your oven to 450ºF. This high temperature is key to achieving that initial crispness. Then, generously spray your muffin pan cups with cooking spray. This crucial step helps prevent sticking and ensures your tater tot cups release easily.
The Crispy Foundation
For a mini-sized muffin pan, place 2-3 tater tots in each muffin cup. If you are using a regular-sized muffin pan, place 4-5 tots in each cup. Arrange the muffin pan on the bottom rack of your oven and bake for 10 minutes. The tots should be lightly golden and just starting to firm up. Remove the pan from the oven.
Forming the Tot Cups
Now for the unique twist that makes these loaded tater tot appetizers so special. Spray the bottom of a shot glass or a small juice glass with cooking spray. Carefully place the bottom of the sprayed glass into a muffin cup, leaving a small gap between the glass and the cupcake pan opening. This gap allows steam to escape, which is vital for crispiness. Gently twist the glass or container until the edges of the potatoes are close to the top of the muffin tin opening, forming a neat potato cup. This gentle twisting motion helps create smooth, even cups. Return the muffin pan to the oven and bake for an additional 15 minutes, or until the potato cups are deep golden brown and wonderfully crispy.
Cheese Please!
Remove the pan from the oven. Add 1 tablespoon of freshly shredded cheddar cheese to each potato cup. Return the pan to the oven and bake for another 4-5 minutes, or until the cheese has melted into a gooey, savory layer. Transfer the loaded tater tot cups to a platter and let them cool for about 5 minutes. This cooling period helps them firm up and makes them easier to handle. If you’re looking for a great main course to follow these appetizers, consider a garlic butter chicken recipe.
Final Flourishes
Once slightly cooled, garnish and top your loaded tater tot appetizer cups with a dollop of sour cream, a sprinkle of cooked and crumbled bacon, and a generous amount of sliced green onions. Serve these delightful Super Bowl appetizer treats warm and enjoy the applause!
Getting Crispy Tots: Brand and Technique
When it comes to achieving optimal crispness for your tater tot cups, the brand and type of tater tots you choose can make a difference. While many frozen tater tots work well, some brands are known for their superior crisping abilities. Brands like Ore-Ida and Alexia often produce consistently crispy results due to their processing. Look for varieties that mention par-frying before freezing, as this can contribute to a crispier texture in the final bake. Checking the ingredients list for simpler ingredients can also be a good indicator of quality. For more detailed information on potato processing and crisping techniques, you can explore resources on the history and making of Tater Tots.
One common concern is tater tots sticking to the glass during the pressing step. While thoroughly spraying the bottom of your shot glass or pressing tool with cooking spray is the primary defense, sometimes stubborn tots need a little extra persuasion. If you find them sticking, ensure your glass is truly coated well. You can also try using a small tart tamper, which sometimes has a smoother, less porous surface. If a tot still clings, gently twist the glass a bit more, or use a thin, offset spatula to carefully loosen the edges before removing the glass. Sometimes, letting the muffin tin cool for just a minute or two after the initial bake can also help, as the tots firm up slightly.
Pro Tips & Troubleshooting
Pro Tips
Do not skip the initial pre-bake. This first bake is absolutely key to preventing soggy tots and building a strong foundation for your potato cups.
Always use freshly shredded cheese. It melts beautifully without the grainy texture or oil separation that can come with pre-shredded options.
Spray both the muffin tin and your pressing glass generously with cooking spray. This is your best defense against sticking.
When pressing the tots, remember to leave a small gap between the glass and the muffin tin opening. This allows steam to escape, promoting a crisper final product.
For an extra boost of crispiness, broil the loaded tater tot appetizers for the last minute of baking, but watch them very carefully to prevent burning.
Common Mistakes to Avoid
Using pre-shredded cheese is a common mistake. It often contains anti-caking agents that prevent it from melting as smoothly as freshly shredded varieties.
Overcrowding the muffin tin with too many tater tots can lead to uneven cooking. Stick to the recommended 2-3 for mini pans or 4-5 for regular.
Pressing too hard with the glass can turn your potential cup into a pancake. Aim for a firm, but gentle press to form the cup shape.
Skipping the cooling period after baking the cheesy loaded tater tot cups. The tots need those 5 minutes to firm up, making them much easier to remove and handle.
Serving & Storage
Serving Ideas
These Loaded Tater Tot Appetizers are fantastic on their own, but they truly shine with a few extra touches. Consider setting up a topping bar at your party; guests love customizing their own tater tot cups. Offer a variety of dipping sauces like creamy ranch dressing, smoky BBQ sauce, spicy Dijon mustard, or a fresh salsa with jalapeño. For a lighter accompaniment, serve them alongside a simple green salad or a classic macaroni salad or perhaps a best Italian pasta salad.
Storage and Make-Ahead
To make these loaded tater tot appetizers ahead of time, you can complete all steps through pressing the tot cups. Then, cover the muffin tin tightly with plastic wrap and refrigerate for up to 24 hours. When ready to bake, add about 5-10 minutes to the second bake time to account for the chilled tots. Alternatively, you can fully bake the tot cups (without cheese and toppings), let them cool completely, then freeze them in a single layer before transferring to a freezer-safe bag for up to one month. Thaw slightly before the final bake with cheese and toppings.
Leftover baked tater tot cups should be stored in an airtight container in the refrigerator for up to 3 days. For best reheating results, preheat your oven to 350ºF and bake the tots for 10-15 minutes, or until heated through and crispy. An air fryer is also an excellent option; reheat at 375ºF for 5-7 minutes, shaking the basket halfway through. While you can microwave them, the texture will be significantly less crispy.
Conclusion
There you have it: my ultimate recipe for perfectly crispy Loaded Tater Tot Appetizers. With my unique pre-bake and press technique, you will achieve an incredibly satisfying crunch every single time, making these a standout dish. They are surprisingly simple to make, using readily available ingredients, making them accessible even for beginner cooks. Do not be afraid to get creative with your toppings; these tot cups are a versatile canvas for flavor. I encourage you to share this recipe with your friends and family and watch them disappear at your next gathering!
FAQ
Can I make this loaded tater tots recipe ahead of time?
Yes, you can. You can pre-bake and press the tater tot cups, then refrigerate them in the muffin tin, covered, for up to 24 hours. Add an extra 5-10 minutes to the second bake time when you are ready to finish them.
How do I store and reheat leftover tater tot appetizer cups?
Store leftover baked tater tot cups in an airtight container in the refrigerator for up to 3 days. To reheat, bake in a 350ºF oven for 10-15 minutes or air fry at 375ºF for 5-7 minutes until crispy and heated through. Microwaving is an option, but they will not be as crispy.
How can I keep the appetizers warm for a party?
You can keep the loaded tater tot appetizers warm for a party by placing them in a slow cooker on the “warm” setting. Line the slow cooker with parchment paper to prevent sticking. Alternatively, keep them in a lightly warmed oven at its lowest setting (around 170-200°F) until serving.
What is the best way to prevent tater tots from sticking to the glass when making the cups?
The best way is to generously spray the bottom of your shot glass or pressing tool with cooking spray before each press. If they still stick, ensure you are leaving a small gap for steam to escape and try gently twisting the glass. You can also allow the muffin tin to cool for a minute after the first bake before pressing.
Can I use sweet potato tots or frozen hash browns instead of tater tots?
Yes, you can experiment with sweet potato tots, though cooking times might vary slightly. For frozen hash browns, you would typically need to press them into the muffin tin raw and bake longer, possibly binding them with a little cheese or egg, so the technique would need significant modification.
What are the specific cooking times/temperatures for reheating in an air fryer?
To reheat loaded tater tot appetizer cups in an air fryer, preheat the air fryer to 375ºF. Place the cold tot cups in a single layer in the air fryer basket and cook for 5-7 minutes, shaking the basket halfway through, until they are hot and crispy.

Loaded Tater Tot Appetizers
Ingredients
Equipment
Method
- Preheat your oven to 450ºF and generously spray your muffin pan cups with cooking spray.
- Place 2-3 tater tots in each mini muffin cup (or 4-5 for a regular pan). Bake on the bottom rack for 10 minutes until lightly golden and firm.
- Spray the bottom of a shot glass with cooking spray. Gently twist the glass into each muffin cup to form a potato cup shape, leaving a small gap for steam. Bake for an additional 15 minutes until deep golden brown and crispy.
- Remove from the oven and add 1 tablespoon of shredded cheese to each cup. Bake for 4-5 minutes until the cheese is melted. Let cool for 5 minutes before removing.
- Garnish the cups with a dollop of sour cream, crumbled bacon, and sliced green onions. Serve warm.
Notes

Emily Thompson is a home cook and food enthusiast who believes that great meals bring families together. She loves exploring creative twists on classic American comfort food, always testing new ideas in her kitchen. Emily is passionate about sharing simple, practical recipes and time-saving tips to help busy people enjoy cooking at home. Her approachable style makes every dish accessible, delicious, and perfect for those seeking inspiration for everyday meals and special occasions. Find Emily’s latest creations and kitchen wisdom on yumeasymeals.com.