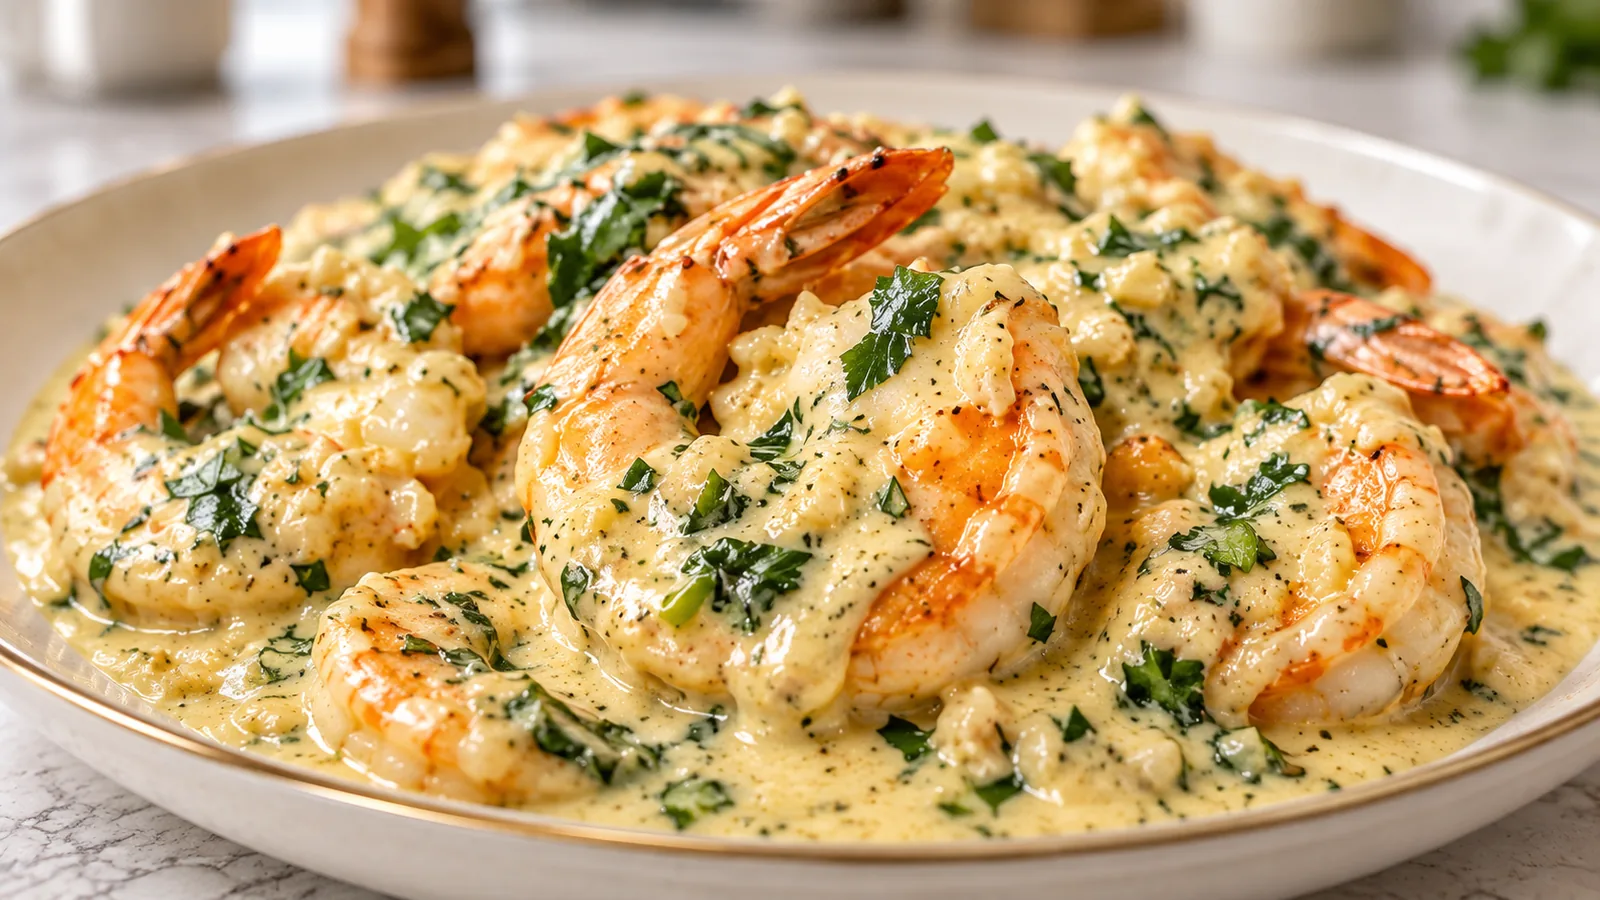
There’s nothing quite like the vibrant flavors of a perfectly executed Asian-inspired meal, especially when it comes together quickly in your own kitchen. Today, I’m thrilled to share my absolute favorite recipe for truly exceptional Sweet and Sour Glazed Shrimp. This isn’t just any stir-fry; it’s a comprehensive guide to mastering tender, juicy shrimp enveloped in a beautifully glossy, restaurant-quality sauce. You’ll learn my unique techniques for achieving that desirable sheen and perfectly balanced sweet, sour, and savory profile, making takeout a thing of the past.
Why You’ll Love This Sweet and Sour Glazed Shrimp Recipe
As a chef, I’m always looking for ways to elevate classic dishes, and this Sweet and Sour Glazed Shrimp recipe has two game-changing twists that I know you’ll adore:
The Glossy Glaze Secret: My first secret is incorporating a cornstarch slurry into the sauce. This isn’t just for thickening; it’s a culinary trick that creates a beautifully homogenous sauce, preventing separation and giving it that luxurious, clingy texture you find in the best Chinese cuisine. It creates a desirable sheen that makes every piece of shrimp irresistible.
A Splash of Tropical Brightness: The second twist is a humble splash of pineapple juice. This isn’t just for sweetness; the natural acidity and enzymatic properties of pineapple juice perfectly complement and enhance the classic sweet and sour flavors, adding a complex, bright, and tropical note that truly sets this dish apart.
Beyond these flavorful innovations, you’ll also love this recipe for practical reasons:
- Quick & Easy Weeknight Meal: Shrimp cooks incredibly fast, making this an ideal dish for busy evenings when you crave something special without spending hours in the kitchen.
- Irresistible Flavor Profile: The harmonious blend of sweet, sour, savory, and a hint of spice appeals to almost everyone, making it a guaranteed family favorite.
- Restaurant-Quality at Home: With my expert tips, you’ll achieve results that rival your favorite Asian restaurants, proving you don’t need to order out for impressive seafood stir-fries.
Ingredients Needed
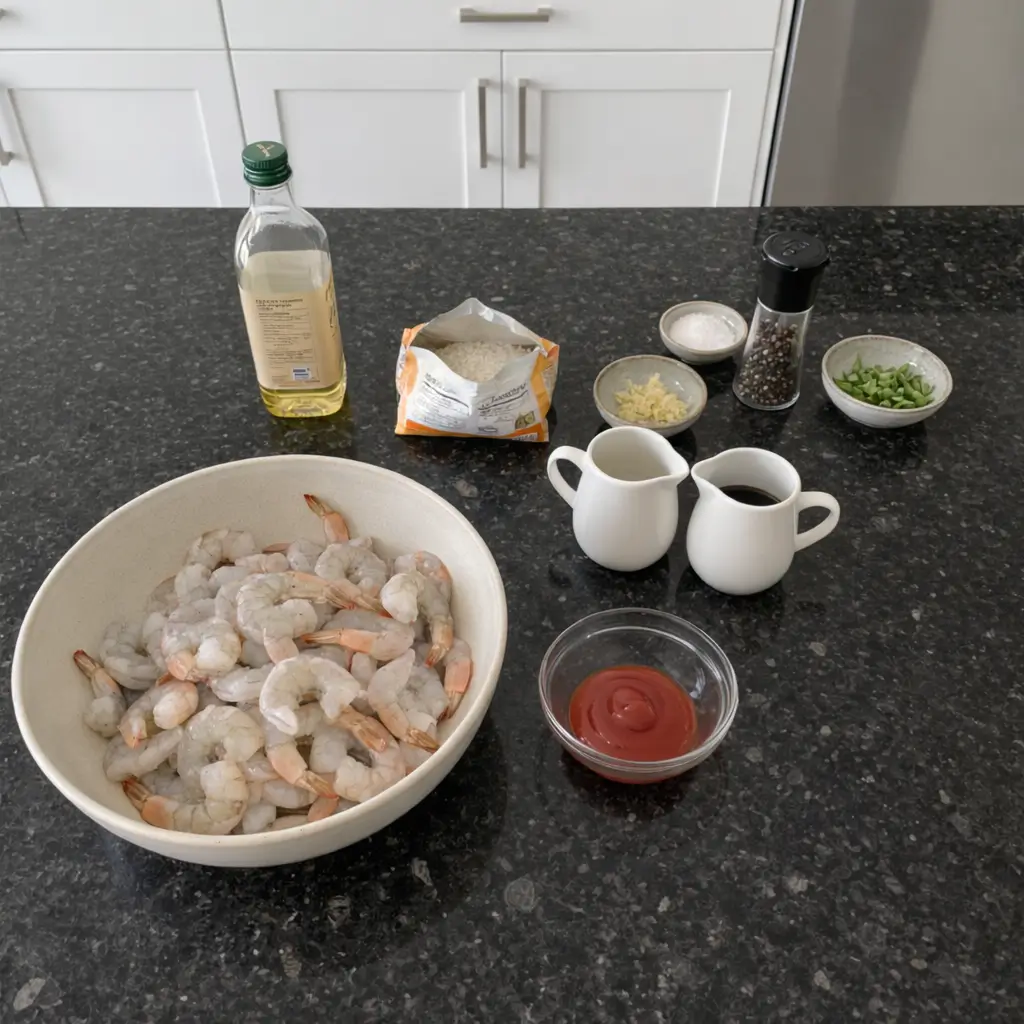
Here’s exactly what you’ll need to create this fantastic dish. Remember, the quality of your ingredients really shines through here!
- 1/4 cup sweet and sour chili sauce
- 1/4 cup ketchup
- 2 tsp soy sauce
- 1/4 tsp crushed red pepper flakes
- 1 1/4 – 1 1/2 lb shrimp, peeled and de-veined
- 1 Tbsp oil, peanut or any high temp neutral oil
- Kosher salt and freshly ground pepper to taste
- 2-3 scallions finely chopped, keep the white and green parts separate
- 1-2 garlic cloves, minced or finely chopped
- 1 tsp grated fresh ginger (ginger in the tube is an OK substitute. found in the refrigerated produce section)
- 3 Tbsp rice wine vinegar
- Cooked rice, for serving (as a shortcut, I’ll use the microwave rice. it cooks in 90 seconds, pretty hard to go wrong with that!)
Ingredient Notes & Substitutions
- Shrimp Selection: For the best texture in this Sweet and Sour Glazed Shrimp, I recommend using medium to large shrimp. Look for counts like 21-30 per pound or even larger, 16-20 count. Fresh shrimp are wonderful, but high-quality frozen shrimp work beautifully and are often more convenient. If using frozen, ensure they are fully thawed and patted dry before cooking.
- Oil: A good quality, high-temperature neutral oil is crucial for searing. Peanut oil is my top choice for its mild flavor and high smoke point, ideal for stir-frying. Vegetable, canola, or grapeseed oil are also suitable alternatives.
- Ginger: While fresh grated ginger offers a bright, pungent kick that is unmatched, the ginger in a tube found in the refrigerated produce section is an acceptable shortcut. Just be mindful that its flavor might be slightly mellower.
- Rice Wine Vinegar: This adds a distinctive tang. If you don’t have it on hand, you can substitute with apple cider vinegar or white wine vinegar, though you might need to slightly adjust the amount to achieve your desired sweet and sour balance.
- Soy Sauce: To make this recipe gluten-free, simply opt for tamari, a gluten-free alternative to traditional soy sauce, which offers a very similar flavor profile.
- Rice: While microwave rice is a convenient shortcut, feel free to serve this dish with your favorite rice. Fragrant jasmine rice, fluffy basmati rice, or even wholesome brown rice are all excellent choices. Cook according to package directions.

How to Make Sweet and Sour Glazed Shrimp
Let’s get cooking! The key to this dish is quick work and having your ingredients ready. Trust me, the aroma alone will make your mouth water.
Phase 1: Searing the Shrimp to Perfection
- First, I pre-heat a large, heavy-bottomed pan, like a cast iron pan, over med-high heat. A hot pan is essential for a good sear.
- Once hot, I add the 1 Tbsp of oil, ensuring it coats the bottom evenly.
- Season the peeled and de-veined shrimp generously with Kosher salt and freshly ground black pepper. Listen for that satisfying sizzle when you add the seasoned shrimp to the hot pan.
- Cook the shrimp for about 90 seconds on each side. They’ll quickly turn pink and opaque, curling into a gentle C-shape. Don’t overcook them! As soon as they’re done, I transfer them to a clean plate and set them aside.
Phase 2: Building the Aromatic Base and Glossy Sauce
- In the same pan (no need to clean it!), I add the white part of the scallions, the minced garlic, and the grated fresh ginger. The kitchen will fill with an incredible fragrance almost immediately.
- Cook for about a minute, stirring constantly, just until the aromatics are fragrant and slightly softened.
- Next, I pour in the 3 Tbsp of rice wine vinegar. The vinegar will deglaze the pan beautifully, allowing me to scrape up any delicious browned bits (the “fond”) stuck to the bottom, adding incredible depth of flavor to the sauce.
- Now for the magic! To achieve that beautiful, glossy finish, I quickly whisk together 1 tablespoon of cornstarch with 2 tablespoons of cold pineapple juice (or water) in a small bowl until it’s a smooth slurry.
- Pour this cornstarch slurry into the simmering sauce in the pan, stirring constantly with a whisk or spoon. You’ll see it transform almost instantly, thickening and developing that desirable sheen. Keep stirring for another 30 seconds to a minute until it’s perfectly glossy and coats the back of a spoon.
Phase 3: Finishing the Glaze and Combining
- With the sauce now thick and glossy, it’s time to build the signature sweet and sour flavor. I add the 1/4 cup sweet and sour chili sauce, 1/4 cup ketchup, 2 tablespoons of additional pineapple juice for that extra tropical brightness, 2 tsp soy sauce, and 1/4 tsp crushed red pepper flakes (adjust to your spice preference!).
- Stir everything together until well combined and bubbling gently.
- Finally, I add the cooked shrimp back into the pan along with the vibrant green parts of the scallions. Toss everything gently to coat the shrimp evenly in that gorgeous, clingy glaze.
- Once the shrimp are fully glazed and heated through (this only takes about 30 seconds), remove the pan from the heat immediately.
- Serve your magnificent Sweet and Sour Glazed Shrimp piping hot over a bed of freshly cooked rice. Enjoy!
Mastering Your Sweet and Sour Shrimp: Selection, Balance, and Prevention
Creating truly outstanding Sweet and Sour Glazed Shrimp goes beyond just following the steps. It’s about understanding the nuances of the ingredients and techniques. Let me guide you to perfection.
Choosing the Best Shrimp for Your Dish
The quality of your shrimp makes a significant difference. When I’m shopping, I focus on a few key things:
- Types and Sizes: For a stir-fry like this, I lean towards medium to large shrimp. Sizes like 21-30 count (meaning 21-30 shrimp per pound) or even larger 16-20 count are ideal. These sizes hold up well to quick searing without getting lost in the sauce. Smaller shrimp tend to overcook too easily.
- Fresh vs. Frozen: While fresh shrimp can be wonderful, often the “fresh” shrimp at your seafood counter were previously frozen and thawed. High-quality frozen shrimp, especially those individually quick frozen (IQF), are an excellent, often more convenient, and equally delicious choice. If using frozen, thaw them properly overnight in the refrigerator or in a colander under cold running water for about 15-20 minutes, then pat them completely dry with paper towels before cooking to ensure a good sear.
- Preparation: Many grocery stores sell shrimp already peeled and deveined, which is a huge time-saver. If yours come with shells on, it’s quite simple to peel them by starting from the underside and gently pulling off the shell. To devein, make a shallow slit along the back curve and remove the dark intestinal tract.
Achieving Your Perfect Sweet and Sour Balance
The beauty of homemade Sweet and Sour Glazed Shrimp is that you can tailor the flavor profile to your exact preference. Here’s how I balance it:
- Taste and Adjust: Always taste your sauce before adding the shrimp back in. This is your chance to tweak! If you prefer a sweeter profile, add a tiny pinch of sugar or a drizzle of honey or even maple syrup. For more tang, a small splash of additional rice wine vinegar or even fresh lime juice will do the trick.
- Spice Levels: The crushed red pepper flakes give a subtle warmth. If you like more heat, feel free to add a bit more. For a milder dish, you can reduce or omit them entirely.
Secrets to Perfectly Tender Shrimp
There’s nothing worse than rubbery shrimp. With these techniques, you’ll achieve perfectly tender results every time:
- High Heat Searing: This is non-negotiable. A screaming hot pan allows the shrimp to sear quickly, developing flavor and color without overcooking the interior.
- Don’t Overcrowd the Pan: If your pan isn’t large enough to accommodate all the shrimp in a single layer with a bit of space between them, cook them in two batches. Overcrowding lowers the pan temperature and causes the shrimp to steam instead of sear, leading to a mushy texture.
- Visual Cues for Doneness: Shrimp cook very fast. Look for them to turn opaque and pink all the way through, curling into a loose C-shape. If they form a tight O-shape, they’re likely overcooked.
- Prompt Removal: As soon as the shrimp are perfectly cooked, transfer them out of the hot pan. They will continue to cook slightly from residual heat, so removing them promptly helps prevent overcooking.
Pro Tips & Troubleshooting
Even seasoned cooks encounter challenges. Here are my best tips to ensure your Sweet and Sour Glazed Shrimp is a resounding success, along with common pitfalls to avoid.
Pro Tips for Success
- High-Temp Oil is Key: Always use a high-temperature neutral oil like peanut oil for searing the shrimp. This allows you to achieve a beautiful Maillard reaction and a good crust without burning the oil.
- Mise en Place: This French culinary term means “everything in its place.” For a quick stir-fry like this, it’s essential! Have all your ingredients prepped, chopped, and measured before you even turn on the stove. This ensures a smooth, stress-free cooking process.
- Don’t Overcrowd the Pan: I can’t stress this enough! If your pan is too full, the shrimp will steam rather than sear, resulting in a less desirable texture. Cook in batches if necessary.
- Taste and Adjust: Your palate is your best tool. Always taste the sauce before adding the shrimp back in and adjust the seasoning (salt, pepper, sweet/sour balance) as needed.
- The Glossy Glaze: Remember, the cornstarch slurry is your secret weapon for that perfect, clingy, glossy sauce. Whisk it well with cold liquid before adding it to the hot pan to prevent lumps.
- Pan Choice Matters: A cast iron pan is my go-to for this recipe. It distributes heat evenly and retains it beautifully, providing an excellent searing surface for your shrimp.
Common Mistakes to Avoid
- Overcooking Shrimp: This is hands down the number one mistake people make. Shrimp cooks in a flash, typically just 1.5-2 minutes total. Overcooked shrimp become rubbery and tough.
- Under-thickening the Sauce: If your sauce isn’t given enough time with the cornstarch slurry to properly thicken, you’ll end up with a watery glaze that won’t cling to the shrimp. Let it simmer and stir until it reaches that beautiful, glossy consistency.
- Not Scraping the Fond: Those delicious browned bits stuck to the pan after searing the shrimp and sautéing the aromatics are pure flavor. Don’t skip deglazing with the rice wine vinegar and scraping them up; they add incredible depth to your sauce.
- Low Heat Searing: Using insufficient heat for searing shrimp will lead to a lackluster dish. High heat is critical for developing that savory Maillard reaction and preventing the shrimp from releasing too much water.
- Ignoring the Twist: Forgetting to incorporate the cornstarch slurry and that splash of pineapple juice means missing out on the key elements that make this particular Sweet and Sour Glazed Shrimp so special and flavorful.
Serving & Storage
Once you’ve mastered your Sweet and Sour Glazed Shrimp, it’s time to think about presentation and enjoying those delicious leftovers (if there are any!).
Serving Ideas
- Classic Pairing: My favorite way to serve this dish is immediately over a generous bed of freshly cooked rice. Fragrant jasmine rice, fluffy basmati rice, or even hearty brown rice all make excellent foundations.
- Garnishes: Elevate the presentation and flavor with simple garnishes. A sprinkle of extra green scallions, a dash of toasted sesame seeds, or a scattering of fresh cilantro leaves add color and a fresh finish.
- Vegetable Additions: To make it a more complete meal, feel free to toss in some quick-cooking vegetables. Sliced bell peppers (any color!), broccoli florets, snow peas, or even water chestnuts can be added to the pan after the aromatics, cooking for a few minutes before the sauce is added.
- Side Dishes: For a more elaborate spread, consider serving alongside classic Asian-inspired appetizers like crispy spring rolls, savory egg rolls, or a light and refreshing cucumber salad.
Storage and Make-Ahead Tips
- Refrigeration: Leftover Sweet and Sour Glazed Shrimp should be stored in an airtight container in the refrigerator. It will remain delicious and safe to eat for up to 3-4 days.
- Reheating: To reheat, gently warm the shrimp and sauce on the stovetop over medium-low heat. A splash of water or broth can help loosen the sauce if it’s too thick. You can also microwave it briefly, but be careful not to overcook the shrimp, which can make them rubbery. Warm just until heated through.
- Make-Ahead: While I highly recommend cooking the shrimp fresh for the best texture, you can certainly get a head start. Chop all your vegetables and whisk together the sauce ingredients (excluding the cornstarch slurry) in advance. Store them separately in the refrigerator. When it’s mealtime, sear the shrimp and assemble the dish in minutes.
Conclusion
I hope you’re as excited as I am about this incredible Sweet and Sour Glazed Shrimp recipe! It truly delivers on all fronts: a quick weeknight meal, an explosion of balanced sweet, sour, and savory flavors, and that restaurant-quality glossy finish, all thanks to our special cornstarch slurry and pineapple juice twist. I firmly believe that even beginner cooks can achieve fantastic results with these detailed instructions and my expert tips.
Don’t be afraid to make it your own by experimenting with different vegetables or adjusting the spice level. Print out this recipe, gather your ingredients, and prepare to impress your taste buds. I can’t wait to hear how it turns out in your kitchen!
FAQ
Q: What type and size of shrimp is best for this recipe?
A: For the best results, I recommend using medium to large shrimp, typically a 21-30 count or even a 16-20 count. These sizes sear beautifully and remain tender without overcooking. You can use either fresh or high-quality frozen shrimp, just ensure frozen shrimp are fully thawed and patted dry before cooking.
Q: How can I prevent my shrimp from becoming overcooked and rubbery?
A: The key to tender shrimp is quick cooking over high heat. Sear the shrimp for only about 90 seconds per side until they turn pink and opaque and form a gentle C-shape. Avoid overcrowding the pan, and remove them promptly from the heat as soon as they’re done.
Q: How can I adjust the sweet and sour balance to my preference?
A: The best way is to taste the sauce before adding the shrimp back in. If you prefer it sweeter, add a tiny pinch of sugar or a drizzle of honey. For more sourness, a small splash of additional rice wine vinegar or even fresh lime juice works well.
Q: How long can I store leftovers, and how do I reheat them?
A: Leftover Sweet and Sour Glazed Shrimp can be safely stored in an airtight container in the refrigerator for 3-4 days. To reheat, gently warm on the stovetop over medium-low heat with a splash of water or broth to loosen the sauce, or microwave briefly, being careful not to overcook the shrimp.
Q: What are some good vegetable additions to this dish?
A: Absolutely! Bell peppers (red, yellow, or green), broccoli florets, snow peas, sliced carrots, or even water chestnuts are excellent additions. Stir-fry them after the aromatics (garlic, ginger, scallion whites) and before adding the vinegar and sauce, cooking until tender-crisp. You could also serve this with a side of crispy air fryer asparagus.
Q: What can I substitute for rice wine vinegar?
A: If you don’t have rice wine vinegar, you can substitute it with apple cider vinegar or white wine vinegar. Start with the same amount and taste, as you might need to slightly adjust for sweetness or sourness to match your preference.
Q: Is this recipe gluten-free?
A: This recipe can easily be made gluten-free by ensuring your soy sauce is replaced with tamari, which is a gluten-free soy sauce alternative. Always check the labels of your sweet and sour chili sauce and ketchup to ensure they are also gluten-free.
Q: Can I use a different type of rice for serving?
A: Yes, absolutely! While microwave rice is a convenient shortcut, this dish pairs wonderfully with various types of rice. Fragrant jasmine rice, fluffy basmati rice, or even a wholesome brown rice would be excellent choices. Prepare them according to their package instructions.
Q: Can I use honey or maple syrup to enhance sweetness?
A: Yes, you certainly can! If you prefer a slightly sweeter glaze or want to experiment with different flavor notes, a small drizzle of honey or maple syrup can be added to the sauce along with the other sweet and sour components. Taste as you go to achieve your desired balance.

Sweet and Sour Glazed Shrimp
Ingredients
Equipment
Method
- Pre-heat a large, heavy-bottomed pan (like cast iron) over medium-high heat. A hot pan is essential for a good sear.
- Once hot, add the 1 Tbsp of oil, ensuring it coats the bottom evenly.
- Season the peeled and de-veined shrimp generously with Kosher salt and freshly ground black pepper.
- Cook the shrimp for about 90 seconds on each side, until they turn pink and opaque, curling into a gentle C-shape. Do not overcook. Transfer them to a clean plate and set aside.
- In the same pan, add the white part of the scallions, the minced garlic, and the grated fresh ginger. Cook for about a minute, stirring constantly, until fragrant and slightly softened.
- Pour in the 3 Tbsp of rice wine vinegar to deglaze the pan, scraping up any browned bits (fond) stuck to the bottom.
- To prepare the slurry, whisk together 1 tablespoon of cornstarch with 2 tablespoons of cold pineapple juice (or water) in a small bowl until smooth.
- Pour this cornstarch slurry into the simmering sauce in the pan, stirring constantly. Stir for another 30 seconds to a minute until it thickens and becomes perfectly glossy and coats the back of a spoon.
- Add the 1/4 cup sweet and sour chili sauce, 1/4 cup ketchup, 2 tablespoons of additional pineapple juice, 2 tsp soy sauce, and 1/4 tsp crushed red pepper flakes (adjust to taste). Stir everything together until well combined and bubbling gently.
- Add the cooked shrimp back into the pan along with the green parts of the scallions. Toss everything gently to coat the shrimp evenly in the glaze.
- Once the shrimp are fully glazed and heated through (about 30 seconds), remove the pan from the heat immediately.
- Serve your Sweet and Sour Glazed Shrimp piping hot over a bed of freshly cooked rice. Enjoy!
Notes
Nutrition information is estimated based on common ingredients and serving sizes and may vary.

Taya Bennett is the founder of YumEasyMeals, a platform dedicated to easy, delicious, and quick-to-prepare recipes for busy families. Passionate about everyday cooking, she simplifies meals with practical, accessible, and always delicious ideas.
Discover her creations at: yumeasymeals.com